Skip to content

Customizable ink stamp

Advertising
Advertising
?
Creation quality: 5.0/5 (1 vote)
Evaluation of members on the printability, utility, level of detail, etc.

  • 2.9k views
  • 10 likes
  • 76 downloads
  • 1 collection

License
3D design format
STL Folder details Close
  • hemera_inkstamp.stl
  • nologo_inkstamp.stl
  • oshw_inkstamp.stl

Learn more about the formats

Publication date 2021-03-17 at 18:15
Design number 333505

3D printer file info

3D model description

Model and goals

I want to share with you a customizable ink stamp! With this design I wanted to achieve multiple goals:

  • The item should be fully printable with no supports.

  • The item should be easily customized

  • The item should consist of multiple materials, both rigid and flexible (PLA+TPU).

  • It should be printed in place with an unique g-code.

  • The item should also be printed with solely one hotend in a printer without capabilities to print multiple materials at the same time.

With these features, the object is feasible to be printed by anyone and without material waste. In addition, the vast majority can **customize it with their own logo/drawing/text.

How to customize

I designed it using Fusion 360. I created two components: One for the body and another one for the logo. With the "combine function" you can generate the "final customized ink stamp" and download as STL. I learned myself this software two months ago, so maybe it is not the best way to do it, but it works... I didn't want to deal with bridges in the stamp part so the handle has a flat part that works as base for the printing process.

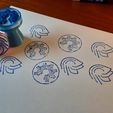
I chose the Hemera logo and the OSHW logo as examples.

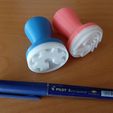
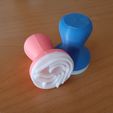
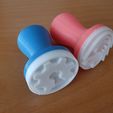
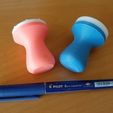
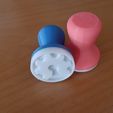
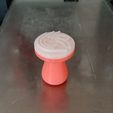
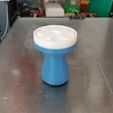
Find attached some pictures of the results, of how I printed them and the designs with Fusion 360. Hope you like it!

3D printing settings

I printed the object using AmazonBasics TPU (flexible white parts) and BQ PLA (rigid pink and blue parts). I changed the filament spool during the printing, pausing it with G-Code in a layer change. I generated the G-code with PrusaSlicer. The 3D printer I used for this was a P3Steel V4 (Makergal). The hotend was an e3d lite v6 and the extruder was this one (https://www.thingiverse.com/thing:755164). I recommend sanding the inked face before using it to achieve better results.

Advertising


Page translated by automatic translation. See the original version.
Issue with this design? Report a problem.

Would you like to support Cults?

You like Cults and you want to help us continue the adventure independently? Please note that we are a small team of 3 people, therefore it is very simple to support us to maintain the activity and create future developments. Here are 4 solutions accessible to all:

  • ADVERTISING: Disable your banner blocker (AdBlock, …) and click on our banner ads.

  • AFFILIATION: Make your purchases online by clicking on our affiliate links here Amazon.

  • DONATE: If you want, you can make a donation via Ko-Fi πŸ’œ.

  • WORD OF MOUTH: Invite your friends to come, discover the platform and the magnificent 3D files shared by the community!


Sharing and downloading on Cults3D guarantees that designs remain in makers community hands! And not in the hands of the 3D printing or software giants who own the competing platforms and exploit the designs for their own commercial interests.

Cults3D is an independent, self-financed site that is not accountable to any investor or brand. Almost all of the site's revenues are paid back to the platform's makers. The content published on the site serves only the interests of its authors and not those of 3D printer brands who also wish to control the 3D modeling market.

100% secure payment by credit card, PayPal, Apple Pay, Google Pay, etc.
View all payment options.