Skip to content

DRIVELINE MOTOR GEARBOX COUPLER FOR ATHEARN GENESIS USRA 2-8-2 MIKADO STEAM LOCOMOTIVE CAB BY SAMHONGSA ALCO BALDWIN LIMA

Advertising
Advertising
?
Creation quality: 5.0/5 (1 vote)
Evaluation of members on the printability, utility, level of detail, etc.

  • 3.8k views
  • 1 like
  • 7 downloads
  • 2 collections

License
3D design format
STL Folder details Close
  • Athearn Genesis Mikado Shaft Coupling.stl

Learn more about the formats

3D model size X 5.97 Γ— Y 5.97 Γ— Z 3.89 mm
Publication date 2021-03-19 at 19:29
Design number 335415

3D printer file info

3D model description

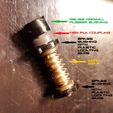
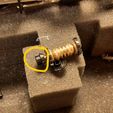
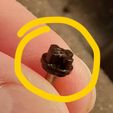
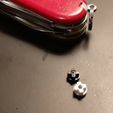
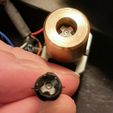
This is a printable replacement coupler for the originals that are prone to cracking on the Athearn Genesis USRA 2-8-2 Mikado Steam Locomotives made by Samhongsa. Two (2) are needed to replace the original Delrin units. Reuse the rubber coupler buffer between the two plastic couplers. If you notice your locomotive "slipping" without wheelspin or just hear the motor humming, but not moving, then this is a likely issue for you.

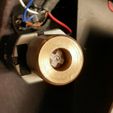
These press fit onto the motor and worm gear shafts. A drop of red Loctite is extra insurance, but is not absolutely necessary.

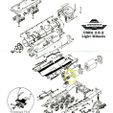
To dissasemble your locomotive, follow the steps below. Reassembly is just the opposite procedure in reverse.

  1. Take off the cab . . . *Remove the two cab handrails first. a. lift the rear of the cab to release the two rear tabs (small screwdriver carefully inserted at bottom rear of cab will help) *Take your time--first removal is tight. Alternate from one side to the other with the screwdriver or exacto blade. b. insert screwdriver at front side of cab between bottom of cab and walkway and carefully spread side of cab away from boiler to release small tabs at front bottom of cab (much easier to do than to describe). c. lift cab straight up and off of boiler.
  2. Remove smokebox front and unplug two wires (use sharp tweezers to pull plugs straight down). *Take note of the polarity for later--white goes to white.
  3. Remove the boiler to pilot deck supports *These are the black diagonal rails between boiler front and pilot.
  4. Remove screw from bottom of frame that goes up into stack *Remove the black gizmo just forward of the walkway on the engineer's side where the silver section starts. Pull it straight out with a needlenose. It goes back the same way.
  5. Insert screwdriver at rear of boiler above walkway and carefully pry boiler rear upward. Do this on both sides to release the tabs that hook the boiler to the walkway.
  6. With a small implement push those black tabs in alternately to help release the boiler.
  7. After rear of boiler is released, lift the rear of the boiler to clear the weight, then CAREFULLY slide the complete boiler forward. You may need to wiggle it as you slide it forward. The boiler comes off, and you have the innards exposed.
  8. The boiler will not break, even though it feels like it will. Tip the rear end as hard as you like until it just clears, then slide the boiler SLOWLY forward with a side to side wiggle. At the same time gently squeeze the front of both walkways inward to release the tabs gripping the inside edges of the boiler front.
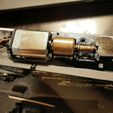
  9. To take out motor and boiler weight, there are four screws to remove. Two screws are at rear, with red and black wires attached. Two are on each side near front of weight, above walkway, just behind centerline of axle of first driver. Take out these four screws and motor/weight assembly comes out. *THE LEADING TRUCK USES A FIBER INSULATING WASHER BETWEEN FRAME AND SPRING. IF YOU REMOVE AND THEN REPLACE THE SPRING, DON'T MISTAKE THE FIBER WASHER FOR THE METAL WASHER OR YOU WILL CREATE A SHORT!

3D printing settings

0.05 or 0.07 mm layer height for PLA filament
215 C nozzle, 60 C bed temps
0.25 mm nozzle is best
Top layer ironing ON in PrusaSlicer 2.3.0
NO support(s) needed!

Less than 10 minute print time for each coupler on Prusa 3D printers.

Advertising


Issue with this design? Report a problem.

Would you like to support Cults?

You like Cults and you want to help us continue the adventure independently? Please note that we are a small team of 3 people, therefore it is very simple to support us to maintain the activity and create future developments. Here are 4 solutions accessible to all:

  • ADVERTISING: Disable your banner blocker (AdBlock, …) and click on our banner ads.

  • AFFILIATION: Make your purchases online by clicking on our affiliate links here Amazon.

  • DONATE: If you want, you can make a donation via Ko-Fi πŸ’œ.

  • WORD OF MOUTH: Invite your friends to come, discover the platform and the magnificent 3D files shared by the community!


Sharing and downloading on Cults3D guarantees that designs remain in makers community hands! And not in the hands of the 3D printing or software giants who own the competing platforms and exploit the designs for their own commercial interests.

Cults3D is an independent, self-financed site that is not accountable to any investor or brand. Almost all of the site's revenues are paid back to the platform's makers. The content published on the site serves only the interests of its authors and not those of 3D printer brands who also wish to control the 3D modeling market.

100% secure payment by credit card, PayPal, Apple Pay, Google Pay, etc.
View all payment options.