Skip to content

MPSM v3/Pro Manual Bed Leveling Hack + Test files

Advertising
Advertising
?
Creation quality: 5.0/5 (1 vote)
Evaluation of members on the printability, utility, level of detail, etc.

  • 1.9k views
  • 1 like
  • 16 downloads
  • 1 comment

License
3D design format
GCODE, SLDPRT, and STL Folder details Close
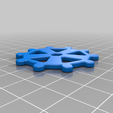
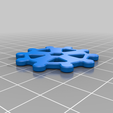
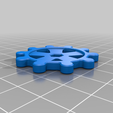
  • Big_Thick_Thumbwheel.STL
  • Big_Thumbwheel.STL
  • Spiral_M200.SLDPRT
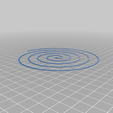
  • Spiral_M200.STL
  • Spiral_M200.gcode
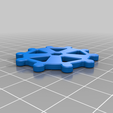
  • ThumbWheel.STL
  • V3_Thumbwheel.STL
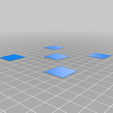
  • test_squares.gcode
  • test_squares.stl

Learn more about the formats

Publication date 2021-03-22 at 03:04
?
Published to Thingiverse on: 2020-11-14 at 01:00
Design number 337372

3D printer file info

3D model description

Not satisfied after this try: https://www.thingiverse.com/thing:4623313
Inspired by what I made for the v2: https://www.thingiverse.com/thing:4626595

This is the final design I use on my machines, with good result. You can now replace the sensor with a cheap SN04 if your is broken/missing. Bye bye crappy auto-leveling!

Update: Tutorial for MBL in preparation

Hardware you need:
3x M3x10mm bolts
1x M3x12mm bolt*
8x M3 nuts

4x M3x6mm female to female thread brass standoff pillar
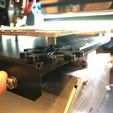
This is the special part that convert the male feet of the aluminium bed.
Update: M3 Threaded inserts for plastic can be a good alternative!

M3 washers (recommanded), under the bed +/-over the bed, for a wider and more stable contact with base plate.

*12mm bolt at ORIGIN. Jam it in place. This give a 2mm play for the 3 other corners to set the level.
**Remove the 3 nuts under the heating plate, as final design is 2-3mm higher. I pointlessly tried to keep them on, with 5mm spacer and 1mm conductive pad... I wasted my time, don't.

--- Manual Bed Leveling ---

You can look-up your values with m503.
Clear mesh with following commands:
M421 x0y0 z0; (null corner 1)
M421 x0y1 z0; (null corner 2)
M421 x1y0 z0; (null corner 3)
M421 x1y1 z0; (null corner 4)
G500; (save your values)
G28; (home, done)

"Bed level correction" or "Tune" set ORIGIN (and the entire print, which you will fine tune).

It sets the distance between a flat bed and your nozzle. This is called "z offset" in the firmware.

I know offset is right when the priming line sticks well. Set speed at 0.1 give you more time for live leveling.

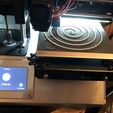
Use gcode or console (pronterface) to home then move at G0 X10Y10Z0, then move 100mm in each direction to roughly level each corner with a post-it (0,1mm).

Then I let the print go and level the other corners during live printing.

3D printing settings

-

Advertising


Issue with this design? Report a problem.

Would you like to support Cults?

You like Cults and you want to help us continue the adventure independently? Please note that we are a small team of 3 people, therefore it is very simple to support us to maintain the activity and create future developments. Here are 4 solutions accessible to all:

  • ADVERTISING: Disable your banner blocker (AdBlock, …) and click on our banner ads.

  • AFFILIATION: Make your purchases online by clicking on our affiliate links here Amazon.

  • DONATE: If you want, you can make a donation via Ko-Fi πŸ’œ.

  • WORD OF MOUTH: Invite your friends to come, discover the platform and the magnificent 3D files shared by the community!


Sharing and downloading on Cults3D guarantees that designs remain in makers community hands! And not in the hands of the 3D printing or software giants who own the competing platforms and exploit the designs for their own commercial interests.

Cults3D is an independent, self-financed site that is not accountable to any investor or brand. Almost all of the site's revenues are paid back to the platform's makers. The content published on the site serves only the interests of its authors and not those of 3D printer brands who also wish to control the 3D modeling market.

100% secure payment by credit card, PayPal, Apple Pay, Google Pay, etc.
View all payment options.