Skip to content

Arrow Rocket (Estes 13mm)

Advertising
Advertising
?
Creation quality: 5.0/5 (1 vote)
Evaluation of members on the printability, utility, level of detail, etc.

  • 636 views
  • 3 likes
  • 6 downloads

License
3D design format
STL Folder details Close
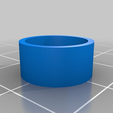
  • 13mm_MotorBlock.stl
  • 13mm_MotorBlock.stl
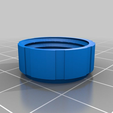
  • 13mm_MotorRetainer.stl
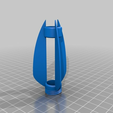
  • ArrowFins.stl
  • ArrowNose.stl

Learn more about the formats

Publication date 2021-03-23 at 02:05
?
Published to Thingiverse on: 2019-08-04 at 16:51
Design number 338268

3D printer file info

3D model description

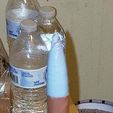
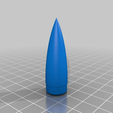
This is a fun little rocket that uses Estes Mini (13mm) motors like the A10-3T. It's perfect for smaller parks as it looks like it goes pretty high (looks, mind you, probably only gets 300 feet or so) and comes down via streamer so there's not much drift. It's a quick and easy build too.

You will need BT-5 (13mm) body tubes and epoxy for construction. An xacto knife to clean things up will help too.

Build Notes:

1) Print the nose cone with 100% infill for weight.

2) Use kevlar line for a shock cord, about 2 feet of it. The line goes through the holes in the bottom of the nose cone. These are a half loop so threading in one makes it come out the other.

3) Poke two small holes about a half inch apart in the top of the body tube about 2 inches from the end. Thread the kevlar line through these holes, knotting it at the bottom hole. It's probably easier if you do this BEFORE attaching the nose cone. Epoxy over the exposed part of the kevlar line on the outside of the body tube.

3) Glue the motor block inside the bottom end of the body tube so that a 13mm motor is flush with the end of the tube when hitting the block. Use a motor to space this correctly.

4) Print the fins with support everywhere to support the upper ring. Clean it up with the xacto knife then glue this so that the threaded part is flush with the bottom of the body tube. Put epoxy fillets along the fins for strength.

5) Attach about a foot and a half of 1" streamer about 3-4 inches from the nose cone end of the shock cord. Use tape folded over the kevlar thread to do this.

6) Paint it brown with two red fins and a silver nose. No, really, just paint it however you want. My paint job was a rush job as I was trying to get several rockets done at the same time before launching on a weekend.

7) Use 1 sheet of wadding, it's a tiny rocket tube.

I've flown this twice on A10-3Ts and it's a pretty impressive flier on those. It should fly on lower power motors but do so at your own risk as I've not tried it.

3D printing settings

-

Tags

Advertising


Issue with this design? Report a problem.

Would you like to support Cults?

You like Cults and you want to help us continue the adventure independently? Please note that we are a small team of 3 people, therefore it is very simple to support us to maintain the activity and create future developments. Here are 4 solutions accessible to all:

  • ADVERTISING: Disable your banner blocker (AdBlock, …) and click on our banner ads.

  • AFFILIATION: Make your purchases online by clicking on our affiliate links here Amazon.

  • DONATE: If you want, you can make a donation via Ko-Fi πŸ’œ.

  • WORD OF MOUTH: Invite your friends to come, discover the platform and the magnificent 3D files shared by the community!


Sharing and downloading on Cults3D guarantees that designs remain in makers community hands! And not in the hands of the 3D printing or software giants who own the competing platforms and exploit the designs for their own commercial interests.

Cults3D is an independent, self-financed site that is not accountable to any investor or brand. Almost all of the site's revenues are paid back to the platform's makers. The content published on the site serves only the interests of its authors and not those of 3D printer brands who also wish to control the 3D modeling market.

100% secure payment by credit card, PayPal, Apple Pay, Google Pay, etc.
View all payment options.