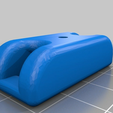
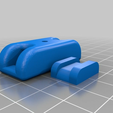
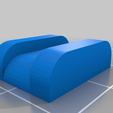
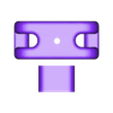
3D model description
***** This part is for experienced printer owners that know how to maintain belt driven systems ***** I take no responsibility for damage caused by the incorrect usage of this part.
I found the idea for a strong belt tensioner here on Thingiverse but I can`t remember who where or when it was, sorry to the designer and if I find the original I will link to it here.. This is my version of the belt tensioner for the ctc 3d printer (ebay special) and maybe other systems that use a 6mm wide gt2 / s2m belt.
This belt tensioner is a simple way to easily adjust the tension of the belt system that is used in the makerbot clone market and others. Important note, this is a pass through tensioner for an open loop belt system and not a joining/connecting (either end of the belts) type of tensioner.
The use of this kind of tensioner makes adjusting the belt as easy as twisting a belt and turning a bolt when you are servicing or mainting your bot.
***** warning ***** Over tightening of these parts WILL cause pre-mature wear and damage to parts of your printer, just look at the black plastic gantry end plate in the image above. I over tightend one of these to find out what can happen and not long into a the first print the gantry end gave way with quite a loud crack. I took a picture to show you what happens if you go too far. Bearings can get damaged, belts can get deformed, parts can break so it`s not worth it the hastle. follow the instructions and all should be ok...
Pre assembly of the tensioner
insert a 12mm m3 bolt through the top of the tensioner, wind on an m3 hex nut and tighten the nut down (easiest way to do this is turn the bolt) and as its getting tight look inside the tensioner and make sure the nut is lined up with the cutout, as you turn the bolt the nut should start to slide into the plastic and stay tightly in place.
Wind the bolt just about all the way out (so its level with the end of the captive hex nut) on the inside and the tensioner is ready to go do it`s thing.
Installing the Tensioner on the belt
As you rebuild the belt system you need to feed the belt through the tensioner with the bolt, in the case of the ctc rep dual on the top pointing upwards,once you have lots of belt fed through you need to push some belt back inside to create a loop so you can insert the belt guide bar with the rounded edges facing down, start pulling the belt tighter and line the 2 parts up so the slide together (the small belt guide slides inside the larger tensioner)
Now that the tensioner is on the belt you can complete the initial setup of that belt, round the pulley and back to the end gantry clamps or however your bot is configured.
To tension the belt up it is just a case of twisting the belt through 90 degrees and turning the bolt. --- > how I done it, grab the tensioner and turn the bolt head towards me then tighten the bolt by a quarter of a turn and let it go, Keep repeating until you feel it getting harder to turn the belt a full 90 degrees. ***** If you can not twist the belt by 90 degrees then its gonna be toooooo tight ***** slacken off the bolt to reduce the tension of the belt. Once you are happy with the belts make sure the gantry will do a full lap of the Y axis without catching.
off you go and print as much as you can...

/https://fbi.cults3d.com/uploaders/16522822/illustration-file/bc8fc80e-5c30-4624-86a9-1d39feca2051/1.jpg)


