Skip to content

Dual Sensor and filament cleaner for ENDER 3 v2 (or else)

Advertising
Advertising
?
Creation quality: 5.0/5 (1 vote)
Evaluation of members on the printability, utility, level of detail, etc.

  • 4.4k views
  • 6 likes
  • 55 downloads

License
3D design format
STL Folder details Close
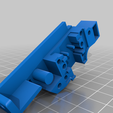
  • DualSensorCleaner_by-Lizzy77_part1.stl
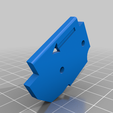
  • DualSensorCleaner_by-Lizzy77_part2.stl
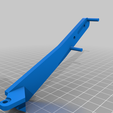
  • DualSensorCleaner_by-Lizzy77_part3.stl
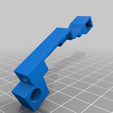
  • DualSensorCleaner_by-Lizzy77_part4.stl

Learn more about the formats

Publication date 2021-03-24 at 02:12
?
Published to Thingiverse on: 2021-03-23 at 19:12
Design number 339127

3D printer file info

3D model description

Hello all,

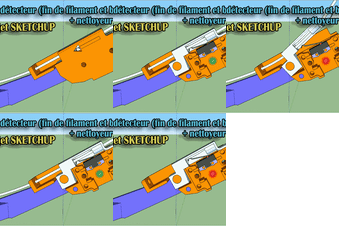
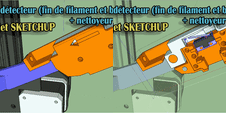
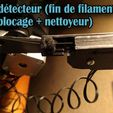
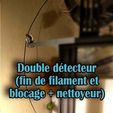
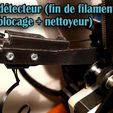
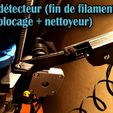
Here is my version of a filament detector (end of filament and blockage), plus a small space to place cleaning foam.
I also designed a mount for the Ender 3 printer.
No glue is needed, just need:

2 x Neodymium magnet (5x5 mm)
2 x "3x20" flat head screws
2 x M3 nuts
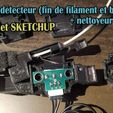
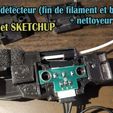
1 x Module detection sensor
1 x small piece of foam
1 x A small piece of PTFE tube (6 mm) to be inserted at the entrance of the moving part (to limit the wear of the entry of the PLA part).

Link: https://www.banggood.com/fr/Lerdge-1_75mm-Filament-Material-Run-Out-Detection-Module-Sensor-For-3D-Printer-Parts-p-1323359.html?rmmds=myorder&cur_warehouse= CN

Or :
https://fr.aliexpress.com/item/32853300525.html?aff_fcid=2009c8eeefcc4bca840431d6fa9849ff-1616539362001-04883-_ACvOy0&spm=a2g0o.productlist.0.0.22d124b8a8PrsI&ws_ab_test=searchweb0_0%2Csearchweb201602_%2Csearchweb201603_&aff_fsk=_ACvOy0&algo_pvid=8e1aeee1-8a60-4afd-97fc-37eae49b3744&aff_platform=portals-tool&btsid=0b0a187916058648632797561e7b7a&sk=_ACvOy0&aff_trace_key=2009c8eeefcc4bca840431d6fa9849ff-1616539362001-04883-_ACvOy0&terminal_id=0da197a7b7904285b7da87f4ff5c5f15&tmLog=new_Detail&algo_expid=8e1aeee1-8a60-4afd-97fc-37eae49b3744-6

The assembly is very simple, you just need to place the attachment on the extruder carriage, by unscrewing a screw from the nut of the threaded rod of the printer.
Place the magnets in the housings, I placed two in the lower part, but maybe only one is enough ... for you to test!
Snap the pieces together and that's it !

This detector reacts to the slightest strain on the filament. The slightest blockage and it stops printing. So be careful to have perfect and very fluid unwinding of the filament.

Have fun :)

Lizzy77.


Salut à toutes et tous !

Voici ma version d'un détecteur de filament (fin de filament et blocage), avec en plus un petit espace pour placer de la mousse de nettoyage.
J'ai aussi conçu une fixation pour l'imprimante Ender 3.
Aucune colle n'est nécessaire, juste besoin de :

2 x Néodyme magnet (5x5 mm)
2 x vis à tête plate "3x20"
2 x écrous M3
1 x Module detection sensor
1 x petit bout de mousse
1 x Un petit bout de tube PTFE (6 mm) à insérer à l'entrée de la partie mobile (pour limiter l'usure de l'entrée de la pièce en PLA)

Lien : https://www.banggood.com/fr/Lerdge-1_75mm-Filament-Material-Run-Out-Detection-Module-Sensor-For-3D-Printer-Parts-p-1323359.html?rmmds=myorder&cur_warehouse=CN

Ou sur AliExpress :
https://fr.aliexpress.com/item/32853300525.html?aff_fcid=2009c8eeefcc4bca840431d6fa9849ff-1616539362001-04883-_ACvOy0&spm=a2g0o.productlist.0.0.22d124b8a8PrsI&ws_ab_test=searchweb0_0%2Csearchweb201602_%2Csearchweb201603_&aff_fsk=_ACvOy0&algo_pvid=8e1aeee1-8a60-4afd-97fc-37eae49b3744&aff_platform=portals-tool&btsid=0b0a187916058648632797561e7b7a&sk=_ACvOy0&aff_trace_key=2009c8eeefcc4bca840431d6fa9849ff-1616539362001-04883-_ACvOy0&terminal_id=0da197a7b7904285b7da87f4ff5c5f15&tmLog=new_Detail&algo_expid=8e1aeee1-8a60-4afd-97fc-37eae49b3744-6

Le montage est très simple, il suffit juste de placer la fixation sur le chariot de l'extrudeuse, en dévissant une vis de l'écrou de la tige fileté de l'imprimante.
Placer les aimants dans les logements, j'en ai placé deux dans la partie basse, mais peut-être qu'un seul suffit ... à vous de tester !
Emboiter les pièces ensemble et c'est tout !

Ce détecteur réagit à la moindre contrainte sur le filament. Le moindre blocage et ça coupe l'impression. Donc attention à avoir parfait et très fluide déroulement du filament.

Have fun :)

Lizzy77.

EDIT :
Lien vers la vidéo d'explications pour l'installation et l'utilisation de ce type de matos :
(MERCI à Ludo !!!)
https://www.youtube.com/watch?v=JzDHxIF9_FY

3D printing settings

  • Infill : 30%
  • PETG or PLA+ (not less)
Advertising


Issue with this design? Report a problem.

Would you like to support Cults?

You like Cults and you want to help us continue the adventure independently? Please note that we are a small team of 3 people, therefore it is very simple to support us to maintain the activity and create future developments. Here are 4 solutions accessible to all:

  • ADVERTISING: Disable your banner blocker (AdBlock, …) and click on our banner ads.

  • AFFILIATION: Make your purchases online by clicking on our affiliate links here Amazon.

  • DONATE: If you want, you can make a donation via Ko-Fi 💜.

  • WORD OF MOUTH: Invite your friends to come, discover the platform and the magnificent 3D files shared by the community!


Sharing and downloading on Cults3D guarantees that designs remain in makers community hands! And not in the hands of the 3D printing or software giants who own the competing platforms and exploit the designs for their own commercial interests.

Cults3D is an independent, self-financed site that is not accountable to any investor or brand. Almost all of the site's revenues are paid back to the platform's makers. The content published on the site serves only the interests of its authors and not those of 3D printer brands who also wish to control the 3D modeling market.

100% secure payment by credit card, PayPal, Apple Pay, Google Pay, etc.
View all payment options.