Skip to content

Cooling fan replacement blades

Advertising
Advertising
?
Creation quality: 5.0/5 (1 vote)
Evaluation of members on the printability, utility, level of detail, etc.

  • 3.3k views
  • 9 likes
  • 137 downloads
  • 1 make

License
3D design format
STL Folder details Close
  • Cooling_fan_replacement_blades_clockwise.stl
  • Cooling_fan_replacement_blades_counter-clockwise.stl

Learn more about the formats

Publication date 2021-03-26 at 01:43
?
Published to Thingiverse on: 2013-11-19 at 22:15
Design number 340655

3D printer file info

3D model description

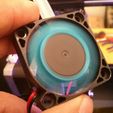
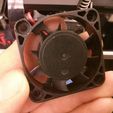
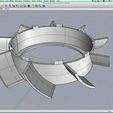
3D-printable replacement blades for the extruder cooling fan. The cooling fan placed in front of the extruder's heat sink has the important job to keep things cool above the hot end.

By accident and a bit of bad luck the fan blades can break if hit by an object or while changing the filament. It is very important to maintain the cooling function of the fan by replacing the old one with a spare part.

Nevertheless in the spirit of owning a Replicator 3D printer at home we wanted to test if the fan blades can be replaced by 3D printed new ones.

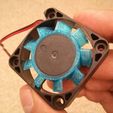
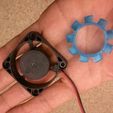
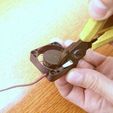
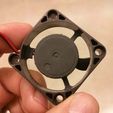
After cutting off the old ones and grinding away the remaining part of the broken ones, the fan barrel becomes a cylindrical shape onto which a flange with new blades can be attached.

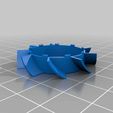
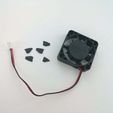
After a few minutes with a calliper and CAD software we created a thing flange (0.5 mm) with nine attached blades.

The design is made to be clamped onto the blade-less motor housing and no glue is required. Our tests turned out successful thus making it possible for one to 3D print new fan blades while waiting for the new replacement fan to arrive in the mail. :)

This part is adapted to fit the commonly used 24 V cooling fan that sits in front of the extruder's aluminium heat sink. The fan size is 40 x 40 x 10 mm. A common model is the FONSONING FSY40S24M.


####By Creative Tools

Home - Youtube - Things (http://www.thingiverse.com/CreativeTools/designs) - #3DBenchy - GooglePlus - Twitter - Facebook - Instructables - Instagram - Pinterest - Flickr - LinkedIn

3D printing settings

  • Turn off the power of your 3D printer
  • Remove the cooling fan carefully
  • Clip away the remaining fan blades
  • Using a small power drill, grind away the remaining parts of the fans. Make sure the surface of the barrel is smooth.
  • Download the STL file in this Thing.
  • 3D print it
  • Put som glue on the inside of printed fan blade cylinder. <<< Important >>>
  • Press it onto the blade-less barrel.
  • Turn the fan blades are true and run freely without hitting the outer part of the fan.
  • Only use this experimentally and replace your broken fan with a new one.
Advertising


Issue with this design? Report a problem.

Would you like to support Cults?

You like Cults and you want to help us continue the adventure independently? Please note that we are a small team of 3 people, therefore it is very simple to support us to maintain the activity and create future developments. Here are 4 solutions accessible to all:

  • ADVERTISING: Disable your banner blocker (AdBlock, …) and click on our banner ads.

  • AFFILIATION: Make your purchases online by clicking on our affiliate links here Amazon.

  • DONATE: If you want, you can make a donation via Ko-Fi πŸ’œ.

  • WORD OF MOUTH: Invite your friends to come, discover the platform and the magnificent 3D files shared by the community!


Sharing and downloading on Cults3D guarantees that designs remain in makers community hands! And not in the hands of the 3D printing or software giants who own the competing platforms and exploit the designs for their own commercial interests.

Cults3D is an independent, self-financed site that is not accountable to any investor or brand. Almost all of the site's revenues are paid back to the platform's makers. The content published on the site serves only the interests of its authors and not those of 3D printer brands who also wish to control the 3D modeling market.

100% secure payment by credit card, PayPal, Apple Pay, Google Pay, etc.
View all payment options.