Skip to content

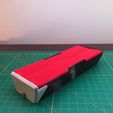
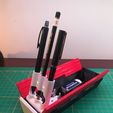
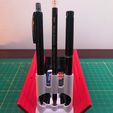
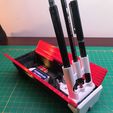
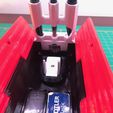
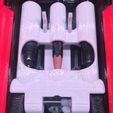
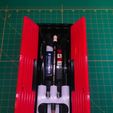
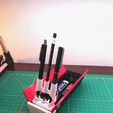
Spring-Loaded Pencil Case/Stand

Advertising
Advertising
?
Creation quality: 4.8/5 (2 votes)
Evaluation of members on the printability, utility, level of detail, etc.

  • 13.3k views
  • 94 likes
  • 411 downloads
  • 3 collections
  • 1 comment

License
3D design format
STEP and STL Folder details Close
  • Writing Tools Case Base.stl
  • Writing Tools Case Button.stl
  • Writing Tools Case Double Latch.stl
  • Writing Tools Case End Cap.stl
  • Writing Tools Case Full Assembly.step
  • Writing Tools Case Full Bevel Gear.stl
  • Writing Tools Case Latch Cover.stl
  • Writing Tools Case Left Door.stl
  • Writing Tools Case Main Pen Holder Body.stl
  • Writing Tools Case Right Door.stl
  • Writing Tools Case Semi Bevel Gear.stl

Learn more about the formats

Publication date 2021-04-04 at 20:14
Design number 357410

cooknadam

3D printer file info

3D model description

You will need the following tools:
-FDM Printer capable of printing models 205mm long in one direction
-Resin Printer
-Hack Saw to cut steel pins
-Sanding implements to round edges of pins after they’re cut
-Soldering iron or some way to install heat set inserts

You will need the following components:
-0.5 x 5 x 15mm Compression Spring qty.1
-M3 Heat Set Inserts qty.2
-M3 x 6 Countersunk Screws qty.2
-M2 x 5 Screws qty.2
-Rotational Damper qty.1
-3mm Steel Stock
-*Torsion Springs Left and Right Handed
0.6mm wire diameter x 4.7mm OD x 4 turns x ~200deg.
*I have not been able to find an exact replacement torsion spring but the linked one is pretty darn close, the only difference is the angle they sell is 145 degrees and the one I designed for is about 200 degrees. You could probably get away with bending these to the correct angle with some pliers since they’re so close. Make sure to order left and right handed wound coils, this design uses two of each.

I would recommend printing the button, the latch and the two bevel gears with a resin printer though you might be able to get away with FDM for all of them.

Cut the 3mm steel stock to the following length with prescribed tolerance.
-194.5mm(Door Hinges, +0/-10mm)
-47.75mm (Latch Push Mechanism +0/-0.5mm)
-61mm(Main Pen Holder Hinge +0/-2mm)
Assembly is pretty straightforward after you print all components, install heat inserts and have pins cut to length.
Assembly Steps:
1. Install a torsion spring into the pocket on the edge of the hinge for the doors.
2. While the spring is in the door, place the other end of the spring into the hole in the base of the case near the door hinge
3. Push one of the precut 3mm rods through the door hinge.
4. Repeat these steps for the other door.
5. Install the latch with the compression spring, place the cover on top then install the countersunk screw to secure it together.
6. Install the rotation damper using the M2 screws that should thread into the plastic.
7. Install the full bevel gear onto the damper.
8. Install the semi bevel gear into the pocket on the inside of the Main Pen Holder Body hinge.
9. Install the two torsion springs into the pockets on the outside of the Main Pen Holder Body hinge.
10. This part is a little tricky but you need to place the whole Pen Holder preassembly in while making sure the other ends of the torsion springs go into the pockets in the base. I Found it easier to slide it in while in the upward orientation
11. After the preassembly is installed correctly slide in the pin and test out the fit. If there is any resistance/binding it is most likely the torsion springs incorrectly installed.
12. Finally add the 3mm pin for the latch push mechanism along with the button.
13. Place the cover into position then using a magnetized screw driver install the M3 countersunk screw behind the main pen holder hinge. It may be a little tricky to get to but it is doable.
14. You’re DONE whew.

These are the pencils and pen I designed the case for
Kura Toga Mechanical Pencil
Pilot Pens
Pencil

Let me know if you have any questions!
Thanks and I appreciate the support!

3D printing settings

No supports and the print orientation should be self explanatory. I printed all of the fdm parts with 0.3mm layers. I printed the latch parts and the bevel gears with a resin printer though it may be possible to print them with FDM.

Advertising


Issue with this design? Report a problem.

Would you like to support Cults?

You like Cults and you want to help us continue the adventure independently? Please note that we are a small team of 3 people, therefore it is very simple to support us to maintain the activity and create future developments. Here are 4 solutions accessible to all:

  • ADVERTISING: Disable your banner blocker (AdBlock, …) and click on our banner ads.

  • AFFILIATION: Make your purchases online by clicking on our affiliate links here Amazon.

  • DONATE: If you want, you can make a donation via Ko-Fi 💜.

  • WORD OF MOUTH: Invite your friends to come, discover the platform and the magnificent 3D files shared by the community!


Sharing and downloading on Cults3D guarantees that designs remain in makers community hands! And not in the hands of the 3D printing or software giants who own the competing platforms and exploit the designs for their own commercial interests.

Cults3D is an independent, self-financed site that is not accountable to any investor or brand. Almost all of the site's revenues are paid back to the platform's makers. The content published on the site serves only the interests of its authors and not those of 3D printer brands who also wish to control the 3D modeling market.

100% secure payment by credit card, PayPal, Apple Pay, Google Pay, etc.
View all payment options.