Skip to content

Fimi X8 SE gimbal protector

Advertising
Advertising
?
Creation quality: 5.0/5 (1 vote)
Evaluation of members on the printability, utility, level of detail, etc.

  • 1.9k views
  • 3 likes
  • 44 downloads

License
3D design format
STL Folder details Close
  • fimi_x8se_gimbal_protector.stl

Learn more about the formats

3D model size X 95.9 Γ— Y 54.4 Γ— Z 40.5 mm
Publication date 2021-04-11 at 01:49
?
Published to Thingiverse on: 2019-06-10 at 18:34
Design number 363233

3D printer file info

3D model description

Please note the non-commercial license on this item. You are NOT allowed to print and sell copies of this thing for a profit. Please send me a message if you want to print and sell.

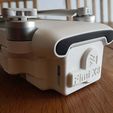
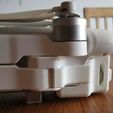
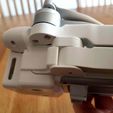
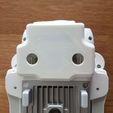
This gimbal protector attaches by hooking onto the sharp inner edges of the motor arm mounts instead of those small tabs inside the gimbal cavity. This works beautifully, there is just one downside: The motor arms must be folded in to attach the gimbal protector. And also, the gimbal protector must be removed before unfolding the arms. Not really a big issue in my opinion, just something to be aware of. And if you forget to remove it before unfolding the arms, the hooks will just pop off by themself, although I won't recommend that method of removal.

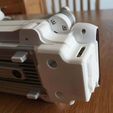
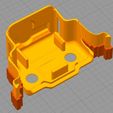
The protector also rests against the drone body all around, and probably (I don't want to test) can take a bigger hit without damaging the gimbal than (most of) the other designs out there. There are four inspection holes that lets you see that the gimbal is in the correct place and that there is no strain on the gimbal rubber mounts.

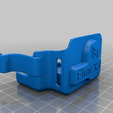
Printing is straightforward, but supports are needed under the locking arms (see picture of how I set up the supports). Printing time is typically between 1 and 3 hours, depending on your settings, so not too bad.

It may be necessary to clean up the underside of the locking arms (where supports was used), especially at the very end, because the width of the hook is designed to fit exacly into the recess on the drone. Support residue may make it too wide, so use some sandpaper or a knife to trim it to fit (if necessary).

Attaching is quite straightforward, start by making sure the rear inner support post goes behind the gimbal, and then rotate the protector forward (keeping the lens pointing forward as well), and then push it back to engage the locks. You will most likely need to use your fingers to pop the locking arms into place. When correctly mounted, the main body of the gimbal should be straight and sit right between the two side stabilizer posts.

Detaching is simple, just disengage the locking arms and remove the protector. I've added a short instruction video as well, see below. :-)

3D printing settings

-

Advertising


Issue with this design? Report a problem.

Would you like to support Cults?

You like Cults and you want to help us continue the adventure independently? Please note that we are a small team of 3 people, therefore it is very simple to support us to maintain the activity and create future developments. Here are 4 solutions accessible to all:

  • ADVERTISING: Disable your banner blocker (AdBlock, …) and click on our banner ads.

  • AFFILIATION: Make your purchases online by clicking on our affiliate links here Amazon.

  • DONATE: If you want, you can make a donation via Ko-Fi πŸ’œ.

  • WORD OF MOUTH: Invite your friends to come, discover the platform and the magnificent 3D files shared by the community!


Sharing and downloading on Cults3D guarantees that designs remain in makers community hands! And not in the hands of the 3D printing or software giants who own the competing platforms and exploit the designs for their own commercial interests.

Cults3D is an independent, self-financed site that is not accountable to any investor or brand. Almost all of the site's revenues are paid back to the platform's makers. The content published on the site serves only the interests of its authors and not those of 3D printer brands who also wish to control the 3D modeling market.

100% secure payment by credit card, PayPal, Apple Pay, Google Pay, etc.
View all payment options.