Skip to content

Snapmaker 2.0 A350 Glass Bed Adapter 310x310mm (3mm or 4mm thick)

Advertising
Advertising
?
Creation quality: 5.0/5 (1 vote)
Evaluation of members on the printability, utility, level of detail, etc.

  • 6.8k views
  • 6 likes
  • 4 downloads

License
3D design format
ZIP Folder details Close
  • Glass Bed Adapter.zip

Learn more about the formats

Publication date 2021-04-13 at 21:11
Design number 365933

Jaydawgx7

3D printer file info

3D model description

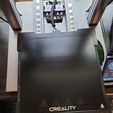
This is a digital download STL file for two adapter plates that slide onto the print bed and hold a 310x310 glass bed in place. There are currently two different versions for 3mm or 4mm thick glass beds (the one in the images can be found here: https://www.amazon.com/gp/product/B082VTK6C7/. Simply slide on the rear adapter, set down the glass bed, and lock it in place by sliding on the front adapter.

PLEASE READ THIS BEFORE FINAL INSTALLATION:
The glass bed will sit higher than the original bed so a new calibration will need to be done to avoid the print head from smashing into the glass bed. There are two similar ways to handle this depending on whether or not you are using auto bed leveling:

Auto Leveling: If using auto-leveling, place the regular magnetic bed on the heated platform for the calibration process. Begin the calibration and allow it to automatically detect each point. On the final point, it will ask you to adjust the Z height manually. For this step, remove the magnetic plate, raise the Z level a bit so the glass fits under the extruder, place glass on the bed, and manually calibrate the last point over the glass bed. Once saved, that will be your new Z0 height and will no longer try to smash the bed. Disclaimer: I've noticed firmware updates overwrite some settings such as extruder step calibrations, so please be cautious after any firmware updates to ensure your z value does not get affected.

Manual Leveling: If using manual leveling for each point, begin the calibration process WITHOUT the glass bed just to ensure it doesn't lower too far and hit the glass. Once the calibration has begun and the nozzle is at its first point, you can raise the z level if needed and insert the glass. Then, proceed to calibrate each point WITH the glass bed in place. After saving, the new Z0 level will assume the build plate height and print properly on the glass bed

Final Note: I use Simplify3d as my slicer and added a start script to purge the nozzle and wipe onto the glass at a different location on the Y-axis to avoid the nozzle from running into the adapters. I don't use Luban for 3d printing so I'm not sure if that can be changed there or not. Here is my current start script if you're interested:

;Start GCode begin
G28 ;home
G90 ;absolute positioning
G1 X-10 Y100 F3000
G1 Z0 F1800
G92 E0
G1 X8 E20 F200
G92 E0
;Start GCode end

https://youtu.be/pquhpGXyNEM

3D printing settings

UPDATE: my PLA adapters started to loosen up quickly from the bed getting hot. I'd recommend printing in higher temp material such as ABS if you intend to use the heated bed.
My print settings:
- Infill: 20%
- Layer Height: 0.28mm
- Rafts: No
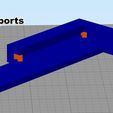
- Supports: Yes. I placed manual supports in the tracks on the sides to make them print clean (see attached images for orange supports)

Advertising


Issue with this design? Report a problem.

Would you like to support Cults?

You like Cults and you want to help us continue the adventure independently? Please note that we are a small team of 3 people, therefore it is very simple to support us to maintain the activity and create future developments. Here are 4 solutions accessible to all:

  • ADVERTISING: Disable your banner blocker (AdBlock, …) and click on our banner ads.

  • AFFILIATION: Make your purchases online by clicking on our affiliate links here Amazon.

  • DONATE: If you want, you can make a donation via Ko-Fi πŸ’œ.

  • WORD OF MOUTH: Invite your friends to come, discover the platform and the magnificent 3D files shared by the community!


Sharing and downloading on Cults3D guarantees that designs remain in makers community hands! And not in the hands of the 3D printing or software giants who own the competing platforms and exploit the designs for their own commercial interests.

Cults3D is an independent, self-financed site that is not accountable to any investor or brand. Almost all of the site's revenues are paid back to the platform's makers. The content published on the site serves only the interests of its authors and not those of 3D printer brands who also wish to control the 3D modeling market.
100% secure payment by credit card, PayPal, Apple Pay, Google Pay, etc.
View all payment options.