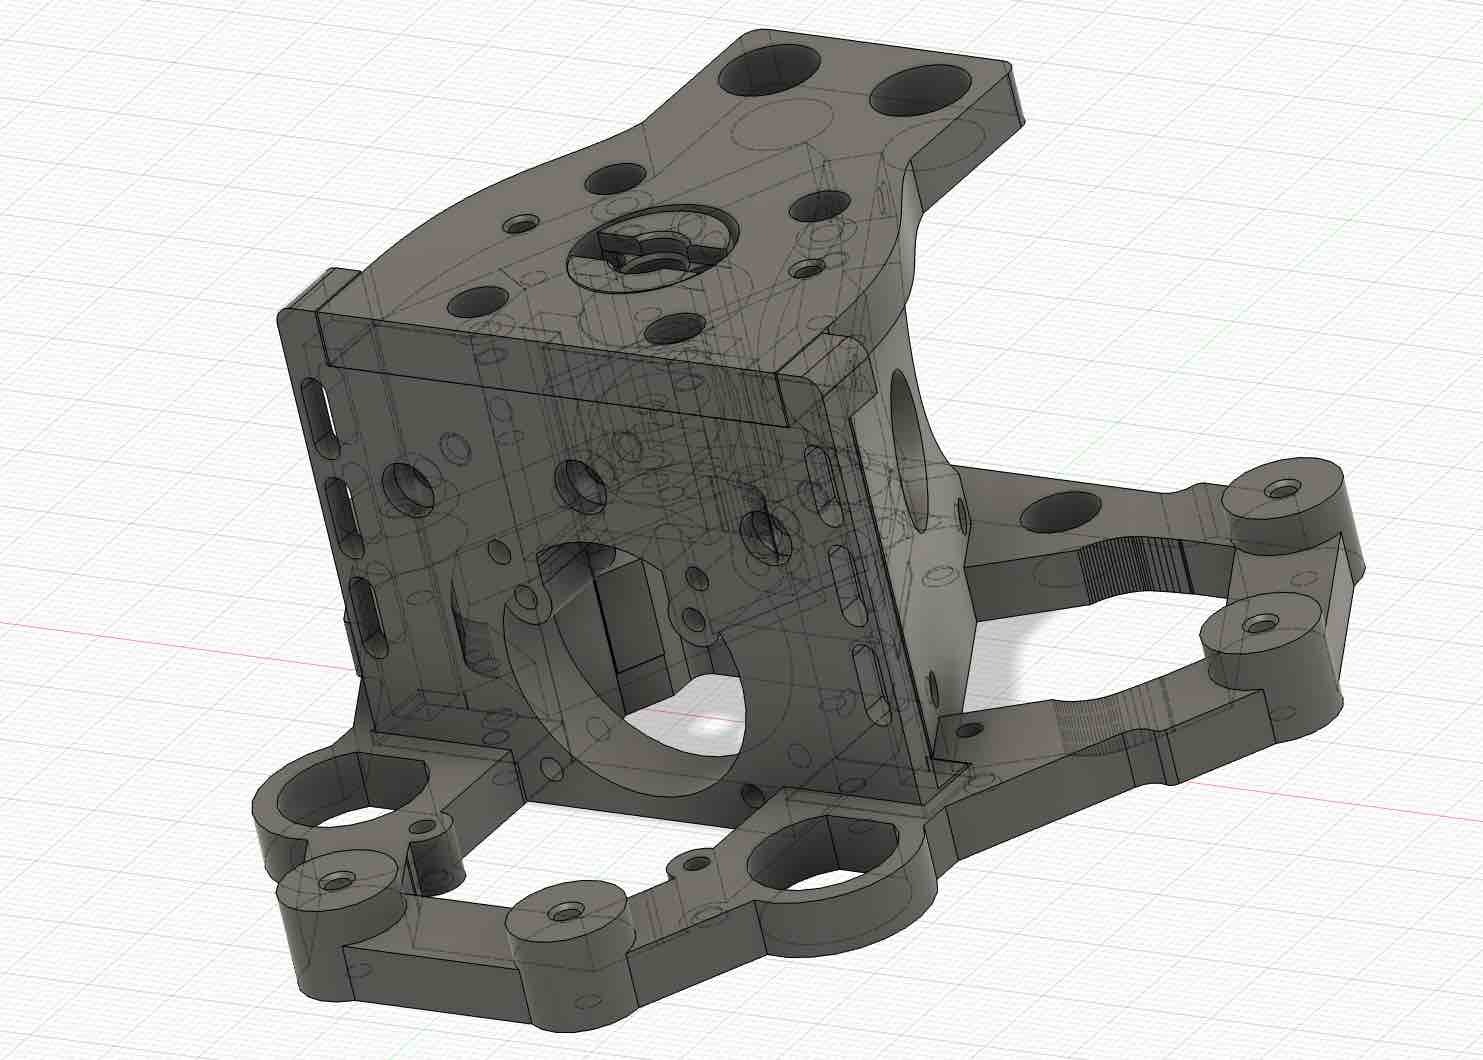
3D model description
NOTE: This thing is still a Work In Progress and I will surely be adding/changing features as I go along.
For Anycubic D 'Predator' Delta printer ONLY.
Designed for use with:
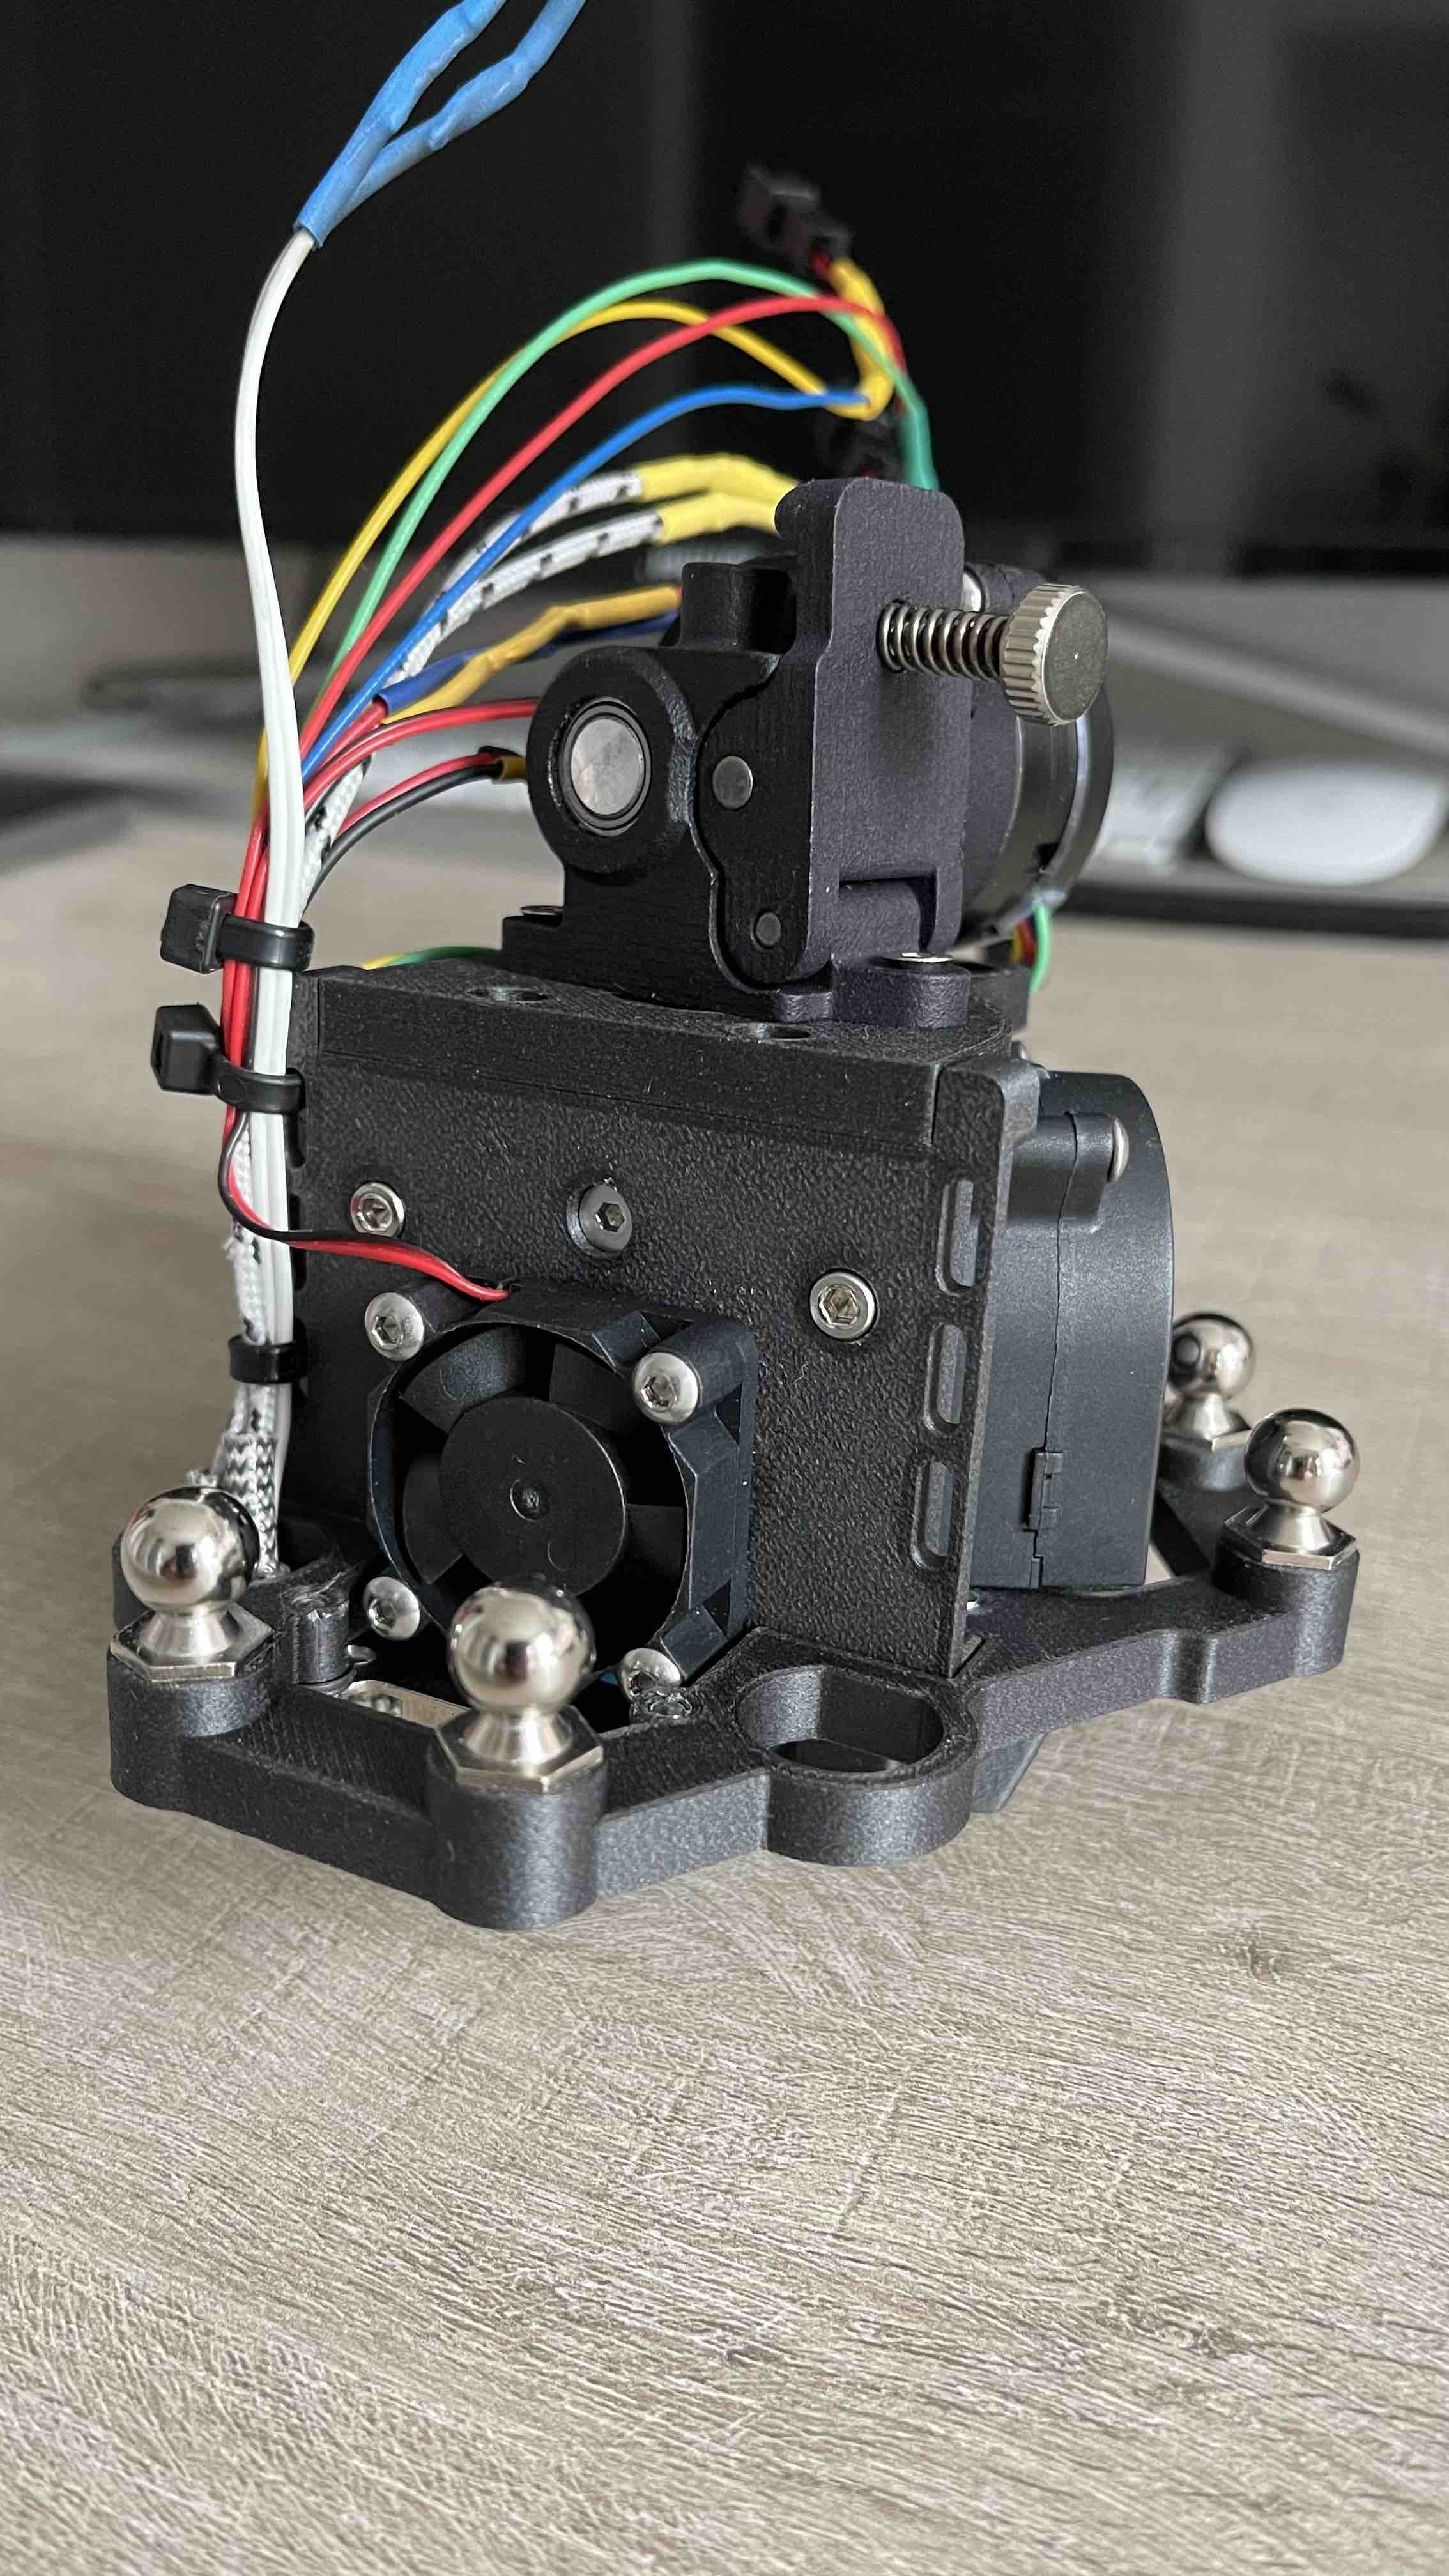
- MagBall arms (Haydn Huntley)
- Orbiter Extruder 1.5
- 2 x 4020 part cooling fans
- 30x30x10 heatbreak fan
- NF-Crazy (Mosquito) Magnum (clone or original)
- Capricorn PTFE tube
Introduction:
After watching the great work of Graham Ham with his CNC’ed aluminum effector, I visited his webpage www.hamrx8.com/PREDATOR-Mosquito-Effector.html and was directly inspired. Looking carefully how he built his uniques design and using a clone Mosquito my long-lasting dream of using a Direct Drive Extruder on my Predator came back to me as I never was a big fan of the Flying Extruder. The idea came to my mind quite often but the challenge was always weight vs. size as I didn't want to ruin the speed of the Predator by making it too heavy and there isn't much space to work with... But evolution was in my favour this time!
Now, since Graham is so kind to share his drawings for download and tinkering, I used this as a base for size and shape to build my own dream effector using Fusion 360.
As I started to see if I could use my existing Bondtech BMG I quickly and painfully found out that this would never work for me as ithe original square big stepper motor would hit my MagBall arms and pop them off. So, I found a way by using the amazing little Orbiter Extruder 1.5 because it’s light, strong, powerful and very small with the 17mm stepper. And it doesn’t hit my arms....ever. I assume the 20mm stepper would work also as I have rotated the holes for the Orbiter with a 10% right angle now. So that should work although I have no tested this.
I printed everything in PETG Carbon Fiber as this is extremely light, super strong and sufficiently heat resistant. Any other filament (except PLA) will probably do just fine also as long as it is strong, sturdy and reasonable heat resistant. You do need a hardened nozzle though! I use the Nozzle X.
Links:
- Orbiter Extruder: https://www.thingiverse.com/thing:4725897 (I just bought the ready-to-go Orbiter version from Aliexpress)
- Fan duct: any regular Predator fan duct would do as long as it stays clear enough of the Hotend. I used Sakman's 4020 V1 design: https://www.thingiverse.com/thing:3585762
Tips and tricks:
all printed holes are M3 based and slightly chamfered (overall bolt lengths of 8 or 10 mm will do and 16mm for the fans - please use 4 x Counter Sunk Screws to attach the Fan Mount Left & Right to the Effector Base as the bottom needs to be flat for the Fan Shroud) and need to be tapered for best results. As plastic threads wears out quickly, I don't recommend too much assembly and disassembly. If it works, it works. And surely don't overtighten the bolts.
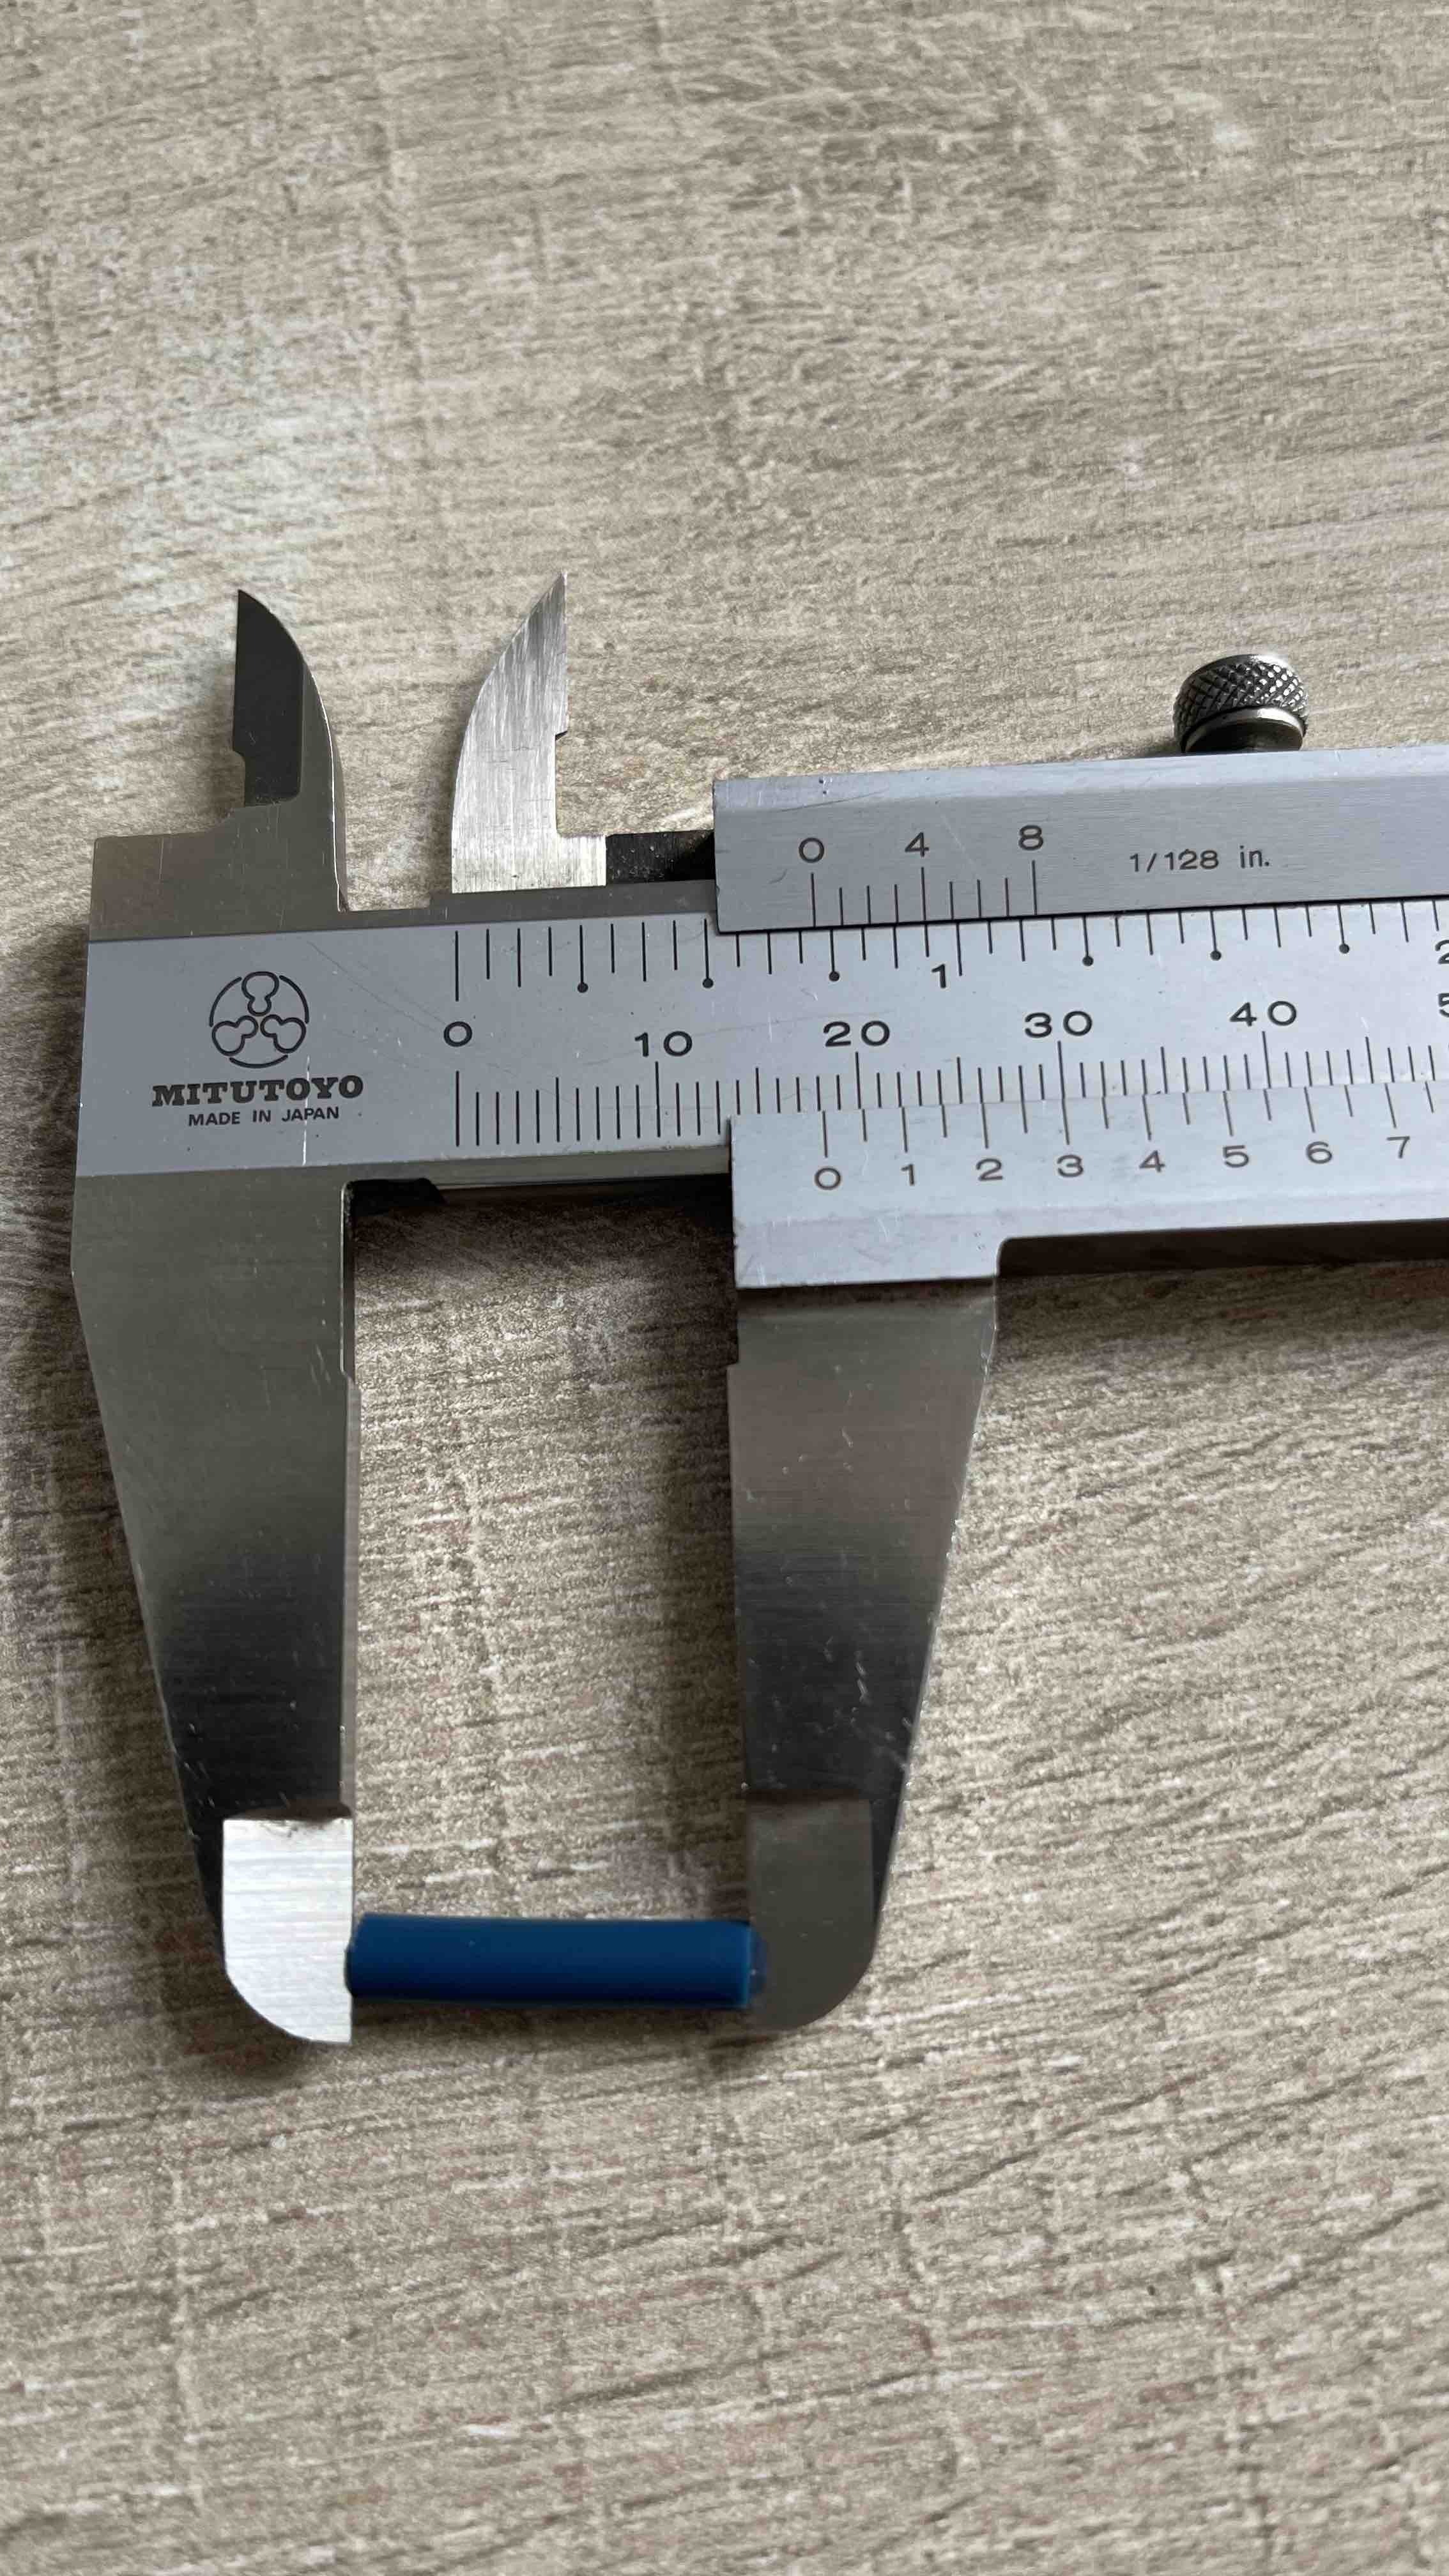
The Groove Mount Adapter STL is designed to work with the heatbreak supplied with the Orbiter 1.5 package. Just screw it in with the smooth 'cup'-shaped side up into the Orbiter so that it almost touches the gears. You may want to use a bit of super glue to secure it in place and then the (9 mm!) threaded side sticking out will fit nicely in the Groove Mount Adapter's top. You then just need to add a small piece of tubing (Capricorn preferred), pressing directly against the heatbreak end and have a very small distance stick out (1.3 mm) to fit into the small hole of the Mosquito top and you're done.
Total length will be around 18.3 mm. Measuring and cutting the PTFE tube needs to be done before assembly as it is hard to correct afterwards.
I'm now using a 50W heater for the Hotend which works great.
The Mosquito Magnum clone I purchased uses 2.5mm threads instead of 3mm, so the holes in the Hotend Mount are 2.5mm but can be widened to 3mm if needed.
You can use the original 'magnetic' steel plate for the Bed Level Probe sensor but you need to add some (I use 2 on each screw) M3 washers for the correct height.
In order to get the wiring correct for the stepper of the Orbiter (LDO-stepper), I just cut off the standard connectors and tested the wires by twisting them together to make the stepper turn into the right direction (I only just had to changie two wires to get it right) and attach new connectors by 2 pairs of 2 wires for easy disassembly and correction in the future).
PS: Full description of my Mosquito clone: Mellow All Metal NF-Crazy Hotend V6 Copper Nozzle - Magnum.
So, that's about all there is to say. So go ahead, print it, assemble it and have fun. And please post your makes!
:format(webp)/https://fbi.cults3d.com/uploaders/15126252/illustration-file/b0feb67d-f65b-48d4-8b49-d020ef318957/CAD_1.jpg)


/https://preview3d-images.cults3d.com/variants/97nnjrbuvgkc0j4kotnbjb6l7srk/cbbb7afd8a0ec9560f7f7940881f98c31dcb04582a03efcc135070de65821be8)
/https://preview3d-images.cults3d.com/variants/9vx3h12iglywyacflbijm485hctm/cbbb7afd8a0ec9560f7f7940881f98c31dcb04582a03efcc135070de65821be8)
/https://preview3d-images.cults3d.com/variants/syh2wa6p3iwxntzdep316u6w5bou/cbbb7afd8a0ec9560f7f7940881f98c31dcb04582a03efcc135070de65821be8)
/https://preview3d-images.cults3d.com/variants/dapvgexqg2awu2w8p90h9ivjijuu/cbbb7afd8a0ec9560f7f7940881f98c31dcb04582a03efcc135070de65821be8)
/https://preview3d-images.cults3d.com/variants/cg5gp7junijcw7daj7p7tnmk1qw8/cbbb7afd8a0ec9560f7f7940881f98c31dcb04582a03efcc135070de65821be8)
/https://preview3d-images.cults3d.com/variants/nk7ihxss1kxxbpk0gz37ekw4fsno/cbbb7afd8a0ec9560f7f7940881f98c31dcb04582a03efcc135070de65821be8)


