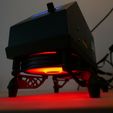
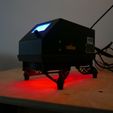
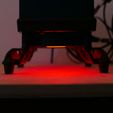
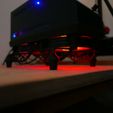
3D model description
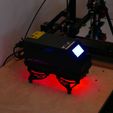
My design for the popular dual 120mm fan upgrade for the CR10/S control box! Features a high clearance for good airflow and supported by 4 legs designed using topology optimization (TopOs plugin for Grasshopper3D). Assembly instructions below. Also, check out the print settings.
See it on my Instagram @meyrickmachine!
I designed the parts for these fans:
https://www.amazon.co.uk/upHere-airflow-Computer-Cooling-PF120RD3-3/dp/B07VQDV14C/ref=sr_1_15?dchild=1&keywords=12v+uphere+120mm+fan&qid=1619014218&sr=8-15
It should probably still work ok with other fan types as long as the hole pattern is the same. May be a little less rigid without the Outside Brace however.
In addition to the printed parts and two 120mm fans, you will need x8 50mm M4 Allen bolts (or other screw type, 7mm max head diameter) and x8 M4 hex nuts. If you use the legs for use with rubber feet you will also need x4 rubber feet and x4 3.5mm self-tapping screws (appropriate length for your feet, I used 30mm). I used these rubber feet:
https://www.amazon.co.uk/20x15x17mm-Black-Rubber-Chair-Protector/dp/B00HR5OYPS/ref=sr_1_8?dchild=1&keywords=rubber+feet&qid=1619014484&sr=8-8
Assembly:
I will not go over how to wire in your new fans, there's loads online so give it a look! Personal preference, but I decided on having the front fan as inlet and the rear as exhaust - stays cool as a cucumber!
After printing all pieces, insert all 8 M4 hex nuts into their respective spaces. 2 on the inside of each Base half and 4 in the slots on the Inside Middle Brace. I find threading them onto a bolt a little and then pushing them into place using the bolt works quite well. They will tighten down when screwing everything into place.
When nuts are in place, take one half of the Base and line up one fan so the fan hole notch is in the most convenient place for the wires. Then, (if using the same fans as me) insert the 2 Spacers into the gaps on the fan closest to the Base corners and take the Outside Brace and slot this into the opposite gaps, making sure the riser piece on the Brace faces towards the bottom of the Base.
Then take two corresponding Legs and thread 4 M4 bolts through each hole - all the way through the Legs, fan, Spacers/Brace, and Base until the two in the corners screw into place. Slot the Inside brace into place and tighten down. Repeat for the other half, minus the Braces and the bolts for these.
When both halves are assembled thus far, slot the two halves together. This will take some jiggling about but a little force and angling should do the job. screw the remaining 2 bolts into places when halves are joined.
If you're using rubber feet, I'd recommend screwing them in place now.
I tried to design it so the slots around the side are push-fit so you don't actually need the screws. This is to allow for easy maintenance or for switching the inlet and exhaust end easily by just flipping it around. Hopefully, it should snap satisfyingly into place as it did for me! However, if you choose to screw back in place or it is looser than my control box is then just use the same screws that came off the original base to bolt it on! So just connect the fans up and slot the whole assembly into place, making sure the wires are tucked neatly out of the way!
All done!!
let me know if you have any trouble with the parts and I'll try and help!
DISCLAIMER: Perform any modifications on your control box/power supply at your own risk and follow all appropriate safety procedures.
3D printing settings
My print settings were (Cura):
.2mm layer height
.6mm line width
3 top/bottom layers
3 walls
skirt adhesion
All parts can be printed without support, HOWEVER, i recommend using some tree supports on the legs for a neater print and also use supports for the Base halves if planning to bolt Base to the control box :)

/https://fbi.cults3d.com/uploaders/17667302/illustration-file/e9ae51c5-f36e-49a4-9758-53c52b1e9e20/P2360830.jpg)
