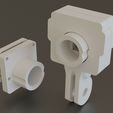
3D model description

Please consider donating if you find this useful.
Quick setup:
case_back_combined_with_camera_back.stl
case_front_with_screw_holes_with_mount.stl
camera_front_10mm.stl (or any other size)
material list:
official raspberry pi camera v2 board ( that's the 8Mpix version), and remove lens (if your m12 needs to get closer for focus, you can cut off the round part), do this in as much of a dust free environment.
With clones, corner of pcb might need to be shaved for rounded corner, but lens alignment might be off anyway, so wouldn't work.
m12 lens
4x screws: if using the full case, any m2 between 8mm and 10mm will work well. if using just the PCB cover + lens, then anything between 7mm and 8mm. Most screw head type should work ( I'm was using socket head cap screws )
non translucent black filament for the lens mount ( anything you want for the other parts )
My ender3v2 was able to print a m12 screw thread for an m12 lens mount and I mean threaded, not eating through the plastic when screwing the lens, just make sure the lens is aligned well. Layer height 0.10mm tested both PLA and PETG with success everytime (PLA resulted in cleaner prints, but I"m new to PETG)
This was meant to be printed not machined, so threads size takes that into account for printer tolerance, result has been perfect every time on my machine (after trial and errors to get it right)
This allows for more lens options, wide or long focal.
they can even act as a macro lens if sitting far enough from the sensor. which is why I made some long threaded lens mount. (if you need longer threads let me know, but 20mm long is probably overkill anyway)
You will find camera_front and camera_back file. The mentioned length is the thread length of the screw. Some long focal lens, may need to sit further to be in focus. The closer the lens is to the sensor, the further the focal point will be. So if it sit far away, you actually will have some sort of macro lens for extreme closeups (with good lighting needed)
And multiple version of case front and case back. (one that actually combines camera back and case back all in one, originally meant as a way to use shorter screws like m2x8, but you can use it with long m2x10 screws as well)
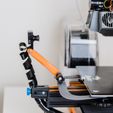
Case front comes with or without mounting system, currently have a gopro type mount as it's most universal and easy to print. I use it for security cameras, and 3d printer camera. (if you dig through my uploaded files you'll find a handle with a gopro mount type on it for ender3/pro/v2 )
install camera cable before closing the case.
if tolerance are tight enough, the case should not requires screws, and friction alone should be enough. but that depends on your printer.
Description of each file:
- camera_front_...mm
the lens mount and from pcb cover. the height represent the screw length. (with lens screw in all the way, and shaved off round part of the original mini lens mount, the gap between bottom of lens and sensor is about 2mm, )
- tight_camera_front_...mm
only in a few sizes for now, if you printer/filament needs a tighter lens screw, that's for you.
- ...lens tightener, you can use this to secure your lens better, if the thread is a little too loose. a normal version and a tighter version, start with the tighter version first.
- camera_back
pcb cover for the back side
- case front with screw holes (with and without mount), is meant to have the screws on the outside of the case going through all the parts.
- case front (without screw holes) (with and without mount), the front of the case is held by friction only.
- case back
self explanatory
- case back combined with camera back:
should be self explanatory, with this piece you would not use the "camera back" mentioned above. this is meant to be able to use shorter screws, m2x8 if using front without screw holes, or m2x10 if using front with screw holes.
- lens hood, to avoid flair from side light or sun if used outdoors with wide angle lens
these are using the losser setting, so should be easy to slide
if using it remember to use a shorted screw barrel, as this takes 2mm thickness on the lens screw.
the value in the file name doesn't include the 2mm screw.
3D printing settings
in case the slicer matter:
I used prusaslicer
infill 15% Gyroid
"detect thin walls" checked. (I don't know if it had some effect on it)
"avoid crossing permieter" checked
No support needed. any overhang should be far enough that they won't interfere even if not printed well
Regarding nozzle, I've only tested with a 0.4mm nozzle (with 0.2mm, tolerance might be too loose, but might also work just fine, with 0.6mm nozzle, tolerance might be too tight)
For the m12 mount I've only tested at layer height 0.10mm (might work at thicker layer height but my ender3v2 with stock single z screw is able to do it repeatedly )
other parts can be printed at any thickness
Make sure the material you are using is not translucent for the lens mount part, as light would interfere with the sensor and create a haze. I had the issue with a white PLA (I have since then thickens the lens mount barrel, both would still avoid it)
I tried black PLA (GST3D) and black PETG (SUNLU) with great success, and completely blocked any light (test with your phone camera flash )
the rest of the parts can be printed in any colors, translucency or material.
if the front case catcher are too thin to hold it, use the version with front screw holes

/https://fbi.cults3d.com/uploaders/17964639/illustration-file/cc4c1584-8d16-4d37-8155-7c85cf125770/3dpreview.jpg)


