Skip to content

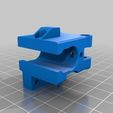
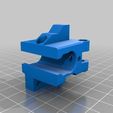
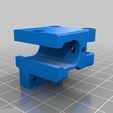
Open XY blocks with adjustable belt tension - for original Ultimaker (8mm gantry rods)

Advertising
Advertising
?
Creation quality: 0.0/5 (0 votes)
Evaluation of members on the printability, utility, level of detail, etc.

  • 450 views
  • 4 downloads

License
3D design format
STL Folder details Close
  • Key_block.stl
  • Open_XY_block_notab.stl
  • Open_XY_block_tab.stl
  • Open_XY_block_tab_left.stl
  • banana.stl
  • bracket.stl

Learn more about the formats

Publication date 2021-04-21 at 23:35
?
Published to Thingiverse on: 2014-02-24 at 17:59
Design number 408052

mtahtali

3D printer file info

3D model description

These blocks can be replaced without having to dismantle the rods and pulleys, after of course removing the original blocks. The belt tension is adjustable through a banana cam. The gantry can be easily removed without undoing the blocks.

The 6mm gantry rod version will be posted soon.

3D printing settings

Print all parts with 0.1mm layer and 100% infill.

Required parts for each block:

6x M3 M6mm socket bolt

5x M3 nut

1x M3 square nut

2x tube (3mm inside, 6.3mm outside diameter, 6.5mm length) plastic or metal. I used cuts from my old Bowden tube.

Make sure you have all parts ready before dismantling the gantry, rods and pulleys!

Assembly:

Re-assemble the rods, belts and pulleys as normal without the blocks, just the brass journal bearings in place. Don't tighten the sync pulleys, but tighten the driving ones (motors).

Place blocks on the rods and assemble the key wedges, don't tighten. Slide in place the blocks over the journal bearings. slightly tighten the bolt.

One block at a time:

Place the square nut in its captive location.

Screw the bolt few threads through the square nut.

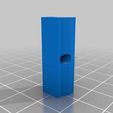
Slide the banana in place.

Capture the belt under the hinge screws passing through the tube cuts acting as rollers.

Position the gantry and secure rods on the blocks using the brackets. Gently tighten bolts.

Tighten the belts using the adjusting bolts, enough to remove slack and hear the belt give a tone. You can balance all belts to give the same tone. Don't over-tighten!

Square the gantry and tighten the pulleys. You may want to use a thread locking compound like Loctite Blue. Remember that to untighten later, you will have to heat the grubscrews or use acetone to dissolve the thread lock.

Level the platform and start printing.

Enjoy!

If you like this design, feel free to donate and ask for improvements:

https://www.paypal.com/cgi-bin/webscr?cmd=_s-xclick&hosted_button_id=AW57FTXN35YZE

Advertising


Issue with this design? Report a problem.

Would you like to support Cults?

You like Cults and you want to help us continue the adventure independently? Please note that we are a small team of 3 people, therefore it is very simple to support us to maintain the activity and create future developments. Here are 4 solutions accessible to all:

  • ADVERTISING: Disable your banner blocker (AdBlock, …) and click on our banner ads.

  • AFFILIATION: Make your purchases online by clicking on our affiliate links here Amazon.

  • DONATE: If you want, you can make a donation via Ko-Fi πŸ’œ.

  • WORD OF MOUTH: Invite your friends to come, discover the platform and the magnificent 3D files shared by the community!


Sharing and downloading on Cults3D guarantees that designs remain in makers community hands! And not in the hands of the 3D printing or software giants who own the competing platforms and exploit the designs for their own commercial interests.

Cults3D is an independent, self-financed site that is not accountable to any investor or brand. Almost all of the site's revenues are paid back to the platform's makers. The content published on the site serves only the interests of its authors and not those of 3D printer brands who also wish to control the 3D modeling market.

100% secure payment by credit card, PayPal, Apple Pay, Google Pay, etc.
View all payment options.