Skip to content

FolgerTech FT5 Aeroshuttle

Advertising
Advertising
?
Creation quality: 0.0/5 (0 votes)
Evaluation of members on the printability, utility, level of detail, etc.

  • 671 views
  • 4 downloads

License
3D design format
STL Folder details Close
  • aero-shuttle-2.stl
  • fan-bottom.stl
  • fan-holder.stl
  • fan-mount.stl
  • fan-top.stl
  • shuttle-back.stl
  • shuttle-front.stl

Learn more about the formats

Publication date 2021-04-27 at 01:06
?
Published to Thingiverse on: 2017-04-07 at 15:37
Design number 412695

3D printer file info

3D model description

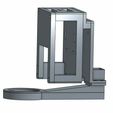
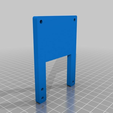
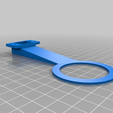
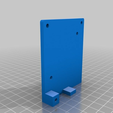
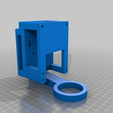
This is a replacement shuttle for the FolgerTech FT5 printer. It's designed for the E3D Titan Aero extruder, so it's got nothing under the stepper motor, allowing for the max possible bed clearance. With a V6 heat block you get about 25mm space for a fan duct.

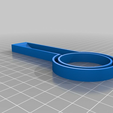
The fan duct I've included was designed to try to minimize disruption due to clips on the bed. It does lose a few mm on the X axis, but it's not too bad.

If you choose to use the part cooling fan, it was designed to fit with these fans:

https://www.amazon.com/gp/product/B00EL938E6/ref=oh_aui_detailpage_o07_s00?ie=UTF8&psc=1

The duct prints in 2 parts which have to get glued together. I use CA glue. I get a nice strong air flow out of this even without sealing the connection between fan and fan holder, though I do plan to put a bit of caulking there to fully seal it.

The order of putting things together is important:

Fan duct:
1: fan connects to fan holder
2: fan duct connects to fan holder
3: fan mount connects to fan holder

Shuttle:
1: cable chain connects to top of shuttle-back
2: shuttle back connects to rail slider
3: motor connects to shuttle back, with cable connector facing to the right (when looking at it from the front)
4: use 4 m3 bolts to connect shuttle front and back.
4a: on the left side of the shuttle, use the TOP screw hole.
4b: secure the bottom two screws with nyloc nuts. do not use nuts on the top yet!
5: attach the titan aero extruder
6: attach the fan mount assembly to the top two screws from step 4 and secure with nylocs.
7: use an m3 bolt through the bottom left hole on the shuttle to secure the bottom of the fan

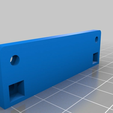
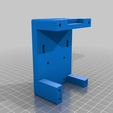
I've also included an assembled STL so that you can see how it all fits together, and a bunch of pictures.

The original cad files are here: https://cad.onshape.com/documents/bdeab98e34d4910e81e0ed05/w/09297873b19d1a6b992c52fa/e/150a251ec63f9edc81ff04a8

3D printing settings

-

Advertising


Issue with this design? Report a problem.

Would you like to support Cults?

You like Cults and you want to help us continue the adventure independently? Please note that we are a small team of 3 people, therefore it is very simple to support us to maintain the activity and create future developments. Here are 4 solutions accessible to all:

  • ADVERTISING: Disable your banner blocker (AdBlock, …) and click on our banner ads.

  • AFFILIATION: Make your purchases online by clicking on our affiliate links here Amazon.

  • DONATE: If you want, you can make a donation via Ko-Fi πŸ’œ.

  • WORD OF MOUTH: Invite your friends to come, discover the platform and the magnificent 3D files shared by the community!


Sharing and downloading on Cults3D guarantees that designs remain in makers community hands! And not in the hands of the 3D printing or software giants who own the competing platforms and exploit the designs for their own commercial interests.

Cults3D is an independent, self-financed site that is not accountable to any investor or brand. Almost all of the site's revenues are paid back to the platform's makers. The content published on the site serves only the interests of its authors and not those of 3D printer brands who also wish to control the 3D modeling market.

100% secure payment by credit card, PayPal, Apple Pay, Google Pay, etc.
View all payment options.