Skip to content

FolgerTech FT-6 Buck Converter Mounting Bracket

Advertising
Advertising
?
Creation quality: 5.0/5 (1 vote)
Evaluation of members on the printability, utility, level of detail, etc.

  • 752 views
  • 7 downloads

License
3D design format
STL Folder details Close
  • Pi_PCB_Power_Board_Mount.stl

Learn more about the formats

3D model size X 56.5 Γ— Y 33.5 Γ— Z 10 mm
Publication date 2021-09-17 at 23:18
?
Published to Thingiverse on: 2019-06-22 at 06:20
Design number 522607

3D printer file info

3D model description

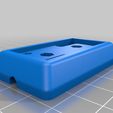
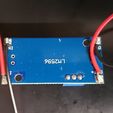
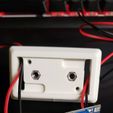
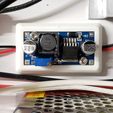
Buck converter mounting bracket for a FolgerTech FT-6.

Requires:

β€’ Soldering
β€’ (2) M3x12 screws (used to mount bracket to ACM panel
β€’ (2) M3x6 button head screws (used to mount buck converter to bracket)
β€’ (2) M3 Nyloc nuts

You could do away with the need for the M3x12's and the Nyloc nuts by simply using double-sided sticky tape that comes with the machine to mount the bracket to the ACM panel while still utilizing the bracket.

Steps (Basic):
β€’ Decide where you are going to mount the buck converter while keeping wire lengths in
mind.
β€’ Use the buck converter bracket as a template to mark the desired mounting location to be
drilled (hexagon nut holes)
β€’ De-solder plug wires from buck converter
β€’ Feed loose plug wires through the front side of bracket through one of the wire slots
(either side is fine) and re-solder the plug wires to buck converter inward/facing one
another to prevent wire interference with the bracket and the buck converter.
β€’ De-solder power lead wires and re-solder orientated inward/facing one another to prevent
wire interference in between the bracket and the buck converter.
β€’ Feed power lead wires through the front side of bracket from buck converter.
β€’ Insert two M3 Nyloc nuts into the hexagon shaped holes (these should fit snug to prevent
turning in the holes)
β€’ Carefully (at your own risk) screw buck converter to bracket using two M3x6 screws (Do
not over tighten)
β€’ Guide wires out the ends of the bracket through the provided channels and install bracket
to the ACM panel using two M3x12 screws (engaging the Nylocs inside) while being
careful to not pinch wires in between bracket and ACM panel or screws.

Feel free to shoot me a message if you believe me to have missed a step or would just like more clarification. I intend on making a PDF installation instruction sheet at some point.

3D printing settings

-

Advertising


Issue with this design? Report a problem.

Would you like to support Cults?

You like Cults and you want to help us continue the adventure independently? Please note that we are a small team of 3 people, therefore it is very simple to support us to maintain the activity and create future developments. Here are 4 solutions accessible to all:

  • ADVERTISING: Disable your banner blocker (AdBlock, …) and click on our banner ads.

  • AFFILIATION: Make your purchases online by clicking on our affiliate links here Amazon.

  • DONATE: If you want, you can make a donation via Ko-Fi πŸ’œ.

  • WORD OF MOUTH: Invite your friends to come, discover the platform and the magnificent 3D files shared by the community!


Sharing and downloading on Cults3D guarantees that designs remain in makers community hands! And not in the hands of the 3D printing or software giants who own the competing platforms and exploit the designs for their own commercial interests.

Cults3D is an independent, self-financed site that is not accountable to any investor or brand. Almost all of the site's revenues are paid back to the platform's makers. The content published on the site serves only the interests of its authors and not those of 3D printer brands who also wish to control the 3D modeling market.

100% secure payment by credit card, PayPal, Apple Pay, Google Pay, etc.
View all payment options.