Skip to content

Vase with hidden LED ring

Advertising
Advertising
?
Creation quality: 5.0/5 (1 vote)
Evaluation of members on the printability, utility, level of detail, etc.

  • 745 views
  • 2 likes
  • 12 downloads

License
3D design format
STL Folder details Close
  • 16_led_vase_base_Bottom.stl
  • 16_led_vase_base_Top.stl
  • LED_Vase_16_Assembled.stl

Learn more about the formats

Publication date 2021-09-20 at 23:22
?
Published to Thingiverse on: 2020-11-03 at 13:04
Design number 524898

3D printer file info

3D model description

STOP! I appreciate you clicking this far, but do me a favor - scroll back up and hit that like button and the watch button. I expect there to be some additions and tweaks to this and I want you to see them. It also helps other folks see it.

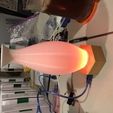
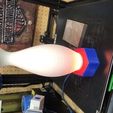
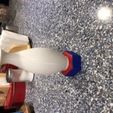
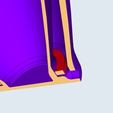
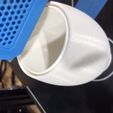
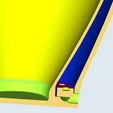
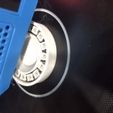
This is a vase with an Adafruit Neopixel LED ring modeled on the INTERIOR of the vase. Hidden away! It magically shows the light when you plug it in.

This is a moderately advanced project. You'll not only be using your printing skills but also some single board computer skills - but don’t be intimidated - I was able to figure it out.

Some of my resources:

https://www.adafruit.com/

https://learn.adafruit.com/

https://www.adafruit.com/category/168

https://www.arduino.cc/

https://github.com/adafruit/Adafruit_DotStar/blob/master/examples/strandtest/strandtest.ino

PARTS LIST:

https://www.amazon.com/Adafruit-NeoPixel-Ring-Integrated-Drivers/dp/B00KBXT9I0/ref=sr_1_5?crid=28LNWK21WU4X2&dchild=1&keywords=neopixel+ring+16&qid=1603968437&sprefix=neopixel+ring%2Caps%2C168&sr=8-5

https://www.amazon.com/LAFVIN-Board-ATmega328P-Micro-Controller-Arduino/dp/B07G99NNXL/ref=sr_1_2_sspa?crid=VGAP22DETBZ0&dchild=1&keywords=arduino+nano&qid=1603968489&sprefix=ardui%2Caps%2C432&sr=8-2-spons&psc=1&spLa=ZW5jcnlwdGVkUXVhbGlmaWVyPUFDOVBDNTRUVERNRVUmZW5jcnlwdGVkSWQ9QTAzNzA4OTZRM0o2TlkyTDhNNDYmZW5jcnlwdGVkQWRJZD1BMDc0MTMwMEYwVlBGRkpMRzFTVyZ3aWRnZXROYW1lPXNwX2F0ZiZhY3Rpb249Y2xpY2tSZWRpcmVjdCZkb05vdExvZ0NsaWNrPXRydWU

OPTIONAL:
https://www.amazon.com/Elegoo-EL-CP-004-Multicolored-Breadboard-arduino/dp/B01EV70C78/ref=sr_1_3?crid=3C4YV8023N2CZ&dchild=1&keywords=arduino+jumper+wires&qid=1603968584&sprefix=arduino+ju%2Caps%2C197&sr=8-3

https://www.amazon.com/ELEGOO-Project-Tutorial-Controller-Projects/dp/B01D8KOZF4/ref=sr_1_1_sspa?crid=1ZD3WAONNAE2J&dchild=1&keywords=arduino+starter+kit&qid=1603968751&sprefix=arduino+%2Caps%2C170&sr=8-1-spons&psc=1&spLa=ZW5jcnlwdGVkUXVhbGlmaWVyPUEzNllNSTFOMzQzWUsxJmVuY3J5cHRlZElkPUEwNDc1OTU5MzhaMkVUTlVLT0RKMiZlbmNyeXB0ZWRBZElkPUExMDAxMzc2M1RTT1dKR0NNR05TQiZ3aWRnZXROYW1lPXNwX2F0ZiZhY3Rpb249Y2xpY2tSZWRpcmVjdCZkb05vdExvZ0NsaWNrPXRydWU

I can't try to teach you Arduino Nano stuff here, but the resources are above. The starter kit is a lot of fun.

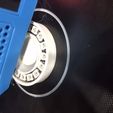
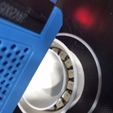
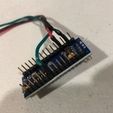
You will need some basic soldering skills. Your first step is to solder leads onto the LED ring. The Jumper Wire kit listed above is cheap and will give you spare stuff to play with. the wires will NOT fit through the hole in the vase with the connectors on. Cut the wire and set the FEMALE end aside. Leave just enough wire on the female end to be able to strip and solder later. Cut the other end off at the connector. Solder the three wires (5V, Ground and Data IN onto the ring. Pay attention to the best routing of wires to one location.

This is a good time to test your Nano, your sketch and your soldering. Hook everything up and make sure it works. There is no going back to test soldering or function once you print without destroying your print.

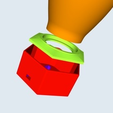
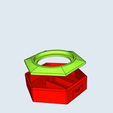
The first thing to print is the base top and bottom. Those are easy. They are friction fit so you may need minor post processing especially if you have a little elephant foot. Set them aside.

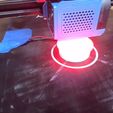
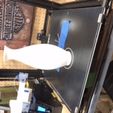
OK - time to start the vase print. You need to set a pause at height command in your slicer at about 9MM. Begin the print when you know you will be available at the pause. When it pauses, route the wires through the hole and place the ring in place. I'd tape the wires to the bed just so they don't end up catching the print head. Complete the print!

Once the vase is done, solder the female connectors back on, protect the joint with tape or heat shrink and plug them onto the nano and plug it in!

Don't forget - LIKE LIKE LIKE, follow and feel free to tip!

3D printing settings

-

Advertising


Issue with this design? Report a problem.

Would you like to support Cults?

You like Cults and you want to help us continue the adventure independently? Please note that we are a small team of 3 people, therefore it is very simple to support us to maintain the activity and create future developments. Here are 4 solutions accessible to all:

  • ADVERTISING: Disable your banner blocker (AdBlock, …) and click on our banner ads.

  • AFFILIATION: Make your purchases online by clicking on our affiliate links here Amazon.

  • DONATE: If you want, you can make a donation via Ko-Fi πŸ’œ.

  • WORD OF MOUTH: Invite your friends to come, discover the platform and the magnificent 3D files shared by the community!


Sharing and downloading on Cults3D guarantees that designs remain in makers community hands! And not in the hands of the 3D printing or software giants who own the competing platforms and exploit the designs for their own commercial interests.

Cults3D is an independent, self-financed site that is not accountable to any investor or brand. Almost all of the site's revenues are paid back to the platform's makers. The content published on the site serves only the interests of its authors and not those of 3D printer brands who also wish to control the 3D modeling market.

100% secure payment by credit card, PayPal, Apple Pay, Google Pay, etc.
View all payment options.