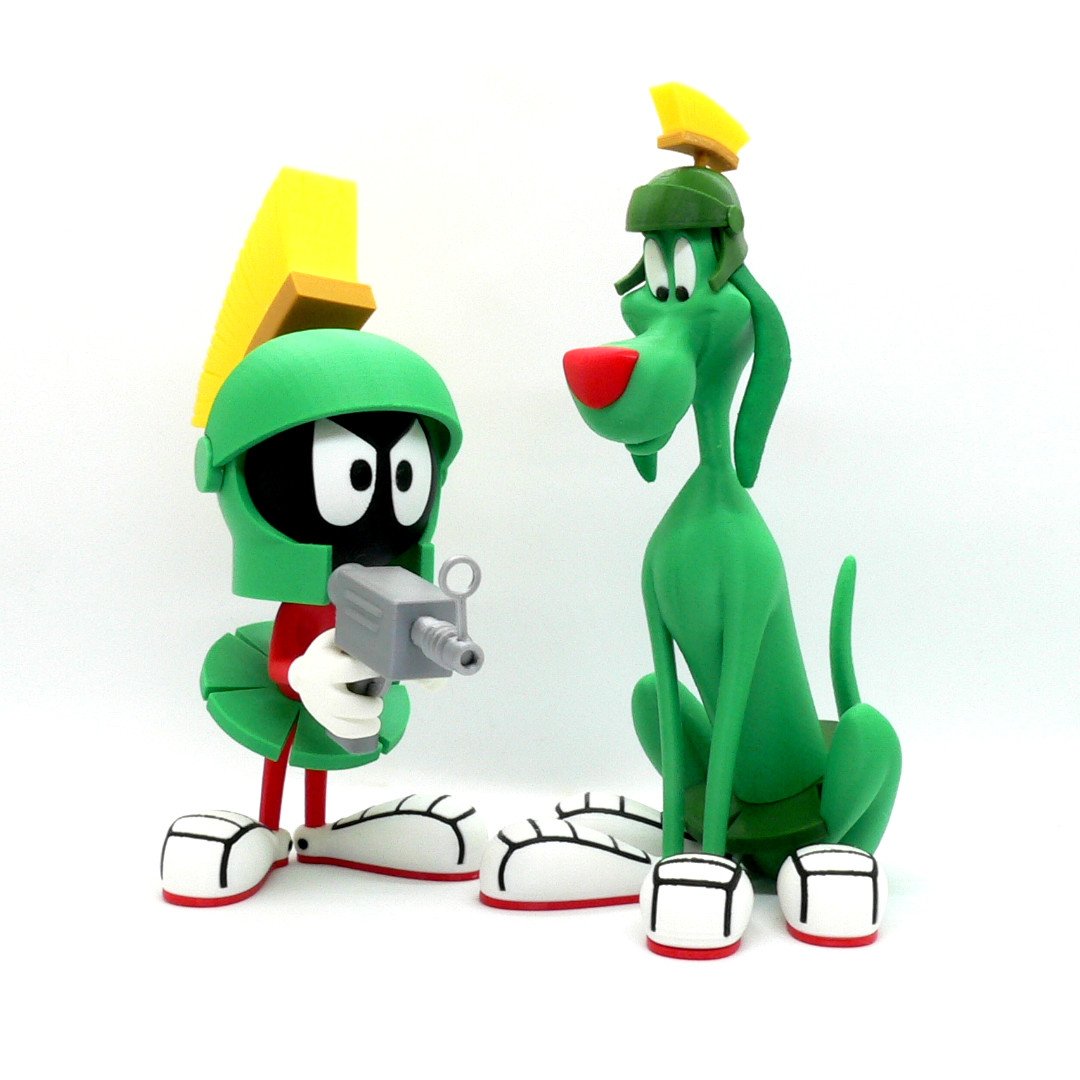
K-9 is Marvin the Martian's pet alien dog, from Warner Bros.' Looney Tunes and Merrie Melodies cartoons.
K-9 debuted in the short "Haredevil Hare", where he and his owner Marvin tried to thwart Bugs Bunny, who had stumbled on the pair's plans to destroy the Earth.
No supports are required. One piece contains built-in supports and one contains built-in braces, optional parts without the built-in supports /braces are also supplied if you want to use your slicer supports (see notes below). If you have the proper filament colors, no painting is needed.
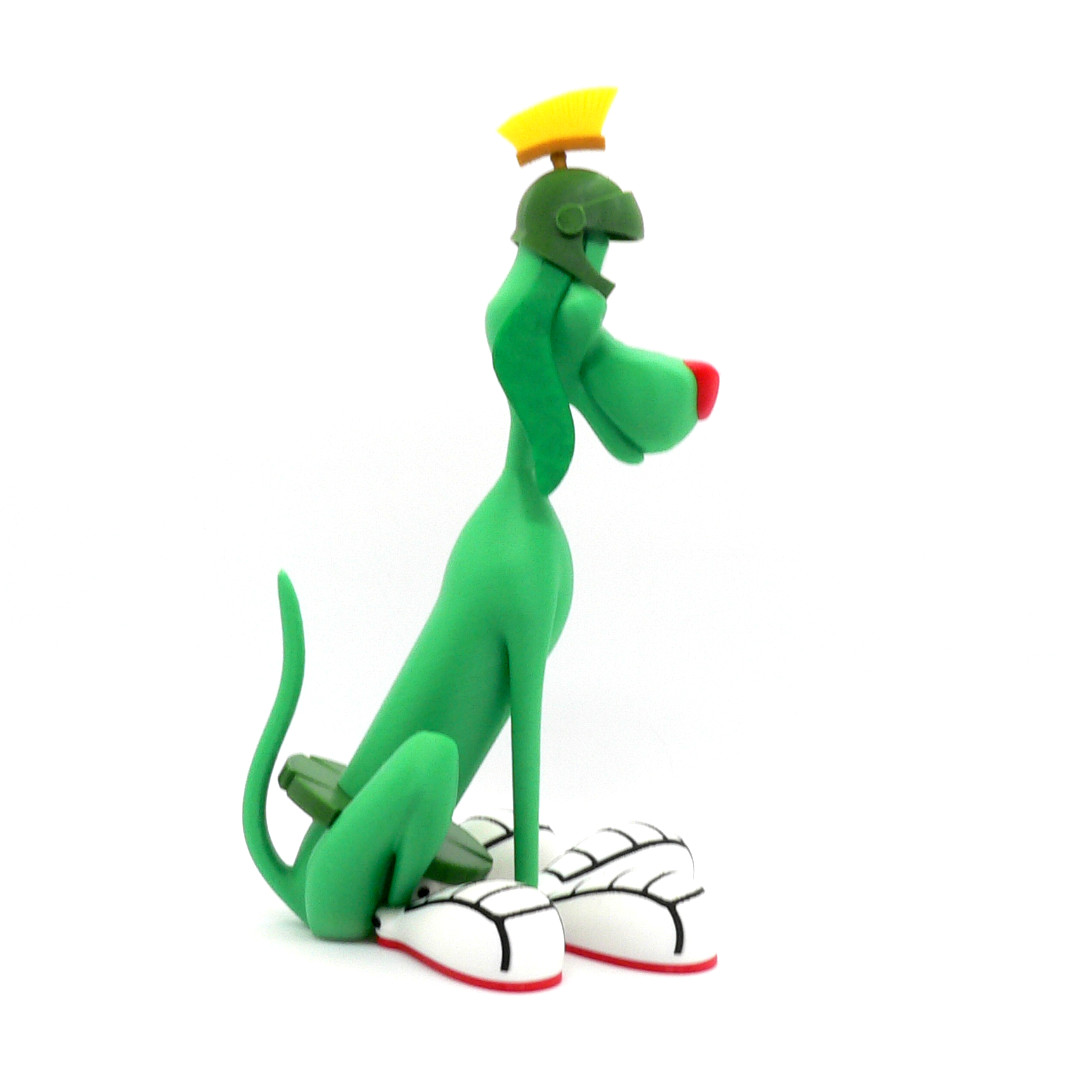
The assembled model is 225mm tall.
Enjoy!
...........................................................................................................
Print Instructions:
Supports: No
Resolution: .2mm
Infill: 10%
Notes:**
Refer to the notes below for a few helpful printing and assembly instructions.
...........................................................................................................
Building the model
Colors
Black: (Paramount3D PLA - Black)
eye_black_right
eye_black_left
shoe_stripes (contains four identical pieces)
shoe_dots (contains eight identical pieces)
..
Yellow: (Paramount3D PLA - Simpson Yellow)
broom_bristles
..
Gold: (Hatchbox PLA - Gold)
broom_base
broom_handle
..
Lightest Green: (Hatchbox PLA - True Green)
body_bottom
body_bottom_with_supports
body_top
body_top_with_brace
..
Darkest Green: (Paramount3D PLA - St Andrews Green)
visor
visor_connector_left
visor_connector_right
helmet
belt
..
Middle Green: (StrongHero3D PLA - Green) Note: I do not recommend this company
ear_left
ear_right
..
Red: (Hatchbox PLA - True Red)
nose
shoe_red_front_left
shoe_red_front_right
shoe_red_back_left
shoe_red_back_right
..
White: (Overture PLA - White)
eye_white_left
eye_white_right
shoe_white_front_left
shoe_white_front_right
shoe_white_back_left
shoe_white_back_right
..
...........................................................................................................
Printing and assembly tips
Printing tips
1 - No supports are required. One piece contains built-in supports, body_bottom. One piece contains built-in braces, body_top. Optional parts without the built-in supports/braces are also supplied if you want to use your slicer supports.
Note: The built-in supports are designed with a .2mm gap, which works well for various layer heights. However, if the model is sized up/down, this gap is also sized and will affect how well the built-in supports will work. The built-in braces are designed to help odd shaped parts with smaller bases from detaching from the bed. These braces have one small extruson line connected to the part, which is easily removed.
2 - There are some pieces that may need brims or rafts, use your discretion. When setting up my prints I prefer to be conservative, especially since the base of many parts are hidden when inserted into another part.
*I used brims on:
- eye_black_left/right
- shoe_dots
- broom_handle
- broom_base
3 - Do NOT use a brim on the shoe_stripes. The part prints easily without a brim and a slightly thick first layer due to a brim or fat first layer may result in too tight of a fit.
4 - I printed all the parts on my Prusa MK3S+ and Prusa Mini using the out of the box default settings for .2mm quality in PrusaSlicer (just changing the infil to 10% due to old habits). All the parts went from the printer to assmbly with no post processing or cleanup.
5 - Colors! This model was made with three shades of green. I used what I had in my filament library, but would imagine that there are probably better combinations of green available.
6 - When removing parts from the printer bed, it's a good idea to place left/right parts into separate containers to help with the assembly process.
..
Assembly tips:
1 - Take your time gluing the model together and enjoy the process. Give some thought into which parts to glue together as groups and then gluing the groups together. Let the glue for each group to set completely before combining groups.
2 - I used 3D Gloop and E6000 to put this model together. I am not affiliated with 3D Gloop but have experimented with different glues for my models and have found that this glue is a great option for my models. Each type of glue has different pros/cons and I found that 3D Gloop was far easier to use than superglue (for me). The E6000 sticky glue that I also use allows more time to position parts and is still the best for smaller parts. 3D Gloop covers the middle ground for me and really works wonders. It leaves enough time to set, so parts can be positioned correctly and it dries fast enough to hold awkward parts without the need for taping. I used the PLA version that comes in a tube. For both glues using a smaller amount is usually better than more glue.
3 - Pay attention when gluing the helmet to the body_top. Be sure to glue in the ears to the body_top first. The helmet sides should then line up with the ears, with the helmet leaning forward slightly. The fit is good, but the helmet can accidentally be glued tilted backward slightly.
4 - The visor connectors should be glued into the helmet along with the visor. The visor will only fit one way, the flat bed side of the visor should be on bottom. Take care ensuring left/right connectors are on the correct sides. The full helmet/visor can be dry fitted to ensure everything is in the right place.
5 - The eye_whites and eye_blacks should be glued into the body_top at the same time. The eye_whites could be accidentally glued in too low into the body which would cause an issue with fitting the eye_blacks.
6 - Refer to the assembly diagrams in the pictures section as well as the uploaded pictures for putting the model together. The model is meant to be glued.
Do not hesitate to ask questions, feedback is essential to making better models.
:format(webp)/https://fbi.cults3d.com/uploaders/12888752/illustration-file/bb04d47d-8a09-4b6b-b4a1-543d9721aa48/k9-angle1.jpg)


/https://preview3d-images.cults3d.com/variants/aqxpos1i8b896sql52o4fm809qnn/cbbb7afd8a0ec9560f7f7940881f98c31dcb04582a03efcc135070de65821be8)
/https://preview3d-images.cults3d.com/variants/82wm3pacz733h221np3hy5vhsnhm/cbbb7afd8a0ec9560f7f7940881f98c31dcb04582a03efcc135070de65821be8)
/https://preview3d-images.cults3d.com/variants/fwdfjygly4volg8ht3u141q21y5b/cbbb7afd8a0ec9560f7f7940881f98c31dcb04582a03efcc135070de65821be8)
/https://preview3d-images.cults3d.com/variants/g5qfi8kt8bll0p97wk1eyf4p04ja/cbbb7afd8a0ec9560f7f7940881f98c31dcb04582a03efcc135070de65821be8)
/https://preview3d-images.cults3d.com/variants/xdh0lyhn9807d0j2p3eqv33tr44t/cbbb7afd8a0ec9560f7f7940881f98c31dcb04582a03efcc135070de65821be8)
/https://preview3d-images.cults3d.com/variants/5svcg7ftxbuxogeyef4vwnig287u/cbbb7afd8a0ec9560f7f7940881f98c31dcb04582a03efcc135070de65821be8)
/https://preview3d-images.cults3d.com/variants/01jnebbd1e7dhh3fjg0greyuxj27/cbbb7afd8a0ec9560f7f7940881f98c31dcb04582a03efcc135070de65821be8)
/https://preview3d-images.cults3d.com/variants/vacpav29b3ju8u2pf6og9cojwu68/cbbb7afd8a0ec9560f7f7940881f98c31dcb04582a03efcc135070de65821be8)
/https://preview3d-images.cults3d.com/variants/9ly4n8o6q3939gn20mucz4mij3kb/cbbb7afd8a0ec9560f7f7940881f98c31dcb04582a03efcc135070de65821be8)
/https://preview3d-images.cults3d.com/variants/nboll8ppbipzr93sq9j6bld2a5yq/cbbb7afd8a0ec9560f7f7940881f98c31dcb04582a03efcc135070de65821be8)
/https://preview3d-images.cults3d.com/variants/gx5kik8mrrivcosipnrf5n2bg7u7/cbbb7afd8a0ec9560f7f7940881f98c31dcb04582a03efcc135070de65821be8)
/https://preview3d-images.cults3d.com/variants/qt3dcprtkzsi0p3cx7f6f5y8bjxr/cbbb7afd8a0ec9560f7f7940881f98c31dcb04582a03efcc135070de65821be8)
/https://preview3d-images.cults3d.com/variants/qsr35a241945jtlk22bf4dbdrgib/cbbb7afd8a0ec9560f7f7940881f98c31dcb04582a03efcc135070de65821be8)
/https://preview3d-images.cults3d.com/variants/kf0oqcssxgojp18ffjy20s44lbof/cbbb7afd8a0ec9560f7f7940881f98c31dcb04582a03efcc135070de65821be8)
/https://preview3d-images.cults3d.com/variants/um09g1oxzkzhmlenavhd9bk6ygou/cbbb7afd8a0ec9560f7f7940881f98c31dcb04582a03efcc135070de65821be8)
/https://preview3d-images.cults3d.com/variants/m5dypmeuu73tdsbltbq0byuhrwxj/cbbb7afd8a0ec9560f7f7940881f98c31dcb04582a03efcc135070de65821be8)
/https://preview3d-images.cults3d.com/variants/9j6r9zx0mgaxevhlwzwu7c1p4p83/cbbb7afd8a0ec9560f7f7940881f98c31dcb04582a03efcc135070de65821be8)
/https://preview3d-images.cults3d.com/variants/laz7p9msaxh4e5zw6o1atxsr14qq/cbbb7afd8a0ec9560f7f7940881f98c31dcb04582a03efcc135070de65821be8)
/https://preview3d-images.cults3d.com/variants/oo8mpypbg5a602p7g1ko85lsrlzs/cbbb7afd8a0ec9560f7f7940881f98c31dcb04582a03efcc135070de65821be8)
/https://preview3d-images.cults3d.com/variants/c2k2o7hfquqcrw7k0qfl4ewgevkl/cbbb7afd8a0ec9560f7f7940881f98c31dcb04582a03efcc135070de65821be8)
/https://preview3d-images.cults3d.com/variants/2eq5m306ezp7ctfrrnfw4k6mqmke/cbbb7afd8a0ec9560f7f7940881f98c31dcb04582a03efcc135070de65821be8)
/https://preview3d-images.cults3d.com/variants/7zrfsnyxu6scq4voavjc8uvlj5nb/cbbb7afd8a0ec9560f7f7940881f98c31dcb04582a03efcc135070de65821be8)
/https://preview3d-images.cults3d.com/variants/olevtgihbdhv39nrqytaxvo99yvh/cbbb7afd8a0ec9560f7f7940881f98c31dcb04582a03efcc135070de65821be8)
/https://preview3d-images.cults3d.com/variants/9qljykhsm1ffumfkbea34meyb9zm/cbbb7afd8a0ec9560f7f7940881f98c31dcb04582a03efcc135070de65821be8)
/https://preview3d-images.cults3d.com/variants/q8e4zxf3rhbqq9t1ht3636yx14f6/cbbb7afd8a0ec9560f7f7940881f98c31dcb04582a03efcc135070de65821be8)
/https://preview3d-images.cults3d.com/variants/p9rfrn8khmth8wrh4y2z40lrkwf7/cbbb7afd8a0ec9560f7f7940881f98c31dcb04582a03efcc135070de65821be8)
/https://preview3d-images.cults3d.com/variants/at94t1iof3nrspd0ihtnhu2yynmw/cbbb7afd8a0ec9560f7f7940881f98c31dcb04582a03efcc135070de65821be8)
/https://preview3d-images.cults3d.com/variants/mg5p67kqu9ovr28f9jeakn5xz4zp/cbbb7afd8a0ec9560f7f7940881f98c31dcb04582a03efcc135070de65821be8)
/https://preview3d-images.cults3d.com/tbz4c37tb2r7y7cc7rvd2oskj8d1)


