Skip to content

Mould - Mote press

Advertising
Advertising
?
Creation quality: 5.0/5 (1 vote)
Evaluation of members on the printability, utility, level of detail, etc.

  • 6.3k views
  • 30 likes
  • 6 downloads
  • 1 collection

License
3D design format
RAR and STL Folder details Close
  • 1 - Moule Externe 5.5 cm.STL
  • 1 - Moule Externe 7.5 cm.STL
  • 2 - Moule Interne 5.5 cm.STL
  • 2 - Moule Interne 7.5 cm.STL
  • 3 - Couvercle Moule 5.5 cm.STL
  • 3 - Couvercle Moule 7.5 cm.STL
  • Moule Γ  Motte By Jamita.rar

Learn more about the formats

Publication date 2021-09-29 at 13:33
Design number 531319

3D printer file info

3D model description

Another version of Moule Γ  Motte: https://cults3d.com/en/3d-model/various/moule-a-motte

~ Object description ~

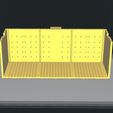
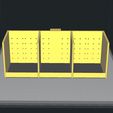
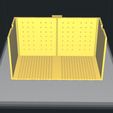
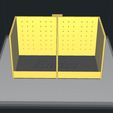
Creation of two clod molds, in 5.5 cm and 7.5 cm, for the realization of seedlings and/or transplanting.

You have :

  • A 3 clod mold in 5.5 x 5.5 x 5.5 cm in 3 parts,

and

  • a mold 2 clods in 7.5 x 7.5 x 7.5 cm in 3 parts.

The grooves on the bottom of the External Moulds are intended for one, for the flow of water, and two, to avoid the "suction cup" effect when removing your clods from the mould.

The holes on the External and Internal Moulds will allow the drainage of excess water.

The withdrawal bars on the Internal Molds will help in the removal of the clods.

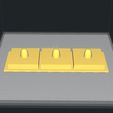
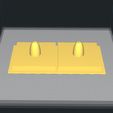
The Mould Covers will pack your divots to give them their proper height and will also punch a hole in the middle of them.

~ Realization of the Mottes ~

To do this you will need:

  • Fine soil, (available in garden centers)

  • Of water, (β‰ˆ1 mustard glass per 5.5 cm clump and β‰ˆ2 glasses per 7.5 cm clump)

  • And from your fingers! (^.^)

1/ Assemble the outer mold and the inner mold, hold them firmly throughout the process!

2/ Fill with potting soil about half way. Potting soil that you

you will have previously well "broken" and stirred to avoid pieces!

3/ Gently pack with 2-3 fingers starting with the corners, then pack following the edges and the middle to finish.

The soil should be packed down enough to be able to unmold afterwards without breaking, but not too much either to allow the roots not to choke!

4/ Repeat step 3 until you reach the height of your mold.

5/ Take your glass and start dripping water very gently along the edges of your lump, and gradually work your way to the center to finish the glass!

Repeat as many times as you have clods...

6/ Always hold your mold firmly, position your lid and apply pressure until it is completely nested, and squeezes out the excess water.

Let your mold drain for 15-20 minutes!

7/ Gently wiggle the lid so that it comes off the top of the clump and remove it.

8/ Separate the outer and inner molds very gently without forcing. If the clods vent on the outer mold, very gently put your fingers on top of them while pulling on the inner mold!

~ For the demolding ~

  • Option #1 (if you have time): It's still best to leave your clumps in the inner part of the mold for 12/24 hours!

This will allow the excess water to drain out and will shrink your clod just enough to safely unmold it, by pushing from underneath!

  • Option #2 (if you are short on time): Tip your inner mold on its side so that the bare face of the clod (indentation bars) is on the ground, and very gently push the clods, one by one, placing your fingers on the corners and your thumb in the center.

Once you've passed the setback bars, you'll be able to separate the inner mold from the clods and tilt the clods back to the right direction!

And here is the work! (^_^)

3D printing settings

~ Printing parameters for PLA ~

  • Layer Height: 0.2 mm

  • Initial Layer Height: 0.24

  • Wall Thickness: 1.2 mm

  • Filling : 99% (If PLA)

  • Printing temperature : 110Β°C

  • Temp. Plateau : 60Β°C

  • Printing speed : 70 mm/s

  • Initial Layer Speed : 20 mm/s

  • Number of slow layers : 1 to 2

  • Shrinkage : Active

  • Supports : Useless

  • Tray adhesion : 4 mm edge

Advertising


Page translated by automatic translation. See the original version.
Issue with this design? Report a problem.

Would you like to support Cults?

You like Cults and you want to help us continue the adventure independently? Please note that we are a small team of 3 people, therefore it is very simple to support us to maintain the activity and create future developments. Here are 4 solutions accessible to all:

  • ADVERTISING: Disable your banner blocker (AdBlock, …) and click on our banner ads.

  • AFFILIATION: Make your purchases online by clicking on our affiliate links here Amazon.

  • DONATE: If you want, you can make a donation via Ko-Fi πŸ’œ.

  • WORD OF MOUTH: Invite your friends to come, discover the platform and the magnificent 3D files shared by the community!


Sharing and downloading on Cults3D guarantees that designs remain in makers community hands! And not in the hands of the 3D printing or software giants who own the competing platforms and exploit the designs for their own commercial interests.

Cults3D is an independent, self-financed site that is not accountable to any investor or brand. Almost all of the site's revenues are paid back to the platform's makers. The content published on the site serves only the interests of its authors and not those of 3D printer brands who also wish to control the 3D modeling market.

100% secure payment by credit card, PayPal, Apple Pay, Google Pay, etc.
View all payment options.