Skip to content

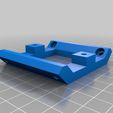
Mendel Mini-Carriage.

Advertising
Advertising
?
Creation quality: 5.0/5 (1 vote)
Evaluation of members on the printability, utility, level of detail, etc.

  • 695 views
  • 11 downloads

License
3D design format
STEP and STL Folder details Close
  • Clamp.step
  • Rail.step
  • carriage.stl
  • carriage2.step
  • carriage3.stl
  • clamp.stl
  • clampRail.step
  • clampRail.stl
  • rail.stl

Learn more about the formats

Publication date 2021-10-09 at 23:11
?
Published to Thingiverse on: 2011-06-12 at 01:04
Design number 539593

3D printer file info

3D model description

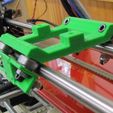
After trying a resistor heated hot-end, I got a little concerned with the tight fit in the standard mendel X axis carriage. I tried Bubak's OpenX Carriage (http://www.thingiverse.com/thing:6278) and I really like having an open center.

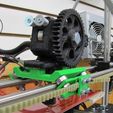
In my config, I've got the dump zone on the far left and the OpenX won't let my extruder reach it. I started playing with this idea for a very lightweight carriage that would only have what I needed. Since I use mechanical endstops, it has no holes for mounting flags and is optimized for a horizontally mounted Wade's extruder.

This design is narrow, light, and uses only 8 bearings. (It might be possible to fully constrain it with just 6 bearings by eliminating one on the bottom of each rail.)

Since this is just an experiment, I'm marking it as a work-in-progress and I welcome comments.

So far, I've only printed a couple small parts with it but it seems very light and tight.

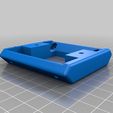
carriage3.stl is a revised version to deal with a couple problems:

The belt is uncomfortably close to the screw heads on the unclamped rail. In my setup, it barely touches, but any rubbing is probably too much. This version recesses 4mm nuts in the carriage and expects a 4mm bolt instead of socket head cap screw. The direction of the bolts is reversed.

The posts for mounting the extruder have been widened and are a little taller to give some additional clearance for the big Wade's gear.

I added a gusseted side on each end to stiffen the carriage.

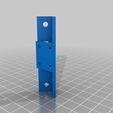
I'm still planning to redesign the clamping rail to add a tensioning screw for the belt.

3D printing settings

Print and assemble using 8 bearings, M4 Screws, nuts, and 16 M4 washers.

pinch the belt between the flat part of the clamp rail and the little clamp plate with 4 M3 screws and nuts.

Advertising


Issue with this design? Report a problem.

Would you like to support Cults?

You like Cults and you want to help us continue the adventure independently? Please note that we are a small team of 3 people, therefore it is very simple to support us to maintain the activity and create future developments. Here are 4 solutions accessible to all:

  • ADVERTISING: Disable your banner blocker (AdBlock, …) and click on our banner ads.

  • AFFILIATION: Make your purchases online by clicking on our affiliate links here Amazon.

  • DONATE: If you want, you can make a donation via Ko-Fi πŸ’œ.

  • WORD OF MOUTH: Invite your friends to come, discover the platform and the magnificent 3D files shared by the community!


Sharing and downloading on Cults3D guarantees that designs remain in makers community hands! And not in the hands of the 3D printing or software giants who own the competing platforms and exploit the designs for their own commercial interests.

Cults3D is an independent, self-financed site that is not accountable to any investor or brand. Almost all of the site's revenues are paid back to the platform's makers. The content published on the site serves only the interests of its authors and not those of 3D printer brands who also wish to control the 3D modeling market.

100% secure payment by credit card, PayPal, Apple Pay, Google Pay, etc.
View all payment options.