NOT INCLUDED, but needed.
Metal pin for neck
Superglue
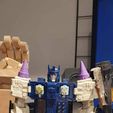
Titans Returns Overlord
Spare TitanMaster, recommend TerriBull or Revolver(Sixshot)
Whilst I absolutely love the Titans Return Overlord, I was a little disappointed, and jealous of some of the big Third party versions. This kit goes some way to bringing the Hasbro toy up to scratch.
The .STLs are separated into print colour and resolution.
HELMET:
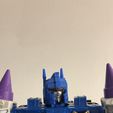
The neck and helmet parts should be joined with a metal pin before attempting to fit the head to the toy. You can either use included face file, which should be printed with as fine a detail as your machine can manage. remove the two screws behind Overlord's shoulders, and prize the body apart just enough to work the original neck out. The new part fits very tightly, and should be carefully worked loose enough to pose, before tightening the screws back up
CANNON:
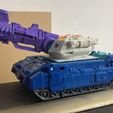
The main thing I wanted to add to the cannon was an ability to elevate. This is managed by gluing the two 'Tank plates' into the gap in the tank, lining them up with the top and back of each side. The two semicircular pegs will grip the vent indents of the cannon, and allow it to swing up and down.
The two halves need to be glued together, with the handle and barrel in place. The square peg will help allow the two halves to align correctly, and the handle's peg is very good at holding it all together whilst the glue dries (just make sure to keep moving the barrel so it doesn't stick in place.)
Slide on the.. um.. slide, with the horn facing forward, and glue the muzzle on (it only fits on one way). again, make sure neither the slide, nor the barrel become seized up in gluing.
POWERMASTERS:
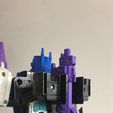
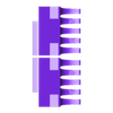
The engine blocks are designed to glue tightly to the back panels, which in turn can be attached to the titan masters. The more square edges face upwards. I suggest not painting the facing sides of the two parts, to allow better adhesion.
This is the design that was originally released in 2017 "OverPower" kit, by NottsBotsCo in the UK, and UToy in China
NEW ADDITION!
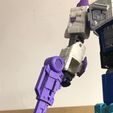
To give Overlord some much needed height, there is a new foot upgrade set. It includes 2 bulldoser blades which need to be glued to the heel spur, aligning using the 2 nubs on the underside of the tank front. This gives the Tank mode a new front blade, suitable for plowing through the enemy, but in robot mode, open the heels to 45 degrees and you'll find they give a lot more stability to Overlord, and allow fo some far more dynamic poses.
There is also a pair of 14mm "sticks"which can be glued into the hinges, meaning the heels will not open passed the 45 degrees. Make sure you are 100% happy with this before you glue them in!
NEW BONUS PARTS!
Anime inspired Power core covers. (animecores.zip)
These two pieces are sized to glue onto the blue backplates, just like the toy inspired ones. If you are printing them in resin, make sure they are fully cured before installing, and put the screws back in VERY slowly and gently.
Im not a great printer or painter, so whilst I design these things to work on the most basic of printers, you may obviously get much better with some dialed in settings.
Be aware that by using these items on a figure, you invalidate any claim that it is child friendly, and neither myself, nor any manufacturer of the base figure will be responsible for injury caused by improper use. Give to children at your own risk.

/https://fbi.cults3d.com/uploaders/14285289/illustration-file/c2838cac-5c6e-4150-91a4-6bf9a4bd578b/HelmetAndMasters.jpeg)
