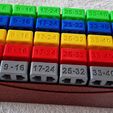
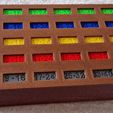
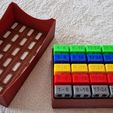
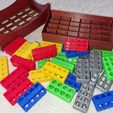
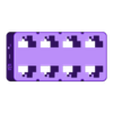
This is my network engineer helper-tool "Patch-Park".
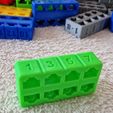
It is used to "park" your "patch" cables in the corresponding socket of each 8-socket block; so you can remove an old switch and install a new one without losing track of the designated port.
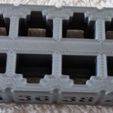
There are six 8-port blocks numbered 1-8, 9-16, 17-24, 25-32, 33-40 and 41-48, with the numbers being arranged Cisco style (top row for odd numbers, bottom row for even numbers).
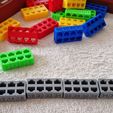
If you use it with modular switches having multiple line cards, you just print a different color for each line card.
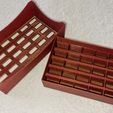
This set includes a box designed to hold 5 full line cards worth of blocks.
As you can read below in "how I got the idea", Patch-Park has been tested in practice and it really saves a lot of time.
In the initial trial run, the time saved by not having to label all cables for later identification and insertion summed up to approximately 2 hours.
Calculating a regular man-hour price in Europe, this translates into a 120€ savings for this one time alone!!!
Since this initial print and use, I have refined the design several times, mainly to adjust the sockets for allowing the plugs some slack, while still keeping them safely in place.
I also went over a few iterations of the box until I felt that it was just right. The Box can now be nested into the lid, which prevents the lid from getting in the way or lost.
Everything prints without support and even without infill; check the recommended print settings.
You can print as many blocks and boxes as you like, as long as it is only for your and/or your immediate colleagues’ usage.
You are not allowed to copy or redistribute the files or sell the prints.
This also applies if you are having a professional 3D print shop do the printing for you.
How I got the idea:
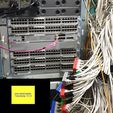
I got the idea for this when my team needed to replace several modular switches with very little downtime available.
In detail, this was about getting old Cisco C4506s replaced with new Cisco C9407-Rs, most with 5 fully loaded line cards (240 patch cables).
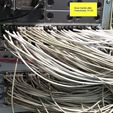
Since this was a "historically grown" environment, there was no cable labeling and the patch list was definitely not accurate anymore.
To make matters worse, we were on a tight schedule, as there was a production environment connected, and each patch cable needed to be in its specific port due to the dedicated config.
On top of that, the 4506 uses slots 2-6 for the "endpoint" line cards, the 9407 uses slots 1-2 and 5-7.
This means that using the typical numbering (e.g. 2/37) might lead to confusion, as on the 4506, this is the top line card but on the 9407, it is the second from the top.
If you carry your config over, this might really mess you up.
So I thought of using colors for the line card slots instead of numbers.
Like this:
yellow = top = 2(4506) = 1(9407)
red = second from top = 3(4506) = 2(9407)
blue... you get the idea
Therefore, I printed some full sets consisting of six 8-port blocks each in yellow, green, red, blue and silver. This was a total of 48 "ports" times 5 line cards.
Then we (2 people) went at it:
1. (start=13:50) unplugged each cable and plugged it into the corresponding number/color of a patch-park block (end=14:13)
2. (start=14:14) shut down the old switch and removed it from the rack (end=14:20)
3. (start=14:21) installed the new switch in the rack and powered it up (end=14:32)
4. (start=14:33) unplugged the cables from the patch-park and plugged it into the corresponding port of the new switch. (end=14:58)
We were done after exactly 1 hour and 8 minutes with the most loaded switch.
Some other switches had only 3 or 4 line cards loaded, obviously they were done even quicker.
The best part of it was that we didn’t mess up a single patch, all endpoints ended up exactly where they needed to be.

/https://fbi.cults3d.com/uploaders/20105802/illustration-file/f74eae72-708a-467d-95df-0972e491bf30/A4_full_Box_nested_in_Top.jpg)
