


This should take overall.

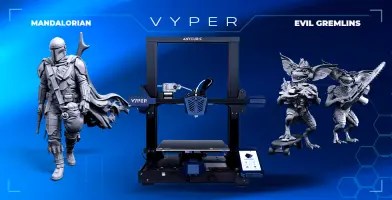
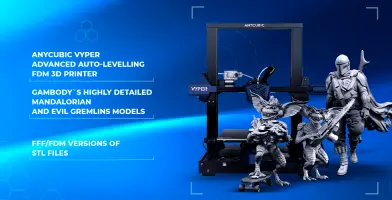
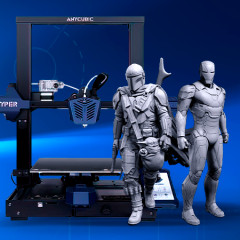
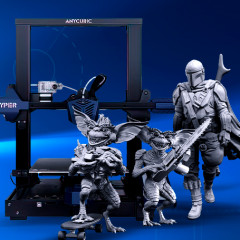
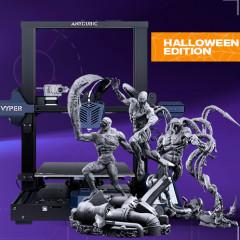
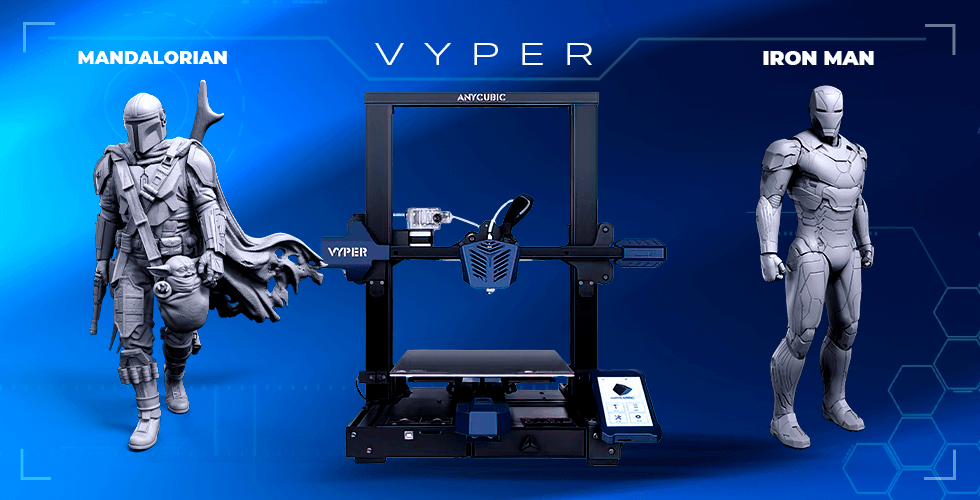
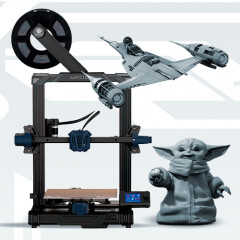
This bundle consists of Anycubic Vyper FDM 3D Printer, Evil Gremlins 3D Printing Figurines, and The Mandalorian 3D Printing Figurine. The 3D printing models comprise the files in StereoLithography (.STL) format that is optimized for FFF/FDM 3D printing.
WHAT WILL YOU GET AFTER PURCHASE?
- New auto-levelling FDM 3D Printer Vyper by Anycubic
- 2 versions of Evil Gremlins STL files for FFF/FDM - Chainsaw and Skateboard scenes:
Files are available for download immediately after purchase
- STL files of The Mandalorian for FFF/FDM printing:
Files are available for download immediately after purchase
- Printing settings that we provide as a recommendation for Anycubic Vyper FDM 3D Printer
- Full technical support from the Gambody Support Team
Detailed information about this bundle is available in the DESCRIPTION section.

|
|||||
|---|---|---|---|---|---|
| File Name | File Size | Time / Filament | Object Size (x/y/z mm) |
||
|
1_head_FDM(repaired).stl |
49.85 MiB | 3 h 7 min 2 m | 30 x 40 x 44 | Download | |
|
1_v2_head_smooth_FDM(repa ired).stl |
49.79 MiB | 3 h 8 min 2 m | 30 x 41 x 44 | Download | |
|
2_body_FDM(repaired).stl |
59.47 MiB | 9 h 44 min 6 m | 59 x 49 x 68 | Download | |
|
2_v2_smooth_body_FDM(repa ired).stl |
59.47 MiB | 9 h 42 min 6 m | 59 x 49 x 68 | Download | |
|
3_legs_FDM(repaired).stl |
55.79 MiB | 10 h 48 min 6 m | 61 x 56 x 92 | Download | |
|
4_arm_R_1_FDM(repaired).s tl |
24.13 MiB | 1 h 14 min 1 m | 38 x 25 x 24 | Download | |
|
5_arm_R_2_FDM(repaired).s tl |
29.78 MiB | 1 h 19 min 1 m | 20 x 20 x 44 | Download | |
|
6_hand_R_FDM(repaired).st l |
32.33 MiB | 1 h 19 min 1 m | 15 x 24 x 66 | Download | |
|
7_arm_L_1_FDM(repaired).s tl |
16.98 MiB | 1 h 13 min 1 m | 38 x 26 x 24 | Download | |
|
8_arm_L_2_FDM(repaired).s tl |
32.44 MiB | 1 h 22 min 1 m | 21 x 35 x 41 | Download | |
|
9_hand_L_FDM(repaired).st l |
30.38 MiB | 40 min <1 m | 17 x 15 x 33 | Download | |
|
10_foot_R_FDM(repaired).s tl |
43.36 MiB | 3 h 42 min 2 m | 27 x 44 x 67 | Download | |
|
11_foot_L_FDM(repaired).s tl |
40.69 MiB | 4 h 26 min 3 m | 27 x 42 x 75 | Download | |
|
12_scapular_R_FDM(repaire d).stl |
24.52 MiB | 57 min 1 m | 29 x 28 x 19 | Download | |
|
12_v2_smooth_scapular_R_F DM(repaired).stl |
26.53 MiB | 56 min <1 m | 29 x 28 x 19 | Download | |
|
13_scapular_L_FDM(repaire d).stl |
18.87 MiB | 57 min 1 m | 27 x 28 x 21 | Download | |
|
13_v2_smooth_scapular_L_F DM(repaired).stl |
25.13 MiB | 54 min 1 m | 27 x 28 x 21 | Download | |
|
14_armor_leg_R_FDM (repai red).stl |
17.97 MiB | 52 min <1 m | 24 x 42 x 9 | Download | |
|
14_v2_armor_leg_R_smooth_ beskar_FDM (repaired).stl |
35.12 MiB | 52 min <1 m | 24 x 42 x 9 | Download | |
|
15_armor_leg_L_FDM (repai red).stl |
14.73 MiB | 45 min <1 m | 22 x 36 x 9 | Download | |
|
15_v2_armor_leg_L_smooth_ beskar_FDM (repaired).stl |
29.85 MiB | 45 min <1 m | 22 x 36 x 9 | Download | |
|
16_pouch_1_FDM(repaired). stl |
10.03 MiB | 10 min <1 m | 13 x 9 x 7 | Download | |
|
17_pouch_2_FDM(repaired). stl |
13.81 MiB | 19 min <1 m | 16 x 13 x 11 | Download | |
|
18_pouch_3_FDM(repaired). stl |
17.56 MiB | 18 min <1 m | 16 x 13 x 11 | Download | |
|
19_belt_charges_FDM(repai red).stl |
14.43 MiB | 40 min <1 m | 16 x 31 x 13 | Download | |
|
20_holster_FDM(repaired). stl |
29.69 MiB | 25 min <1 m | 30 x 15 x 8 | Download | |
|
20_holster_FDM(repaired)( 1).stl |
19.82 MiB | 24 min <1 m | 30 x 15 x 8 | Download | |
|
21_bullets_1_FDM(repaired ).stl |
15.37 MiB | 11 min <1 m | 11 x 9 x 9 | Download | |
|
22_bullets_2_FDM(repaired ).stl |
17.28 MiB | 12 min <1 m | 11 x 10 x 10 | Download | |
|
23_bullets_3_FDM(repaired ).stl |
17.40 MiB | 12 min <1 m | 10 x 11 x 10 | Download | |
|
24_belt_loop_FDM(repaired ).stl |
4.88 MiB | 10 min <1 m | 10 x 7 x 11 | Download | |
|
25_bullet_1_FDM(repaired) .stl |
8.84 MiB | 8 min <1 m | 6 x 11 x 9 | Download | |
|
26_bullet_2_FDM(repaired) .stl |
8.84 MiB | 8 min <1 m | 11 x 6 x 9 | Download | |
|
27_bullet_3_FDM(repaired) .stl |
8.82 MiB | 8 min <1 m | 11 x 6 x 9 | Download | |
|
28_bullet_4_FDM(repaired) .stl |
8.82 MiB | 8 min <1 m | 11 x 6 x 8 | Download | |
|
29_bullet_5_FDM(repaired) .stl |
8.83 MiB | 8 min <1 m | 6 x 11 x 8 | Download | |
|
30_bullet_6_FDM(repaired) .stl |
8.83 MiB | 8 min <1 m | 6 x 11 x 8 | Download | |
|
31_bullet_7_FDM(repaired) .stl |
8.78 MiB | 8 min <1 m | 11 x 6 x 8 | Download | |
|
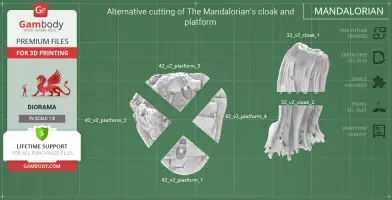
32_cloak_FDM(repaired).st l |
45.24 MiB | 41 h 6 min 30 m | 141 x 140 x 147 | Download | |
|
32_v2_cloak_1_FDM(repaire d).stl |
50.56 MiB | 11 h 46 min 8 m | 99 x 45 x 96 | Download | |
|
32_v2_cloak_2_FDM(repaire d).stl |
48.32 MiB | 16 h 5 min 9 m | 114 x 81 x 104 | Download | |
|
33_cloak_for_jetpack_FDM( repaired).stl |
35.15 MiB | 17 h 35 min 14 m | 85 x 60 x 145 | Download | |
|
34_jetpack_FDM(repaired). stl |
33.37 MiB | 5 h 47 min 3 m | 58 x 29 x 76 | Download | |
|
35_blaster_rifle_1_FDM(re paired).stl |
28.41 MiB | 57 min <1 m | 9 x 24 x 65 | Download | |
|
36_blaster_rifle_2_FDM(re paired).stl |
29.33 MiB | 3 h 3 min 1 m | 16 x 24 x 121 | Download | |
|
37_blaster_rifle_3_FDM(re paired).stl |
23.86 MiB | 36 min <1 m | 17 x 5 x 61 | Download | |
|
38_baby_yoda_FDM(repaired ).stl |
44.01 MiB | 3 h 32 min 2 m | 52 x 27 x 45 | Download | |
|
39_bag_for_baby_yoda_FDM( repaired).stl |
24.31 MiB | 2 h 5 min 1 m | 35 x 34 x 38 | Download | |
|
40_bag_strap_1_FDM(repair ed).stl |
13.56 MiB | 1 h 22 min 1 m | 106 x 20 x 19 | Download | |
|
41_bag_strap_2_FDM(repair ed).stl |
14.94 MiB | 55 min 1 m | 14 x 71 x 15 | Download | |
|
42_platform_FDM(repaired) .stl |
67.73 MiB | 22 h 14 min 11 m | 144 x 150 x 35 | Download | |
|
42_v2_platorm_1_FDM(repai red).stl |
25.79 MiB | 5 h 4 min 3 m | 92 x 75 x 17 | Download | |
|
42_v2_platorm_2_FDM(repai red).stl |
26.36 MiB | 6 h 52 min 4 m | 78 x 104 x 35 | Download | |
|
42_v2_platorm_4_FDM(repai red).stl |
25.81 MiB | 4 h 14 min 2 m | 66 x 104 x 16 | Download | |
|
43_ge_lock_7S(x2)_FDM.stl |
0.02 MiB | 3 min <1 m | 7 x 18 x 2 | Download | |
|
43_v2_platorm_3_FDM(repai red).stl |
23.79 MiB | 7 h 45 min 4 m | 121 x 75 x 25 | Download | |
|
Keychain (repaired).stl |
0.35 MiB | 23 min <1 m | 30 x 30 x 2 | Download | |
|
Tag (repaired).stl |
1.70 MiB | 1 h 18 min 1 m | 150 x 18 x 5 | Download | |
| ... | |||||
This should take overall.
ABOUT THIS BUNDLE
Prepared within Gambody & Anycubic Collaboration, this bundle offer allows you to purchase the new auto-levelling FDM Vyper 3D printer by Anycubic together with a pair of high-quality, highly detailed 3D printing models by Gambody contributing 3D artists. Please, find the details of the collaboration in our official Press Release.
IMPORTANT: On the Checkout page, you will see the ‘Shipping Information’ section where you will need to specify your shipping details. If you happen to have any questions or want to leave any notes, please contact us at support@gambody.com. Your shipping details will be delivered to Anycubic 3D printer manufacturer, who will take care of the Vyper 3D printer’s shipping and provide the tracking number. The delivery of the Vyper 3D printer may be expected approximately within 3 weeks after placing the order.
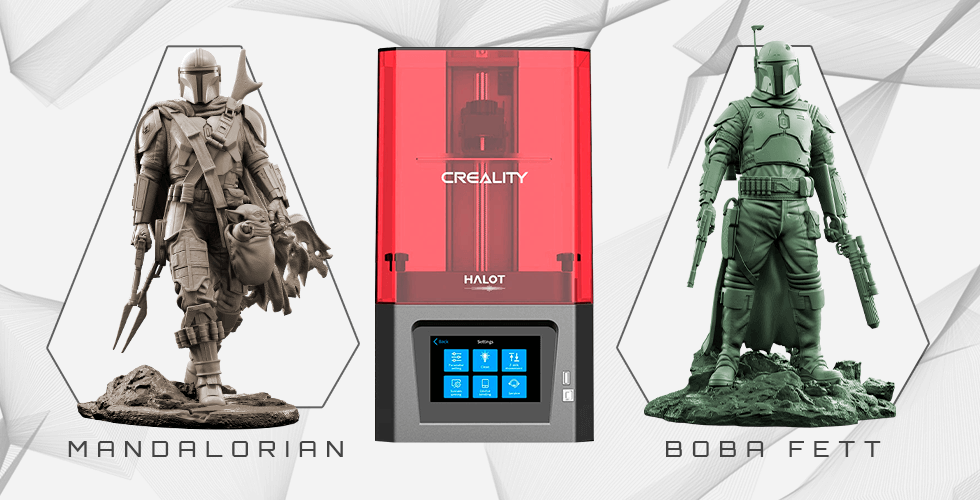
ABOUT THE 3D PRINTER
Vyper is the newest home FDM 3D Printer by Anycubic that features hassle-free automatic bed-levelling and delivers high-quality results! Gambody team thoroughly tested the unit of the Vyper FDM 3D Printer kindly provided by Anycubic and wrote a complete in-depth review that you can already find on our blog.
Anycubic Official Website features detailed overviews of the printer's most prominent technical specifications that you can get acquainted with.
ABOUT 3D PRINTING MODELS
Evil Gremlins and The Mandalorian figurines are highly detailed 3D printing projects that were created by our talented contributing 3D artists and thoroughly moderated and adapted for 3D printing by Gambody team. This bundle comprises the FFF/FDM versions of both items that are specifically adapted to be printed on FDM 3D printers such as Anycubic Vyper. The process of adaptation presupposes that practical aspects of printing the model using the FFF/FDM technology are taken into account, and the model's scale and cutting are chosen to ensure an optimum result of printing.
3D PRINTING MODELS' SPECIFICATIONS
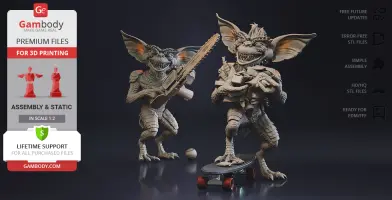
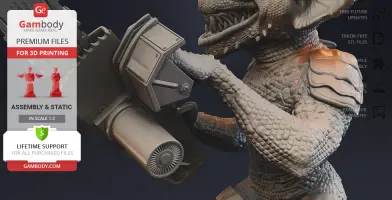
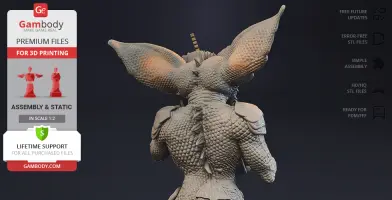
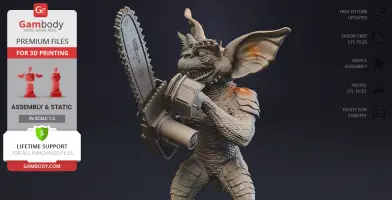
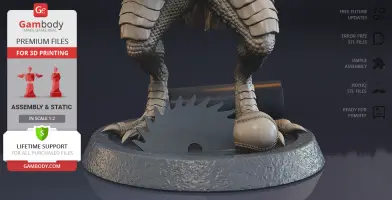
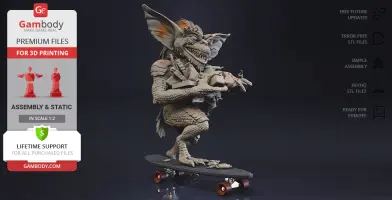
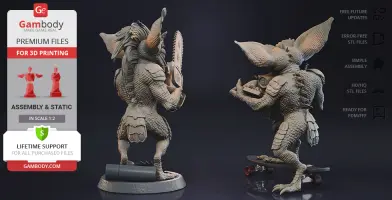
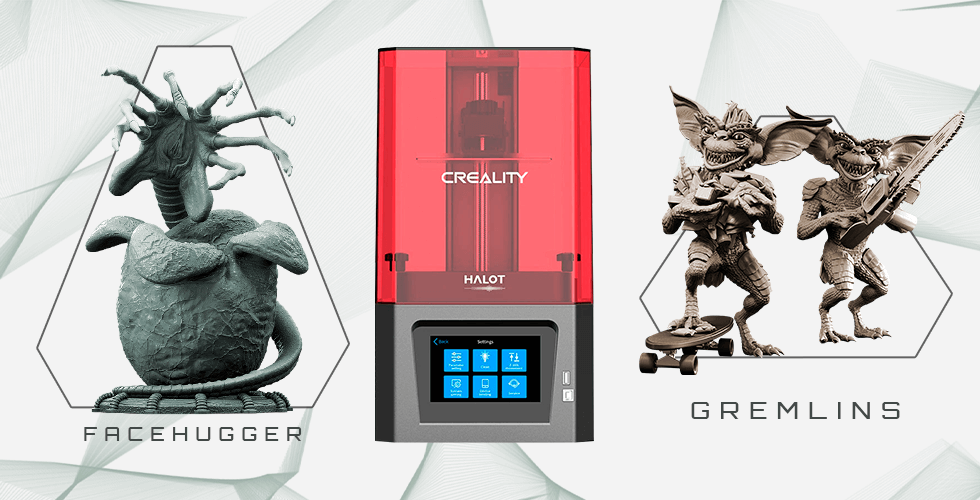
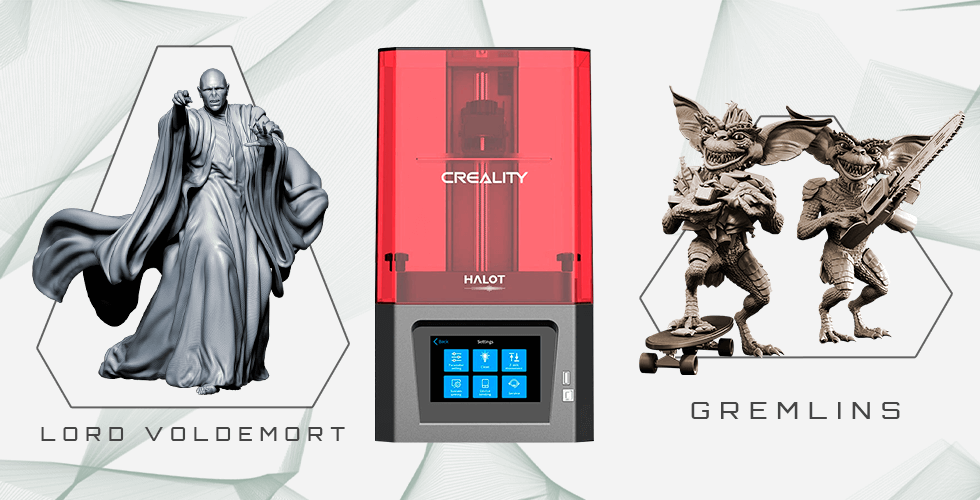
Evil Gremlins 3D Printing Figurines:
FFF/FDM (Skateboard) version:
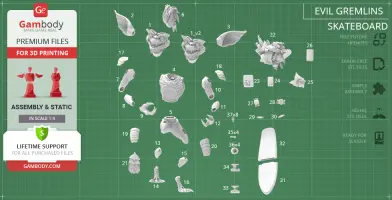
- Contains 37 parts;
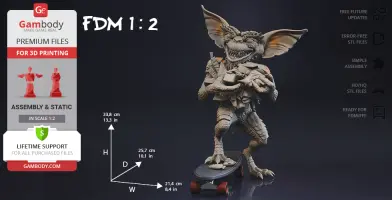
- The model's scale is 1:2;
- A printed model is 338 mm tall, 214 mm wide, 257 mm deep;
- The assembly kit includes a lock to attach the model's parts securely without glue - the lock 37_ge_lock_7S(x8) needs to be printed 8 times;
- Gremlin rides a skateboard with an armful of sweets! Skateboard wheels are articulated;
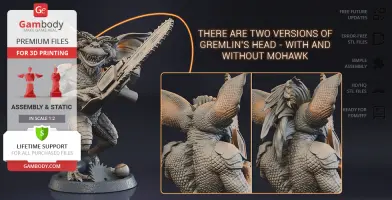
- There are two versions of Gremlin's head - with and without mohawk;
- All parts are divided in such a way that you will print them with the smallest number of support structures.
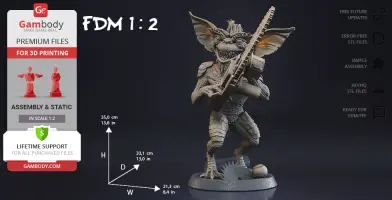
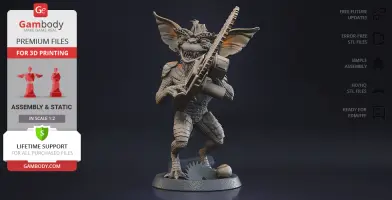
FFF/FDM (Chainsaw) version:
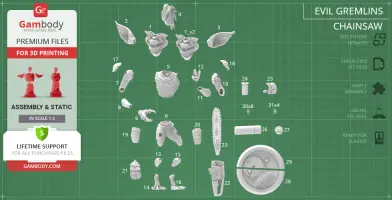
- Contains 31 parts;
- The model's scale is 1:2;
- A printed model is 350 mm tall, 213 mm wide, 331 mm deep;
- The assembly kit includes locks to attach the model's parts securely without glue. The lock 30_ge_lock_7S(x8) needs to be printed 8 times; lock 31_ge_lock_10H(x4) needs to be printed 4 times;
- There are two versions of Gremlin's head - with and without mohawk;
- All parts are divided in such a way that you will print them with the smallest number of support structures.
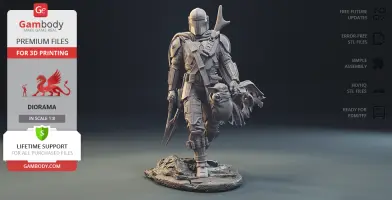
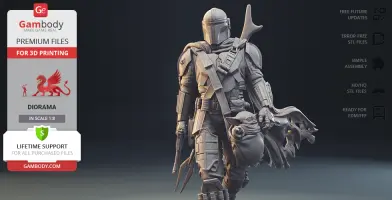
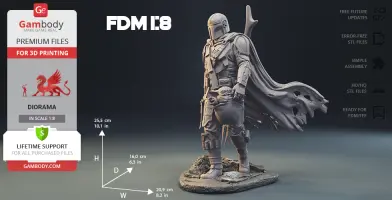
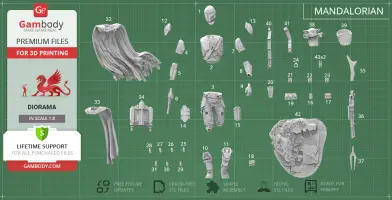
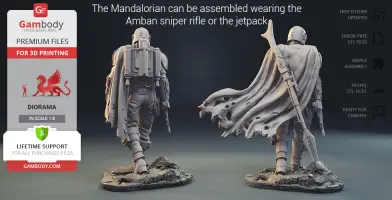
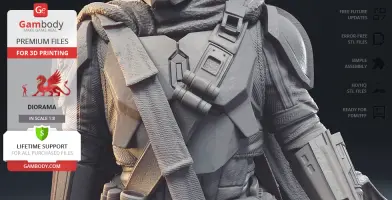
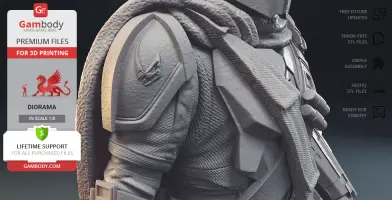
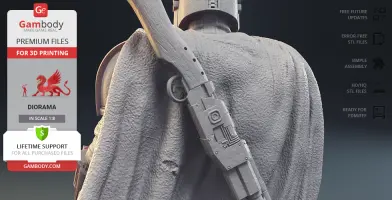
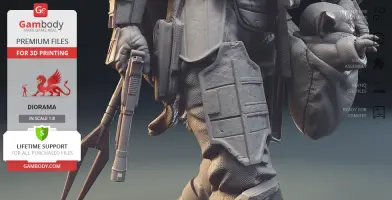
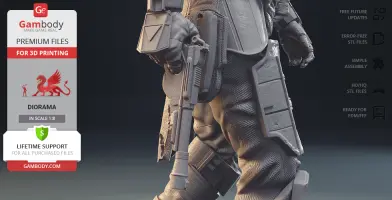
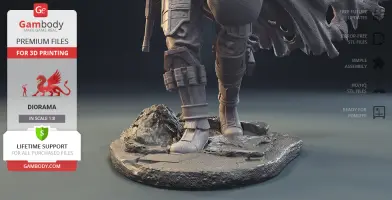
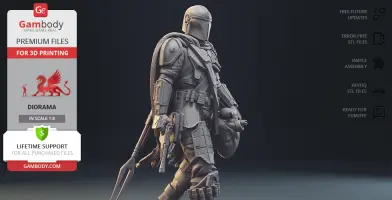
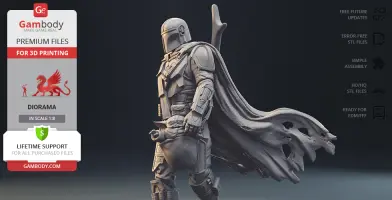
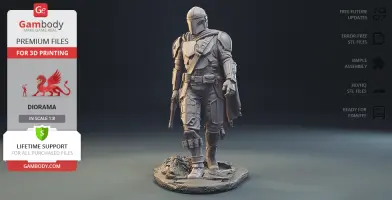
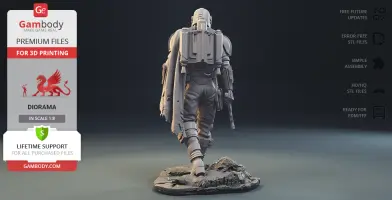
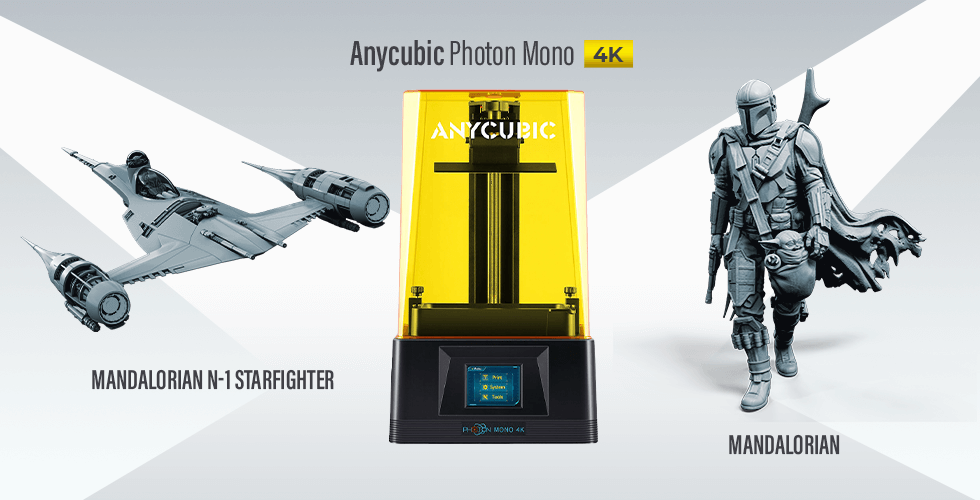
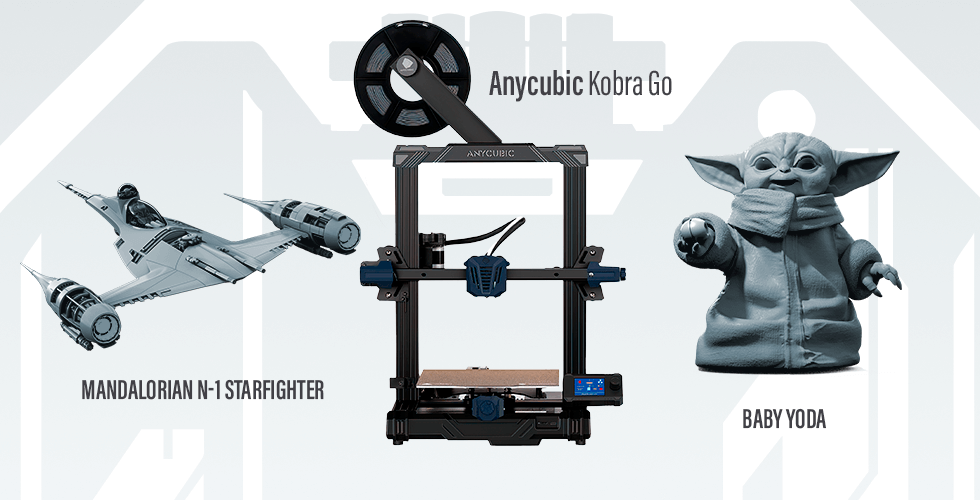
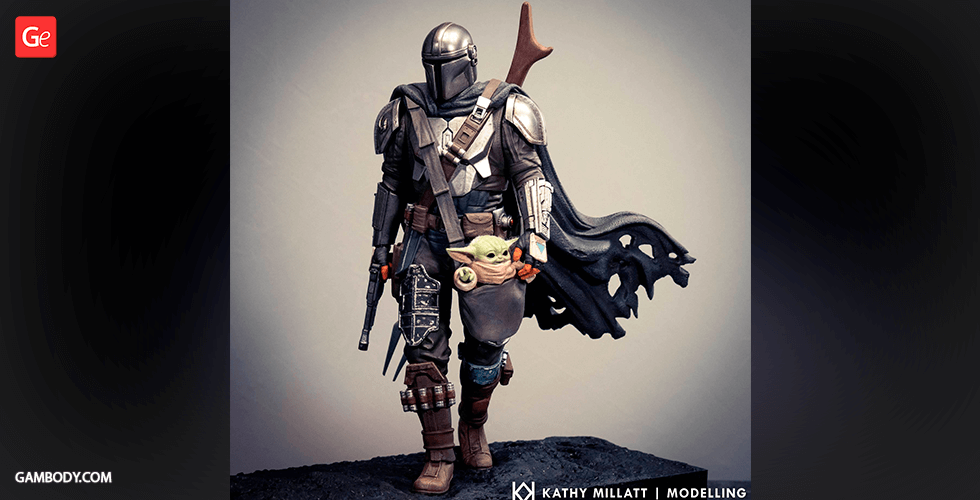
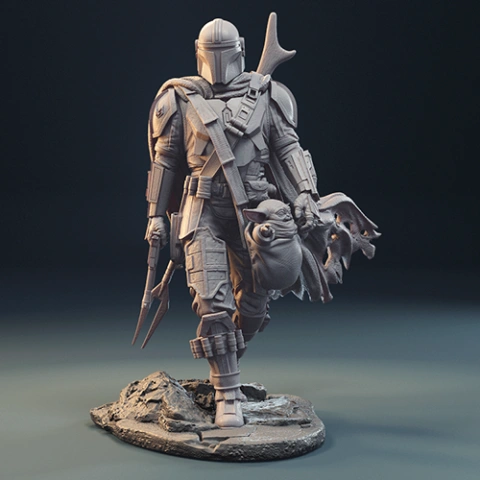
The Mandalorian 3D Printing Figurine:
FFF/FDM version:
- Contains 43 parts;
- The model's scale is 1:8;
- A printed model is 255 mm tall, 209 mm wide, 160 mm deep;
- Assembly kit includes a lock 43_ge_lock_7S(x10) to attach the model's parts securely without glue that needs to be printed 10 times;
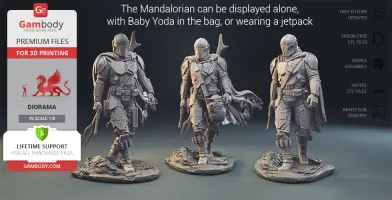
- The Mandalorian can be assembled into a diorama with the Speeder Bike;
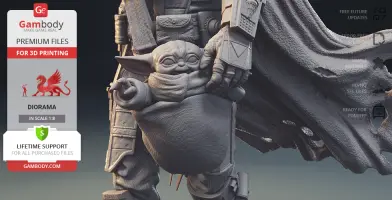
- Din Djarin can be displayed alone, with Baby Yoda in the bag, or wearing a jetpack;
- All parts are divided in such a way that you will print them with the smallest number of support structures.
To purchase the bundle comprising Anycubic Vyper FDM 3D Printer, Evil Gremlins 3D Printing Figurine and The Mandalorian 3D Printing Figurine click the green Buy button in the top-right corner of the model’s page.
Go to the page of Evil Gremlins 3D Printing Figurines and The Mandalorian 3D Printing Figurine to find more details and additional illustrative material!
These are basic settings that were tested in Cura 4.8.0 slicer. Test models were printed on Anycubic Vyper FDM 3D printer with Anycubic PLA filaments.
star-wars, sw, mandalorian, baby-yoda, anycubic, anycubic-gambody-bundles, gambody-anycubic-collaboration, the-mandalorian, mando, christmas, grogu, the-child, anycubic-fdm-3d-printer, din-djarin, folklore, gremlin, evil-gremlins, stripe, anycubic-vyper, vyper, vyper-fdm-3d-printer, gremlin-stripe, beskar, gremlin-skateboard, gremlin-chainsaw, 3d-printer
You are about to report Anycubic Vyper 3D Printer + The Mandalorian + Evil Gremlins for violating our Terms and Conditions. Please take a few moments to fill in the following information.


Comments
comments powered by Disqus