Skip to content

Lack Enclosure for 3D Printer

Advertising
?
Creation quality: 5.0/5 (1 vote)
Evaluation of members on the printability, utility, level of detail, etc.

  • 6.8k views
  • 10 likes
  • 74 downloads

License
3D design format
STL Folder details Close
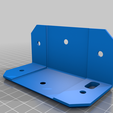
  • BaseLeg_Power_x1.STL
  • BaseLeg_x3.STL
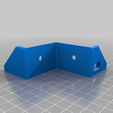
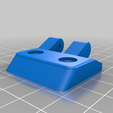
  • BottomLegClamp_x4.stl
  • BottomLegToBase_Power_x1.stl
  • BottomLegToBase_x3.stl
  • DoorHingeClamp_x4.stl
  • HandleBack_x2.stl
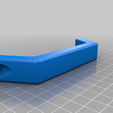
  • Handle_x2.STL
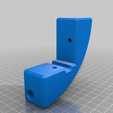
  • HingeClampL_x2.stl
  • HingeClampR_x2.stl
  • HingeL_x2.stl
  • HingeR_x2.stl
  • Latch_Door_L_x2.stl
  • Latch_Door_R_x2.STL
  • Latch_x2.STL
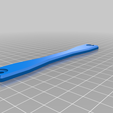
  • MidBraces_x12.STL
  • OuterPanelMagnet_x12.stl
  • RearFilamentGuide_LEDStrip_Cutaway.STL
  • SideClamp_Power_x1.stl
  • SideClamp_x3.stl
  • TopClamp_x4.stl
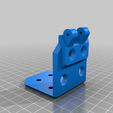
  • TopLeg_x4.STL
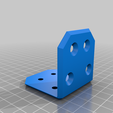
  • TopPlate_x4.STL

Learn more about the formats

Publication date 2021-12-02 at 00:02
?
Published to Thingiverse on: 2021-02-01 at 11:51
Design number 575377

3D printer file info

3D model description

UPDATE: 2021-11-17 - External link to acrylic panel dimensions: https://drive.google.com/drive/folders/1-DQ4vnDarU_2ahzLtE5PGvU7BmXczHMu?usp=sharing

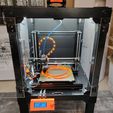
This is my take on a Lack Enclosure. I appreciate that there are literally hundreds of other designs out there, but I figured it was a learning experience to design my own. That also gave me the chance to add a few features that I wanted that I didn't see elsewhere.

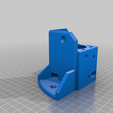
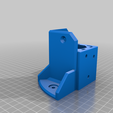
The Ikea Lack table is not the most stable of furniture. So, I wanted more stability without having to rely on threaded screws in very thin material. To this end, I wanted to fix the legs to the table in a reliable way by using nuts & bolts that go all the way through the table and clamp the printed parts to the table. This does mean you will have to drill holes all the way through the table top - you WILL need a decent drill stand for this - don't try it free hand, you'll never get the holes to align properly.

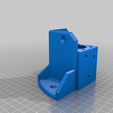
I also wanted to increase the available internal height, so the BaseLeg_x3.stl and TopLeg_x4.stl add an extra 5.5cm each - so there is 11cm total extra internal height on top of the table legs.

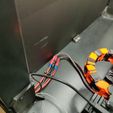
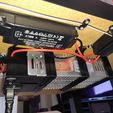
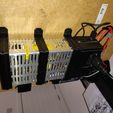
I wanted to mount the PSU on the underside of the table - this is entirely optional. I created a slot in the BaseLeg_Power_x1.stl and BottomLegToBase_Power_x1.stl to be able to feed the power cables through to the inside of the enclosure. If you want the PSU mounted internally, you could still use the slot to route the mains power cable through. Obviously you wouldn't then need to print either of the PSU_Bracket.stl files. Note that the oval hole in the BottomLegToBase_Power.stl is sufficiently sized to pass all the PSU power cables including a USB cable (for raspberry Pi power) and twin-core LED cable - it's a tight squeeze but it will fit. I added some inline sockets to the power cables so I can detach the cables and remove the printer from the enclosure without having to unplug the molex connectors inside the Rambo board. Again, this is optional. IMPORTANT: do NOT use cheap connectors as they will melt (as I found out). I used mains connectors like these: https://www.amazon.co.uk/Connectors-Preciva-Assortment-Conductor-Electrical/dp/B088BQM4VM

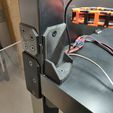
I provided a round cable pathway through the TopLeg_x4.stl models to allow power leads for LED strip lighting to be routed through it. Note that in my photos, I completely forgot to use them and am too lazy to reroute the cables.

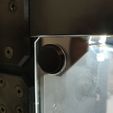
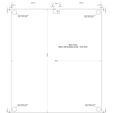
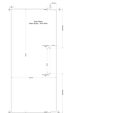
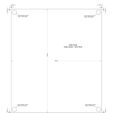
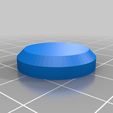
The panels are 3mm thick acrylic with dimensions shown in the layouts. They are designed to be held in place by 12mm diameter 3mm thick round magnets. Note that the circular rebates in the side and rear panels for the magnet holders are optional, but it helps to seat the holders and gets the magnets closer to the matching ones inside the enclosure. I glued the magnets and holders in place with superglue. If you get your panels professionally cut, each cut will cost you, so you can choose to leave out the corner chamfers if you want.

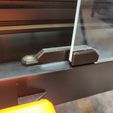
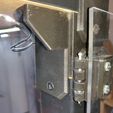
The bar magnets for the door latches are 20 x 10 x 2mm. I just superglued these inside the rebates in the corresponding Latch.stl printed parts. Just make sure the magnets are correctly aligned so they attract one another. The latches for the door are friction fit for 3mm thick acrylic. Just force them onto the door corners into the small cutaways provided.

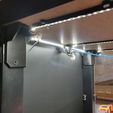
Note that the LED lighting supports (I used https://www.thingiverse.com/thing:2387112 (https://www.thingiverse.com/thing:2387112)), LCD supports (I used https://www.thingiverse.com/thing:2953070 (https://www.thingiverse.com/thing:2953070)) and Raspberry pi articulating camera arms (https://www.thingiverse.com/thing:3114849 (https://www.thingiverse.com/thing:3114849)) you see in the photos are entirely optional and taken straight off other excellent designs on Thingiverse.

I have included an optional filament guide that can be mounted at the back of the top table in the middle. It has threads for PC4-M6 fittings https://www.amazon.co.uk/gp/product/B07HSL6296 to feed 4mm teflon tubing through for a reverse bowden setup. There is a matching cutaway in the back panel acrylic diagram. If you want to use an alternative filament guide, ensure you don't cut the notch out of the top of the rear acrylic panel.

Credits:
The hinges were taken from: https://www.thingiverse.com/thing:1933479 (https://www.thingiverse.com/thing:1933479)
The door handles were modified from: https://www.thingiverse.com/thing:1228617 (https://www.thingiverse.com/thing:1228617)
The door latches were inspired by from: https://www.thingiverse.com/thing:2923031 (https://www.thingiverse.com/thing:2923031)
The PSU holder is modified from: https://www.thingiverse.com/thing:3349588 (https://www.thingiverse.com/thing:3349588)
The filament guide is modified from: https://www.thingiverse.com/thing:3491533 (https://www.thingiverse.com/thing:3491533)

BOM:
1) 24 of 8mm diameter, 3mm thick round neodymium magnets - https://www.amazon.co.uk/Magnet-Expert%C2%AE-12mm-thick-Neodymium/dp/B00TACGDUA
2) 8 of 20 x 10 x 2 mm rectangular bar magnets https://www.amazon.co.uk/gp/product/B076CMJLGR
3) 44 of M5 12mm countersunk hex socket bolts
4) 4 of M5 16mm countersunk hex socket bolts
5) 20 of M5 60mm countersunk hex socket bolts
6) 48 of M5 square nuts (thin type DIN562)
7) 20 of M5 washers (flat form C type)
8) 20 of M5 hex nuts
9) 12 of M4 16mm countersunk hex socket bolts
10) 12 of M4 hex nuts
11) 28 of No.10 1" Countersunk pozi self-tapping screws
12) 44 of No.10 3/4" Countersunk pozi self-tapping screws
13) 4 of Rubber feet (40mm diameter)

You can always use standard pozi/philips head bolts in place of the hex socket bolts.

3D printing settings

Construction

Ensure your lack table is disassembled, and remove the big double headed screw from the leg tops.

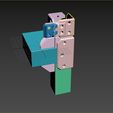
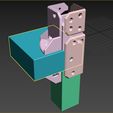
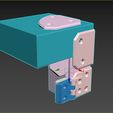
Please use the 3D views as a guide to how the finished product should look.

1) Base table preparation
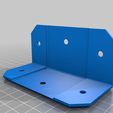
1a - For each BaseLeg_x3.stl piece, turn it upside down and insert one M5 square nut into each of the two holes there. Take one of the SideClamp_x3.stl/SideClamp_Power_x1.stl pieces, align the holes, and screw in M5 12mm bolts to clamp the pieces together. You can then use the constructed pieces and place them on the corners of the Lack table top to mark out the 3 holes you will need to drill vertically through the table. Also, mark out the middle holes on SideClamp_x3.stl in the side of the table.

1b - Using a drill stand, drill a 3mm pilot hole all the way through the table top on each of corner-most marks you made in step 1a - this is for the 80mm screws that will screw into the octagon-shaped opening on each BaseLeg_x3.stl piece, all the way through the cork and into the top of the Lack table leg.

1c - Drill 5mm holes vertically all the way through the Lack table top for each of the 8 remaining marks you made in step 1a. Be careful, you're drilling through very thin surfaces, so don't push too hard as you'll splinter the table top.

1d - Drill 2mm pilot holes into the side of the corners of the table top on the marks you made in step 1a. Note that these pilot holes will be drilled into the cork that is inside the Lack table top corners.

2) Base table construction
2a - For each corner of the table, take a BottomLegToBase_x3.stl and a BaseLeg_x3.stl/SideClamp_x3.stl constructed piece, align the holes top/bottom. For the two holes on the semi-circular baseplates of BaseLeg_x3.stl, insert an M5 60mm bolt all the way through, and use an M5 washer and hex nut to clamp BottomLegToBase_x3.stl to the table top.

Pay attention to where you want the BottomLeg_Power_x1.stl and BaseLeg_Power_x1.stl/SideClamp_Power_x1.stl position.

2b - Using No.10 1" countersunk screws, screw the SideClamp_x3.stl onto the side of the table top. These screws should go into the pilot holes you made in step 1d.

2c - In the octagon-shaped opening, screw an 80mm countersunk screw all the way through the top of the table and into the top of the Lack table leg.

2d - For each BaseLeg_x3.stl/SideClamp_x3.stl constructed piece, insert M5 square nuts into each of the 4 holes.

2e - Take two BottomLegClamp_x4.stl pieces, and loosely attach it to the BaseLeg_x3.stl pieces at the back of the table with M5 12mm bolts.

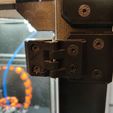
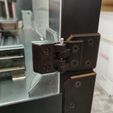
2f - Take one each of HingeClampL_x2stl and HingeClampR_x2.stl, and loosely attach them to the BaseLeg_x3.stl pieces at the front of the table, using M5 12mm bolts. Pay attention to the orientation of the hinges.

At the end of this step, you should have the bottom Lack table with the legs firmly attached. You can screw the rubber feet on at this point if you want.

3) Top table preparation
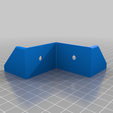
3a - For each TopLeg_x4.stl piece, turn it upside down and insert one M5 square nut into each of the two holes there. Take one of the TopClamp_x4.stl pieces, align the holes and screw in M5 12mm bolts to clamp the pieces together. You can then use the constructed pieces and place them on the corners of the second Lack table top to mark out the 3 holes you will need to drill vertically through table. Also, mark out the holes on TopClamp_x4.stl in the side of the table.

3b - Using a drill stand, drill 5mm holes through each of the marks you made in step 3a. Be careful, you're drilling through very thin surfaces, so don't push too hard as you'll splinter the table top.

3c - Drill 2mm pilot holes into the side of the corners of the table top on the marks you made in step 3a. Note that these pilot holes will be drilled into the cork that is inside the Lack table top corners.

4) Top table construction
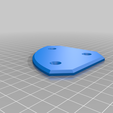
4a - For each corner of the top table, take a TopPlate_x4.stl and a TopLeg_x4.stl constructed piece, align the holes top/bottom. Insert an M5 60mm bolt through each hole in TopPlate_x4.stl, and use an M5 washer and hex nut to clamp TopLeg_x4.stl to the table top.

4b - Using No.10 1" countersunk screws, screw the TopClamp_x4.stl onto the side of the table top. These screws should go into the pilot holes you made in step 3c.

4c - Turn the Top table construction upside down. For each TopLeg_x4.stl, insert M5 square nuts into the 4 slots.

4d - Take two BottomLegClamp_x4.stl pieces, and loosely attach them to the TopLeg_x4.stl pieces at the back of the table with M5 12mm bolts.

4e - Take one each of HingeClampL_x2stl and HingeClampR_x2.stl, and loosely attach them to the TopLeg_x4.stl pieces at the front of the table, using M5 12mm bolts. Pay attention to the orientation of the hinges.

At the end of this step, you should have the top Lack table with the TopPlates firmly attached.

5) Attach the legs to the table constructions
5a - Take the base Lack table. Insert the Lack table legs into the BaseLeg_x3.stl pieces.

5b - Place the top Lack table on top, and insert the tops of the Lack table legs into the TopLeg_x4.stl pieces.

5c - Make sure everything is aligned and level, then tighten the M5 bolts on the BottomLegClamp_x4.stl and HingeClampL/R_x2.stl pieces to hold the legs in place.

5d - Mark the holes on the sides of the legs on the clamp pieces, and drill 2mm pilot holes into the sides of the legs. Note each leg will need 4 pilot holes drilled into the bottom and top.

5e - Use the No.10 3/4" countersunk screws to attach the leg clamps to the legs.

At the end of this step, you should have two Lack tables firmly attached to one another.

6) Attach the hinges to the door panels
6a - Take the HingeL_x2.stl pieces, the left acrylic door panel, and two of the DoorHingeClamp_x4.stl pieces. Using the M4 16mm bolts, attach the hinges to the door panel.

Pay attention to the orientation of the hinges.

6b - Do the same for the HingeR_x2.stl pieces on the right acrylic door panel.

6c - Glue the round magnets into the OuterPanelMagnet_x12.stl pieces, and glue those into the rebates on the acrylic side/back panels. Ensure you have all the magnets aligned the same way.

6d - Attach the Handle_x2.stl and HandleBack_x2.stl to the acrylic doors with

6e - Glue round magnets into rebates in the BaseLeg_x3.stl and TopLeg_x4.stl holes. Ensure you have the magnets aligned correctly - they should attract the magnets you glued into the acrylic panels.

6f - Once dry, you can fit the acrylic panels, and screw the MidBraces_x12.stl in place to stop the panel's bowing.

6f - Glue the rectangular magnets into the Latch_Door_x2.stl. Glue rectangular magnets into the Latch_Door_L_x2.stl and Latch_Door_R_x2.stl pieces. Ensure you have the magnets aligned correctly - they should attract the magnets you glued into the Latch_Door_x2.stl pieces.

6g - Fit the Latch_Door_L_x2.stl and Latch_Door_R_x2 pieces onto the acrylic door pieces.

6h - With the doors closed, mark where the Latch_Door_x2 pieces should go, and screw them to the table surfaces.

Advertising


Issue with this design? Report a problem.

Would you like to support Cults?

You like Cults and you want to help us continue the adventure independently? Please note that we are a small team of 3 people, therefore it is very simple to support us to maintain the activity and create future developments. Here are 4 solutions accessible to all:

  • ADVERTISING: Disable your banner blocker (AdBlock, …) and click on our banner ads.

  • AFFILIATION: Make your purchases online by clicking on our affiliate links here Amazon.

  • DONATE: If you want, you can make a donation via Ko-Fi πŸ’œ.

  • WORD OF MOUTH: Invite your friends to come, discover the platform and the magnificent 3D files shared by the community!


Sharing and downloading on Cults3D guarantees that designs remain in makers community hands! And not in the hands of the 3D printing or software giants who own the competing platforms and exploit the designs for their own commercial interests.

Cults3D is an independent, self-financed site that is not accountable to any investor or brand. Almost all of the site's revenues are paid back to the platform's makers. The content published on the site serves only the interests of its authors and not those of 3D printer brands who also wish to control the 3D modeling market.

100% secure payment by credit card, PayPal, Apple Pay, Google Pay, etc.
View all payment options.