Skip to content

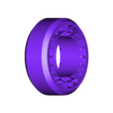
1.9" ZigZag Foam for RC Scale Crawler

Advertising
Advertising
?
Creation quality: 4.9/5 (7 votes)
Evaluation of members on the printability, utility, level of detail, etc.

  • 31.7k views
  • 68 likes
  • 362 downloads
  • 1 collection

License
3D design format
3MF and STL Folder details Close
  • 1.9 insert zigzag Infill.stl
  • 1.9 x 4.75 16-zigzag.stl
  • 1.9 x 4.75 PL.stl
  • 1.9 x 4.75 XL insert zigzag Infill.stl
  • 1.9 x 4.75 ZigZag V3 (103mm Small).stl
  • 1.9 x 4.75 ZigZag V3 (106mm Standard).stl
  • 1.9 x 4.75 ZigZag V3 (110mm Proline).stl
  • 1.9 x 4.75 ZigZag V3 (112mm).stl
  • 1.9 x 4.75 ZigZag V3 (114mm Ruptures).stl
  • 2.2 x 4.75 insert zigzag Infill.stl
  • Project 1.9 x 4.75 16ZigZag - E3DD - 0.3nozzle.3mf
  • Project 1.9 x 4.75 PL - 0.3mm nozzle.3mf
  • Project 1.9 x 4.75 PL Hyrax - 0.3mm nozzle.3mf
  • Project 1.9 x 4.75 XL zigzag - E3DD - 0.3nozzle.3mf
  • Project 1.9 x 4.75 ZigZag V3 (103mm Small).3mf
  • Project 1.9 x 4.75 ZigZag V3 (106mm Standard).3mf
  • Project 1.9 x 4.75 ZigZag V3 (110mm Proline).3mf
  • Project 1.9 x 4.75 ZigZag V3 (112mm).3mf
  • Project 1.9 x 4.75 ZigZag V3 (114mm Ruptures).3mf
  • Project 1.9 x 4.75 zigzag - E3DD - 0.3nozzle.3mf
  • Project 2.2 x 4.75 zigzag - E3DD - 0.3nozzle.3mf

Learn more about the formats

Last update 2023-10-02 at 05:56
Publication date 2021-12-05 at 07:13
Design number 577596

3D printer file info

3D model description

Just to make things clear, my designs are protected by copyright laws. It is not authorized to distribute or sell any of my designs without prior written authorization from myself. Even if you modified my original design. Thank you.


UPDATE 10/27/2022 I have added V3 version of ZigZag. These models are more accurate than the previous version and have build-in support for the inner ring (no need for support when slicing). It also add a "Small" version to cover more options.


UPDATE 7/22/2022 I have added a new version of the popular 1.9 x 4.75" which sits between the standard sized 4.75 and the XL to perfectly fit common tires from PL and JC. Printed best with 0.3mm nozzle but also possible with 0.4mm nozzle. Also included a project file specifically for Hyrax tires.


UPDATE 1/7/2022 More testing with infill values surfaced that 3.5% to 6% infill is ideal. For pure crawling, 3.5% is best, giving a super soft outer. Also found out you could reduce Flow to let's say 80% or use a smaller nozzle (e.g. 0.3mm), resulting in thinner lines and an even softer overall insert, but need to keep an eye on layer bonding. Again, this is all with TPU 95A from Overture. You could end with similar softness without changing infill but using other softer filaments, like 85A (NinjaFlex) or 60A (CoexFlex), but they get more expensive. This will help get the exact outcome you are looking for.


UPDATE 1/1/22 I added a new 1.9 x 4.75" insert that has 16 zigzag patterns (instead of 20). This is an option to make the overall foam slightly softer for lighter-weight rigs.


UPDATE 12/12/21 Added a new version "1.9 x 4.75 XL insert zigzag Infill". This version is even taller and will fit tight with big 1.9" tires like Hyrax and TSL XL. The previous versions leave a gap between the insert and the tire which is intended to increase grip (more tire squish). By using this version, you will get a more stretched tire with little to no gap between the insert and the tire.
Note: These models cannot be stretched on the X/Y axis (insert diameter) since it will impact the design, but you can stretch them as you want on the Z axis (insert width) if you want to fit them in a wider tire or wheel.


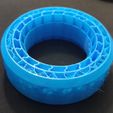
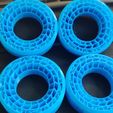
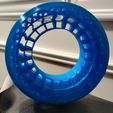
This is a tire insert model to print in TPU for 1.9" wheel diameter tires for RC Crawlers/U4RC/Scale rigs. There are two models included, one for 1.9" wheels and a second for 2.2" wheels, both for 4.75" tires (usually called 1.9" XL or tall tires).

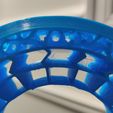
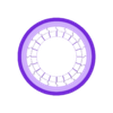
The model has 3 layers that provide progressive resistance to the tire surface, from very soft to stiff in the center. This allows RC cars to have great traction while keeping the tire shape, adding grip and making the car predictable during crawling, trailing, or racing.

Check video explanation with assembly here: https://youtu.be/grk4mYsLeGY

Read 3D printing settings carefully, as is critical to get the right outcome. Each print will take 5~6hrs if setup correctly. If you need help, please reach out on my Facebook page: https://www.facebook.com/groups/d440rc


You can sell 3D printed parts designed by D440RC, but need to comply with four simple rules: 1) Respect the brand, make it clear this is D440RC design, and don’t change the original name/brand helping advertise model purchase in Cults, 2) you need to buy/download the models you want to sell, 3) prints must be in good quality, 4) you can only sell 3d printed parts, you CAN NOT sell/give away the models/files, those are only for you to keep.

3D printing settings

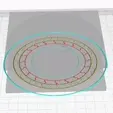
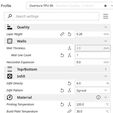
The model uses Ultimaker Cura slicer infill patterns to model the soft layers, providing full flexibility to the user to configure the tire insert as they like. The model will include 3mf file to open as "project" in Cura, which includes the print settings.

After several testing, the best infill in my experience for RC Crawling/Trailing use cases is Gyroid with 6% Infill. Infill UP or DOWN if you want softer or stiffer insert. Between 5 and 10% I found to be good, but 6% was the magic number for me but depends a lot on the filament you are using.

This must be printed in TPU (tested with Overture TPU 95A), 0.4 or 0.3mm nozzle, wall line count 1, and 0.2~0.28 layer height. Make sure your TPU settings are performing well. Printing Gyroid usually needs good cooling and slow speed (I do 20mm/s for infill and 100% cooling fan - but this will depend on your printer capabilities).

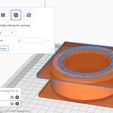
I also added two "Setting Overlaps" in Cura, one at the bottom of the model and one at the top. This allows adding "Wall Line Count 2" to get a stronger wall on the curved corner of the outer layer of the model. This is also part of the 3mf project file. The purpose of the setting is to make the tire insert to support better the RC car on side crawling.

Here's a video with some tips to get the desired outcome: https://www.youtube.com/watch?v=7GkwF7k0koY

Advertising


Issue with this design? Report a problem.

Would you like to support Cults?

You like Cults and you want to help us continue the adventure independently? Please note that we are a small team of 3 people, therefore it is very simple to support us to maintain the activity and create future developments. Here are 4 solutions accessible to all:

  • ADVERTISING: Disable your banner blocker (AdBlock, …) and click on our banner ads.

  • AFFILIATION: Make your purchases online by clicking on our affiliate links here Amazon.

  • DONATE: If you want, you can make a donation via Ko-Fi πŸ’œ.

  • WORD OF MOUTH: Invite your friends to come, discover the platform and the magnificent 3D files shared by the community!


Sharing and downloading on Cults3D guarantees that designs remain in makers community hands! And not in the hands of the 3D printing or software giants who own the competing platforms and exploit the designs for their own commercial interests.

Cults3D is an independent, self-financed site that is not accountable to any investor or brand. Almost all of the site's revenues are paid back to the platform's makers. The content published on the site serves only the interests of its authors and not those of 3D printer brands who also wish to control the 3D modeling market.

100% secure payment by credit card, PayPal, Apple Pay, Google Pay, etc.
View all payment options.