Skip to content

Motor Boat RC small (experimental)

Advertising
Advertising
?
Creation quality: 5.0/5 (3 votes)
Evaluation of members on the printability, utility, level of detail, etc.

  • 26.1k views
  • 42 likes
  • 1.1k downloads
  • 2 collections

License
3D design format
STL Folder details Close
  • motor_boat_small.stl
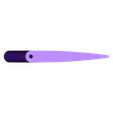
  • propeller_small.stl
  • rudder_horn_small.stl
  • rudder_mount_small.stl
  • rudder_small.stl
  • rudder_with_shaft_small.stl

Learn more about the formats

Last update 2018-06-27 at 10:59
Publication date 2015-08-18 at 12:09
Design number 3051

3D printer file info

3D model description

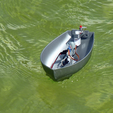
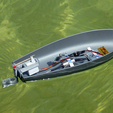
Even small boats can be seaworthy ;-) http://youtu.be/zP-G-ovutto
Actually, this is my first motor boat, but I had as yet not such a small receiver. That's why it comes at last.

Additionally now with a keel a stern tube a motor mount and a rudder unit to make it ready for RC and of course a propeller.
The boat which is shown on the video has no additional stern tube. The shaft runs directly in the plastic.
It must be well greased and you have to look out not to overheat it. Otherwise you will get holes very soon.
The second version (motor_boat_stern_tube_small) has a bigger stern tube outside contour. This is destined to insert a brass stern tube (inside diameter 1 mm, outside 1.5 mm), like my bigger boats have. It should fit, but I haven't tested it.
The coupling simply consists of a heat shrink tube

3D printing settings

The best is, if you print the hull with spiral vase methode. Then you will get a neat surface without any noses from layer change.
The hull is 1.5 mm thick.
I printed with layer hight: 0.3 mm and width: 0.6 mm.
If you need to scale down you maybe need to reduce the width also because there must be a gap between the two perimeters. Otherwise it may not print continuous without stopping - even in spira vase methode.
I added a small base on aft to get more brim. I printed without heatbed and used 6 mm brim.
And yes, be very careful, if you reach the nose.
Reduce the temperature and speed by and by in small steps.

Propeller: layer height = 0.1 mm, width = 0.3 mm
All other parts: layer height = 0.2 mm, width = 0.3 mm

Propeller shaft: diameter = 1 mm, length = 47 mm

Instead of printing the rudder with shaft you can print only the rudder and use for the shaft 3 mm filament. Then drill a 0.8mm hole in the filament, connect both parts with a 0.8 mm wire and glue them together.

Advertising


Issue with this design? Report a problem.

Would you like to support Cults?

You like Cults and you want to help us continue the adventure independently? Please note that we are a small team of 3 people, therefore it is very simple to support us to maintain the activity and create future developments. Here are 4 solutions accessible to all:

  • ADVERTISING: Disable your banner blocker (AdBlock, …) and click on our banner ads.

  • AFFILIATION: Make your purchases online by clicking on our affiliate links here Amazon.

  • DONATE: If you want, you can make a donation via Ko-Fi πŸ’œ.

  • WORD OF MOUTH: Invite your friends to come, discover the platform and the magnificent 3D files shared by the community!


Sharing and downloading on Cults3D guarantees that designs remain in makers community hands! And not in the hands of the 3D printing or software giants who own the competing platforms and exploit the designs for their own commercial interests.

Cults3D is an independent, self-financed site that is not accountable to any investor or brand. Almost all of the site's revenues are paid back to the platform's makers. The content published on the site serves only the interests of its authors and not those of 3D printer brands who also wish to control the 3D modeling market.

100% secure payment by credit card, PayPal, Apple Pay, Google Pay, etc.
View all payment options.