Skip to content

iCharger 308/406 Duo for Ridgid 22" case

Advertising
?
Creation quality: 5.0/5 (1 vote)
Evaluation of members on the printability, utility, level of detail, etc.

  • 5.7k views
  • 2 likes
  • 4 downloads

License
3D design format
STL Folder details Close
  • Bottom Left - Added Fans and Vents.stl
  • Bottom Left - Blank.stl
  • Bottom Left 6S.stl
  • Bottom Left 6s - Added fans.stl
  • Bottom Left.stl
  • Bottom Plate.stl
  • Bottom Right - Added Fans and Vents.stl
  • Bottom Right - Blank.stl
  • Bottom Right 6S.stl
  • Bottom Right.stl
  • Bottrom Right 6s - Added fans.stl
  • Charger Plate - Blank.stl
  • Side Louver.stl
  • Top Left - Added Fans and Vents.stl
  • Top Left - Blank.stl
  • Top Left.stl
  • Top Right - Added Fans and Vents.stl
  • Top Right - Blank.stl
  • Top Right.stl

Learn more about the formats

Last update 2022-05-05 at 20:14
Publication date 2021-12-16 at 19:55
Design number 586315

3D printer file info

3D model description

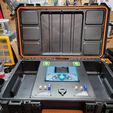
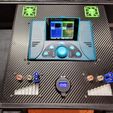
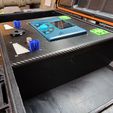
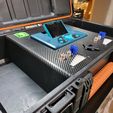
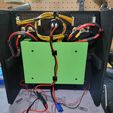
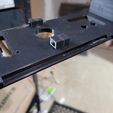
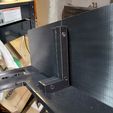
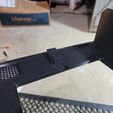
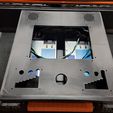
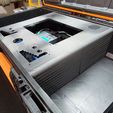
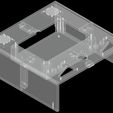
This is an insert to mount an iCharger 308/406 Duo into the Ridgid 22" carrying case. It was designed by myself and 3D printed on an Ender 3 Pro.

Hardware needed for assembly:
(1) Ridgid 22" carrying case
(4) M3 x 10-12mm button head screws to attached charger to bottom plate
(16) M3 x 16mm button head screws for fans and balance boards
(10) M3 x 20 button head screws to screw the pieces together
(8) M3 x 30 button head screws to screw bottom plate to top plate AFTER charger has been mounted to bottom plate
(16) M3 lock nuts for the fans and balance boards
(10) M3 nuts for screwing the pieces together
(4) M3 washers for the fan that you put in backwards
(6) M3 screw 10-20mm long to mount the entire assembly to the case. This is optional but I did incorporate "pre-drilled" holes to do this.
(4) 90 degree 4mm bullet connectors for the front of the iCharger.
(2) 40mm case fans 12 or 24v depending on your power supply
(1) USB charging port 1 1/8" OD 12 or 24v depending on your power supply.
(2) 8s Balance boards and associated wires from Progressive RC (Optional). The voids can be modified and filled it if you plan to surface mount your balance boards.

Added:
- Bottom left/right pieces for Progressive RC 6S balance boards
- Blank bottom left/right pieces for mounting balance boards on top of the charging plate
- Blank top left/right pieces with an opening for the power cable
- Shortened charger plate for use with blank pieces and top mounted balance boards. (Please note: This WILL likely require modification or remove of the top insert in the case to accommodate the higher position of the charger and to clear the button.

Steps:
1. Screw the 4 main pieces together with M3 x 20mm screws and M3 nuts. There are recessed nut areas for the M3 nuts.
2. Test fit
3. Line up, mark, and drill hole locations on bottom of box for bolting the entire assembly down at the end.
4. Mount Balance boards.
5. Mount fans.
6. Mount charger to bottom plate.
7. Plug in balance leads and bullet connectors BEFORE mounting bottom plate to top plate.
8. Plug in all your power leads.
9. Set into case
10. Screw assembly to case from bottom and back with your choice of M3 screw NOT exceeding 20mm long.

UPDATE: I have never overheated, however, I acquired a new charger that was 6s but 40 amps, so I redesigned the case to accommodate the 6s balance boards from Progressive RC and while doing so I added 2 additional fan locations on the front panels, plus passive vent louvers in the back. Feel free to download and use!

3D printing settings

These are 100% at your discretion, however, this is how I printed mine:

Printer: Ender 3 Pro
Material: eSUN PLA Plus
Temperature: 205 Nozzle/60 Bed
Speed: Default
Retraction: 3mm @ 40mm/s
Walls: 4
Infill: 25%
Support: Yes - touching build plate only. This is strictly to support the filleted edges. (Print topside on bed, aka upside down except for the bottom plate, that will print with the stand-offs up)
Brim: No
Time: Roughly 15.5 hours per piece

Advertising


Issue with this design? Report a problem.

Would you like to support Cults?

You like Cults and you want to help us continue the adventure independently? Please note that we are a small team of 3 people, therefore it is very simple to support us to maintain the activity and create future developments. Here are 4 solutions accessible to all:

  • ADVERTISING: Disable your banner blocker (AdBlock, …) and click on our banner ads.

  • AFFILIATION: Make your purchases online by clicking on our affiliate links here Amazon.

  • DONATE: If you want, you can make a donation via Ko-Fi πŸ’œ.

  • WORD OF MOUTH: Invite your friends to come, discover the platform and the magnificent 3D files shared by the community!


Sharing and downloading on Cults3D guarantees that designs remain in makers community hands! And not in the hands of the 3D printing or software giants who own the competing platforms and exploit the designs for their own commercial interests.

Cults3D is an independent, self-financed site that is not accountable to any investor or brand. Almost all of the site's revenues are paid back to the platform's makers. The content published on the site serves only the interests of its authors and not those of 3D printer brands who also wish to control the 3D modeling market.

100% secure payment by credit card, PayPal, Apple Pay, Google Pay, etc.
View all payment options.