Skip to content

K8400 Plotter

Advertising
Advertising
?
Creation quality: 5.0/5 (1 vote)
Evaluation of members on the printability, utility, level of detail, etc.

  • 964 views
  • 6 downloads

License
3D design format
STL Folder details Close
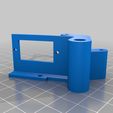
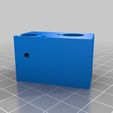
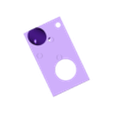
  • k8400_plotter_glider.stl
  • k8400_plotter_holder.stl

Learn more about the formats

Publication date 2021-12-20 at 00:02
?
Published to Thingiverse on: 2018-09-20 at 19:52
Design number 588642

3D printer file info

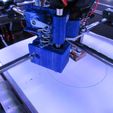
3D model description

You need:

  • 1 Slider printed part
  • 1 Holder printed part
  • 1 Nail 4mm x 50
  • 1 bearing LM6UU
  • 1 axle 6mm, 75mm
  • 2 screws M3x10 + washer
  • 3 screws M3X4 to mount the spring
  • 1 screwq M3X8 to tighten the pencil
  • 1 SG90 Mini servo
  • 3 wired 130mm ribbon cable + pin connector
  • 1mm wire(nail e.g.)
  • 2 cable end sleeve 1.5mm
  • 1 pressure spring OD10mm 18mm

Patch the Firmware:

You can get the firmware source code from the Vertex homepage at

https://vertex3dprinter.eu/downloads/vertex-downloads/

(choose for 1 or for 2 extruders)

In Confiuration.h enable NUM_SERVOS and set it to 1

define NUM_SERVOS 1

In Pins.h set:

define SERVO0_PIN 53

Then use Arduino 1.6.0 to upload the program to your printer

Installing the Ribbon Cable

Uninstall the Display controller board and attach the 3 Ribbon Cable to the back of the socket where the cable from the motherboard connects

MINUS, PLUS, SS are pins, 2, 6, 16

Install back the Display controller . Then guide the Cable nicely to the Hotend :) :)

Preparing the Hardware:

  • File the Head of the Nail to be almost half
  • Cut it to a length of 50mm
  • Thread the cable end sleeves to a helping wire and solider it onto the end of the spring
  • Attach the lever to the servo and drill a 1mm hole into the end

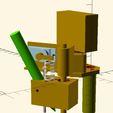
Assembling the plotter

  • Clean up the prints and support the holes with a drill. The diameters are 12mm, 4mm, 2.5mm
  • Insert the Axle into the holder
  • Insert the Nail into the Holder and glue it
  • Insert the Servo into the holder and mount it.

  • Insert the LM6UU into the slider

  • Insert the M3x8 screw into the slider(will tighten the pencil)

  • Put the Spring onto the glider and mount it with 3 screws

  • Combine the Holder and the slider and attach the spring with the servo with a wire

Install the Plotter into the place of 2nd nozzle with the 2 screws and washers from the bottom.
Plug in the Servo and watch for correct polarity. ( MINUS, PLUS, SIGNAL) its essential.

Testprogram:

G28 ; Auto-home
G0 X75 Y100 ; go to start of circle
G4 P100 ; wait until arrived
M280 P0 S60 ; lower pen
G2 X75 Y100 I50 J0 ; one full circle
G4 P100 ; wait until complete
M280 P0 S90 ; lift pen
M4 ; end of Program

Look at this: https://youtu.be/ijZioF61R2k

Any kind of contributions are welcome!
Happy plotting

3D printing settings

-

Advertising


Issue with this design? Report a problem.

Would you like to support Cults?

You like Cults and you want to help us continue the adventure independently? Please note that we are a small team of 3 people, therefore it is very simple to support us to maintain the activity and create future developments. Here are 4 solutions accessible to all:

  • ADVERTISING: Disable your banner blocker (AdBlock, …) and click on our banner ads.

  • AFFILIATION: Make your purchases online by clicking on our affiliate links here Amazon.

  • DONATE: If you want, you can make a donation via Ko-Fi πŸ’œ.

  • WORD OF MOUTH: Invite your friends to come, discover the platform and the magnificent 3D files shared by the community!


Sharing and downloading on Cults3D guarantees that designs remain in makers community hands! And not in the hands of the 3D printing or software giants who own the competing platforms and exploit the designs for their own commercial interests.

Cults3D is an independent, self-financed site that is not accountable to any investor or brand. Almost all of the site's revenues are paid back to the platform's makers. The content published on the site serves only the interests of its authors and not those of 3D printer brands who also wish to control the 3D modeling market.

100% secure payment by credit card, PayPal, Apple Pay, Google Pay, etc.
View all payment options.