Optical Limit Switches Endstop Mount X Y Z axes for cnc 3018 3024 3040 2410 max alu series
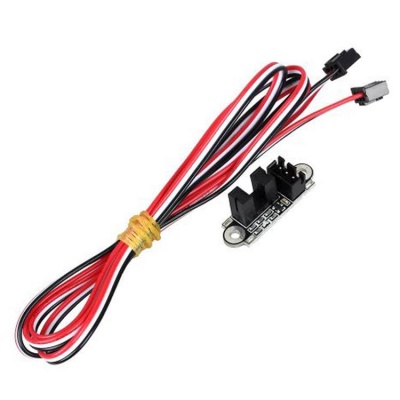
The optical sensors have V S and G.
Connect 'G' to the Graund row of the header, for the corresponding axis.
Connect 'S' to the Signal row of the header, for the corresponding axis.
Connect all contacts 'V' to the 5v (common feed contact 5v)
For optical limit switches with rounded corners only
https://www.ebay.co.uk/itm/402914186464?hash=item5dcf8e94e0:g:ZJEAAOSwqbVgwxmm
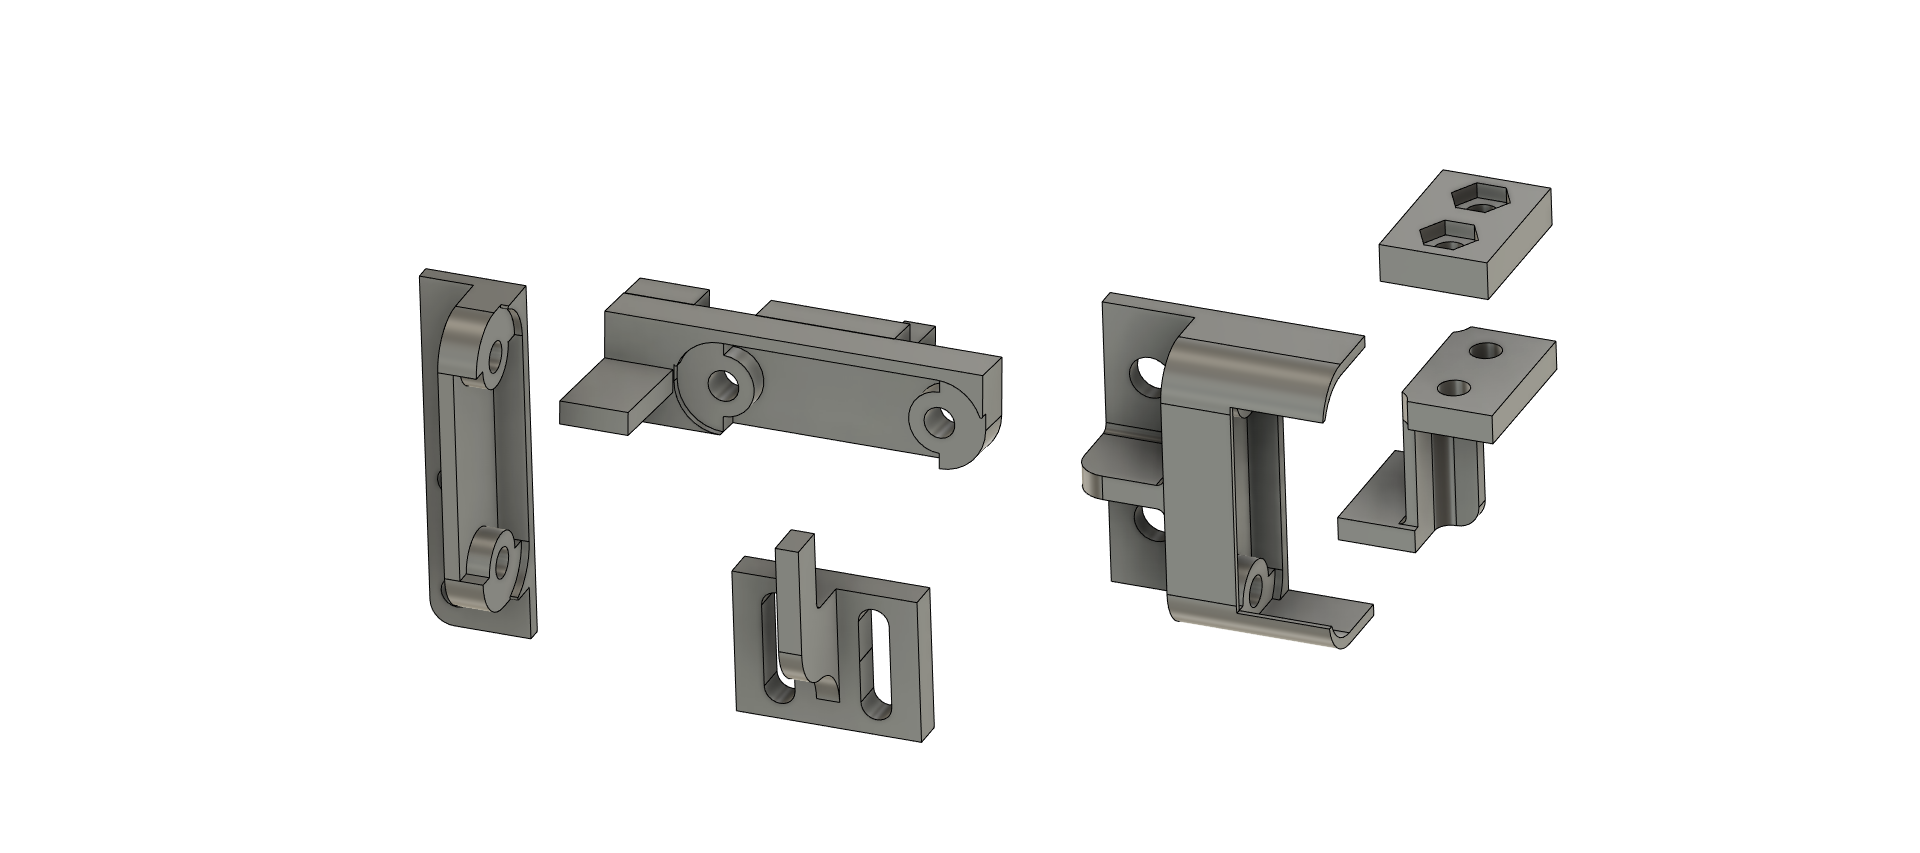
These advanced parts for CNC 3018 and similar engraving machines (1610, 2418, 3040, 2410 else) are designed to add optical end stops to the machine.
You will need M3 screws and nuts for installation and for inserting the slots on the bottom of the platform, and a long M3 screw (it acts as a flag that locks the sensor and this allows you to adjust the position).
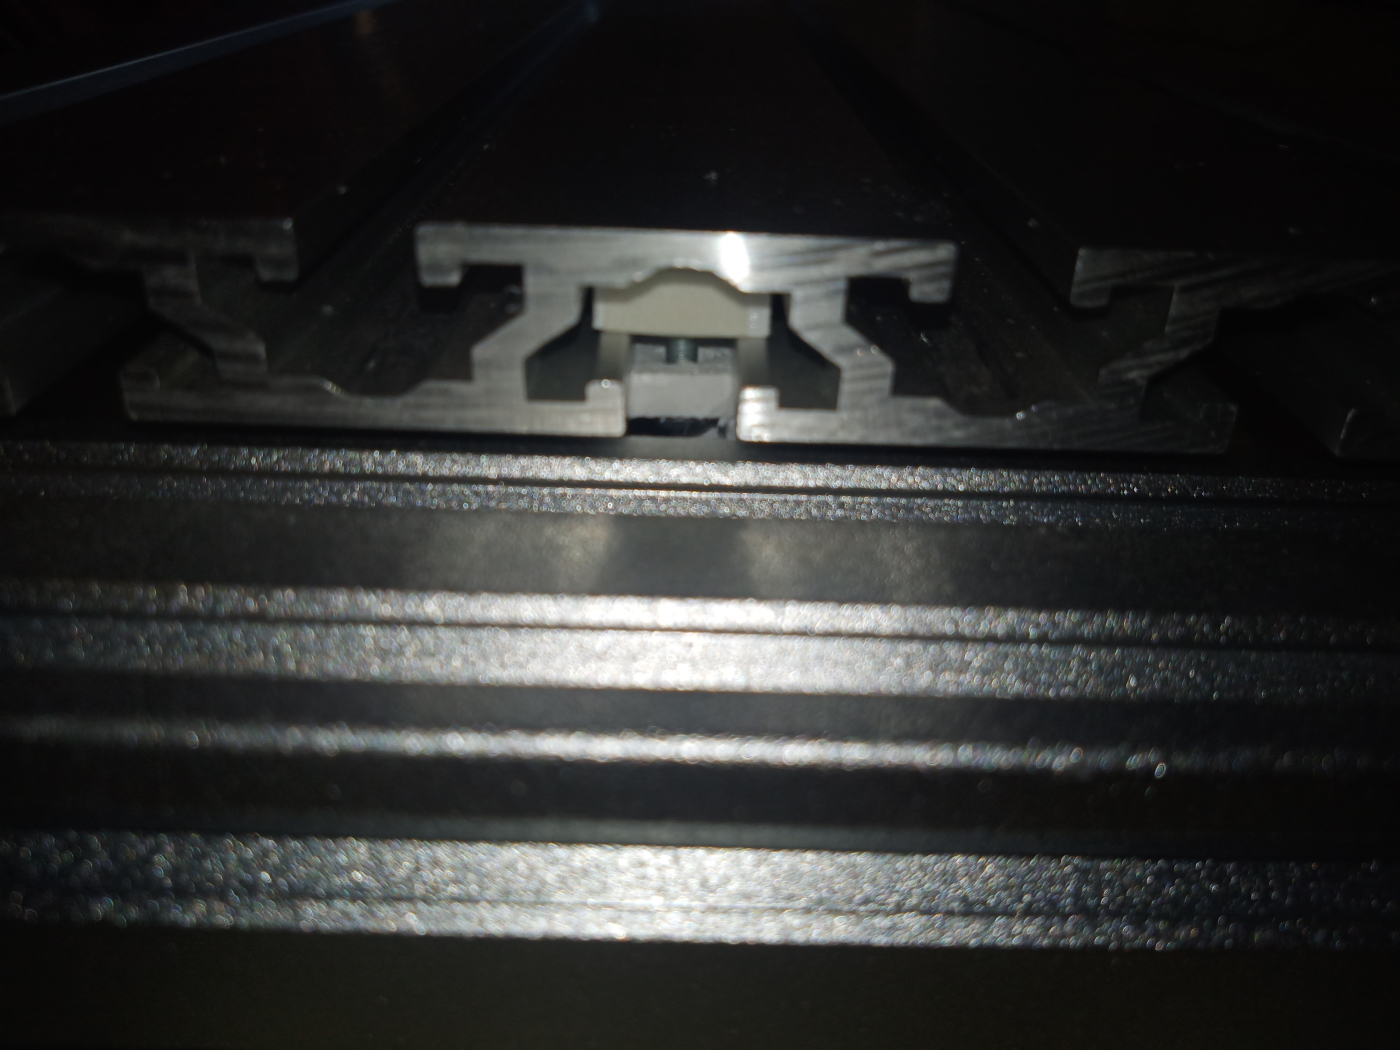
To install the Y-axis sensor on the aluminum profile of the machine frame under the platform, standard mounts for t-slots (M4) are used as those that come with the cnc machine.
For the X, Z axis, print both pieces and attach them as shown above. For the flag, you have to drill small holes like in the photo and use an M3 tap to attach it with an M3 screw.
After installation, use commands to direct the movements of the axes in the appropriate direction to the limit switches.
Forget about inaccurate and jittery mechanical limit switches on your machine!
Optische Endschalter Endstop Mount X Y Z Achsen für CNC 3018 3024 3040 2410 max Alu-Serie
Die optischen Sensoren haben V S und G.
Verbinden Sie 'G' mit der Grundzeile der Kopfzeile für die entsprechende Achse.
Verbinden Sie 'S' mit der Signalzeile der Kopfzeile für die entsprechende Achse.
Verbinden Sie alle Kontakte 'V' mit 5v (gemeinsamer Feedkontakt 5v)
Nur für optische Endschalter mit abgerundeten Ecken
https://www.ebay.co.uk/itm/402914186464?hash=item5dcf8e94e0:g:ZJEAAOSwqbVgwxmm
Diese fortschrittlichen Teile für CNC 3018 und ähnliche Graviermaschinen (1610, 2418, 3040, 2410) wurden entwickelt, um der Maschine optische Endanschläge hinzuzufügen.
Sie benötigen M3-Schrauben und -Muttern für die Installation und zum Einsetzen der Schlitze an der Unterseite der Plattform sowie eine lange M3-Schraube (sie dient als Fahne, die den Sensor verriegelt und ermöglicht Ihnen die Positionseinstellung).
Zur Montage des Y-Achsen-Sensors am Aluminiumprofil des Maschinenrahmens unter der Plattform werden Standardaufnahmen für T-Nuten (M4) verwendet, wie sie bei der CNC-Maschine mitgeliefert werden.
Für die X-, Z-Achse drucken Sie beide Teile aus und befestigen Sie sie wie oben gezeigt. Für die Fahne müssen Sie wie auf dem Foto kleine Löcher bohren und mit einem M3-Gewindebohrer mit einer M3-Schraube befestigen.
Verwenden Sie nach der Installation Befehle, um die Bewegungen der Achsen in die entsprechende Richtung auf die Endschalter zu lenken.
Vergessen Sie ungenaue und unruhige mechanische Endschalter an Ihrer Maschine!
Interrupteurs de fin de course optiques à montage en butée X Y Z axes pour cnc 3018 3024 3040 2410 max série alu
Les capteurs optiques ont V S et G.
Connectez 'G' à la ligne Graund de l'en-tête, pour l'axe correspondant.
Connectez 'S' à la ligne Signal de l'en-tête, pour l'axe correspondant.
Connectez tous les contacts 'V' au 5v (contact d'alimentation commun 5v)
Uniquement pour fins de course optiques à coins arrondis
https://www.ebay.co.uk/itm/402914186464?hash=item5dcf8e94e0:g:ZJEAAOSwqbVgwxmm
Ces pièces avancées pour CNC 3018 et machines de gravure similaires (1610, 2418, 3040, 2410) sont conçues pour ajouter des butées optiques à la machine.
Vous aurez besoin de vis et d'écrous M3 pour l'installation et pour insérer les fentes au bas de la plate-forme, et d'une longue vis M3 (elle agit comme un drapeau qui verrouille le capteur et cela vous permet d'ajuster la position).
Pour installer le capteur d'axe Y sur le profilé en aluminium du châssis de la machine sous la plate-forme, des supports standard pour rainures en T (M4) sont utilisés comme ceux fournis avec la machine cnc.
Pour les axes X, Z, imprimez les deux pièces et attachez-les comme indiqué ci-dessus. Pour le drapeau, il faut percer des petits trous comme sur la photo et utiliser un taraud M3 pour le fixer avec une vis M3.
Après l'installation, utilisez des commandes pour diriger les mouvements des axes dans la direction appropriée vers les fins de course.
Oubliez les fins de course mécaniques imprécis et instables sur votre machine !
Interruptores de límite ópticos Montaje final X Y Z ejes para cnc 3018 3024 3040 2410 max alu series
Los sensores ópticos tienen V S y G.
Conecte 'G' a la fila de Graund del encabezado, para el eje correspondiente.
Conecte 'S' a la fila Señal del encabezado, para el eje correspondiente.
Conecte todos los contactos 'V' al 5v (contacto de alimentación común 5v)
Solo para finales de carrera ópticos con esquinas redondeadas
https://www.ebay.co.uk/itm/402914186464?hash=item5dcf8e94e0:g:ZJEAAOSwqbVgwxmm
Estas piezas avanzadas para CNC 3018 y máquinas de grabado similares (1610, 2418, 3040, 2410 más) están diseñadas para agregar topes ópticos a la máquina.
Necesitará tornillos y tuercas M3 para la instalación y para insertar las ranuras en la parte inferior de la plataforma, y un tornillo M3 largo (actúa como una bandera que bloquea el sensor y esto le permite ajustar la posición).
Para instalar el sensor del eje Y en el perfil de aluminio del bastidor de la máquina debajo de la plataforma, se utilizan soportes estándar para ranuras en T (M4) como los que vienen con la máquina cnc.
Para el eje X, Z, imprima ambas piezas y adjúntelas como se muestra arriba. Para la bandera, debes perforar pequeños agujeros como en la foto y usar un grifo M3 para sujetarla con un tornillo M3.
Después de la instalación, use comandos para dirigir los movimientos de los ejes en la dirección apropiada a los interruptores de límite.
¡Olvídese de los interruptores de límite mecánicos imprecisos y temblorosos de su máquina!
see the exact size on the photo
All real sizes you can see in the photos.
the location of the product for printing on the table is shown in the photo
The model can be printed as a 3D model, as well as produced on CNC machines.
Made in spaceclaim, tested in the manufacture of the master model of the product.
This is a fully solid-state version for 3d-print and cnc-made, This is not a scan of an existing product.
At the photos you can see the contours of the models on screens with stl or obj files, it is enough
to understand the possibility of printing a model or producing a model by a cnc machine.
You can easily change the size of the product in any 3D printer or cnc printing preparation program.
It is possible to model anyone another model according to your size or drawings and sketches.
ATTENTION! This item is a DIGITAL 3D model (*STL *OBJ file format) for ARTCAM, ASPIRE, CUT3D, Cura
anyone software applications for CNC and 3D printers.
Its files For CNC Routers and 3D printers.
Not a vectric, not a bitmap file, not a G-code. You buy a digital model image file for the manufacture of the product,
and not the product itself as a physical unit of goods made of glass or wood.
Non-commercial use only.
Attribution-NonCommercial CC BY-NC
:format(webp)/https://fbi.cults3d.com/uploaders/14190836/illustration-file/9d5f858a-2901-4410-946d-73e3a49006ac/mount-01-000.jpg)


/https://preview3d-images.cults3d.com/variants/ot5nnr7o4hl5kt2ibs44a97qwu9w/77d3f3b93f425080e8527932a83b54282f99f31ca9700de02f554c0ba0d78731)
/https://preview3d-images.cults3d.com/variants/59kld24ispzgvgksj7e5gje3gnkg/77d3f3b93f425080e8527932a83b54282f99f31ca9700de02f554c0ba0d78731)
/https://preview3d-images.cults3d.com/variants/e4hanm4iygtw2o16dzirr2rj2b4e/77d3f3b93f425080e8527932a83b54282f99f31ca9700de02f554c0ba0d78731)
/https://preview3d-images.cults3d.com/variants/8z3m7nj8epk7m9plrzo5buk8keuz/77d3f3b93f425080e8527932a83b54282f99f31ca9700de02f554c0ba0d78731)
/https://preview3d-images.cults3d.com/variants/a1l78q306uefreldc1ia055zb2et/77d3f3b93f425080e8527932a83b54282f99f31ca9700de02f554c0ba0d78731)
/https://preview3d-images.cults3d.com/variants/ri1xkfq7ytelq9z0ym4g9eci6nzw/77d3f3b93f425080e8527932a83b54282f99f31ca9700de02f554c0ba0d78731)


