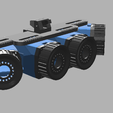
The tolerances are now fixed my apologies to anyone who printed the bodies which were too tight. i like to run the tolerances close so that a small amount of filing or sanding is required usually my design tolerances are .02mm.
There are two options for bodies the 5 degree body .STL offers less overlap
This is a redesign of the VPNVG-4 Lite
Bodies are in a binocular configuration reducing weight and profile.
Th C stands for cheap because this allows for use of the Zosi 4 in 1 Security camera internals such as the cameras and IR array. Zosi's are half the cost of the Pheonix 2 however not as good of lux value that may improve if you bust out the IR filter but the cameras are equipped with a IR shutter so its not necessary. this will likely require a build tutorial as it snot as self explanatory as the other builds. i currently dont have a switch designed for the Active IR but plan on it in the future. currently it runs on the Zosi daylight sensor integrated in the PCB
$15 Zosi performed as expected for no light but was extremely washed out during high light probably because the daylight sensor wasn’t getting enough light looking from inside to outside the Zosi could easily see through door ways and the IR proved to be less than expected but for indoors use worked as expected providing bright illumination. The Zosi also included active IR effectively driving the actual price of the camera lower than $15 and the 1/3 Sony camera PCB with lens can be had for fairly cheap on eBay
$30 Phoenix performed well in all lighting condition but had a grainier picture than the night eagle. I did remove the IR filter from the lens. The night eagle and Phoenix are running different size lenses I don’t know exactly what size
$70 The night eagle performed stellar in no light conditions however transitioning from low to no light and high to no light was a struggle. you could not see from a light room into a dark room or outside. Making it less ideal for indoors use where lights levels can vary.
A big variable is the screens because while running 4 identical cameras with identical settings the screens varied a lot in picture quality one has a green grey color and makes a high pitch whine one is more gray and has almost no graininess to it and I run those two in the middle the other two I run on the sides as they are a lot more wire and kind of hurt my eyes.
I also bought a $50 PEQ-15 on Amazon and the IR laser on it actually works and is very visible.
In conclusion I would recommend the Phoenix for multipurpose use the night eagle for outdoors use in a non urban environment or where there’s little light transition. The Zosi proved to be a good especially for the price however produced a way grainier picture and I personally don’t plan on running it. My suggestions is a helmet mounted IR light as they’re fairly cheap and extremely bright and require no wiring additional circuits
i also have a sensor cap which fits the runcam pheonix and night eagle 3 sensor caps from other VPNVG lites are not directly compatible due to some hole changes but can be drilled to work in the future i plan to run the active IR board in the two font sensors but use a Runcam sensor and run the Zosi sensors as periphrials
as always you'll need
4x 2" adafruit NTSC/PAL tft
4x 50mm focal length lenses
xt30 connectors
7.5v battery
various metric bolts from m2 to m5
What to print
2x bodies
4x sensor caps Zosi or pheonix depending on your camera
2x buffers
1x bride
1x hinge
4x locking plate
2x lense retainers

/https://fbi.cults3d.com/uploaders/21072383/illustration-file/3fe3f9aa-a741-47dd-8027-a1ec1a3a6aaa/mk2.png)


