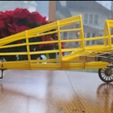
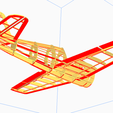
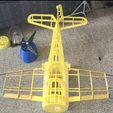
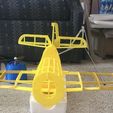
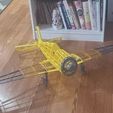
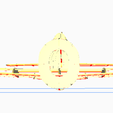
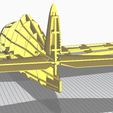
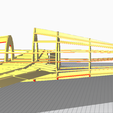
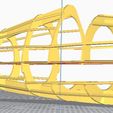
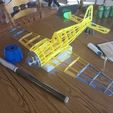
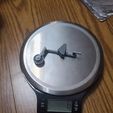
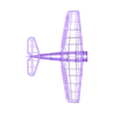
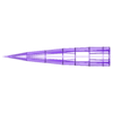
We are currently working on the V3 of this airframe. That one will be RC ready for electronics and covering, however it can not be scaled down like this one can. It's still a work in progress but the full wing has been posted for free for you guys to try and prototype. Check it out in my designs.
V1 Notes below:
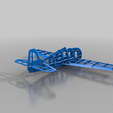
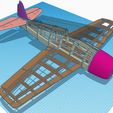
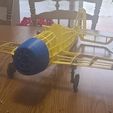
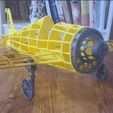
Made this model from a set of antique paper plans, was way more work than I anticipated, however i am very pleased with the results. im about 65% done with this build as of this posting. if i get 50 likes on this one Ill release all the individual puzzle pieces. there are few spots on frame that could use some clean up work still. if someone would be intersted in helping skin the model with realistic 1mm thick armor plating. or atleast an idea of how to incorporate the curves better then my current carving methods. any programs with digital plastic wrap effect? lol
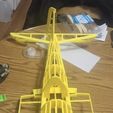
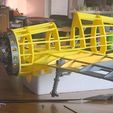
12/12/2021: Making progress on "skinning" the tail section. sample pic added. the frame is actually providing structure to outside layer. stabilizer and elevators are now complete. gonna be breaking those pieces down for printing very soon.
12/13/2021: Ive uploaded version 1 in printable sections. this is not the final version, however, anyone who has built a traditional airplane from balsa will be ok from this point if they were trying to sand in curves and cover with iron on mono-kote. There are still some areas that could still use some clean up.
12/16/2021: Version 1 of this plane is made directly from scanning balsa pieces, however... as I am currently actually printing the full size version, there are some things that I think would benefit from a change since we are fabricating with a 3d printer. Weight is an obvious difference between balsa and pla plastics. the version 2 that I am currently working on hopefully will adress these issues: cut in curves, weight reduction, assembly tabs, providing cut out locations for servos and mounting hardaware, more precise dihedral ect.
Feel free to remix and post here would love to see how others would approach this build. I've cut alot of seemingly excess material out of the v2 fuselage. Ive uploaded the 1 piece model today. could probably cut even more of it out but dont want to risk compromising the structure.
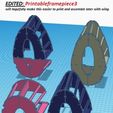
12/18/2021: Special shout-out to the people leaving tips on this build. Thank you guys so much for your support, I was already motivated by the experiment alone but you guys are making this an even more enjoyable project, I go thru quite a bit of material on these projects, so every little bit helps. Thanks again... As for the update: Edited frame pieces 4&5 now available for download. Same concept as #3 to give us that removable bottom section to connect to the wing later. Build is going much better than I honestly expected for version #1 cant wait to fly or crash it. Either way we will learn something about 3d printed structures by the end of this. Enjoy :p
12/20/2021: Added Tail Rudder Fixed into downloads. Fixed the rectangle gap at the top of the rudder, fixed a few gaps created by initial export, and connected the support spar so it spans proper.
12/21/2021: Added Flap and Aileron wedges to the downloads. Nothing special just thin sized to fit wedges, just forgot to add them. I would suggest using foam board for these pieces tho if you plan on making a flying model. If its static it wont really matter I guess.
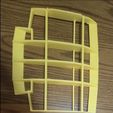
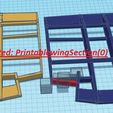
I have uploaded "Edited PrintableWingSection(0)" fixing that gap between flap and frame. not a big deal but will save us from reinforcing that piece for a hinge in the future. the original plans don"t actually show where these flaps have to be framed out, they just show you the size of the cutout and assume you will figure out how to frame them in. Twas an oversight in V1. I also spotted a gap by the aileron today. I will be editing that out later today, hopefully should be uploaded by tonight. If you have not printed this piece yet you might want to wait for the edit to save time in the build. If you have, its not a big deal, I'm making sure all the parts are inter-changable between versions, you are just gonna have to reinforce that gap as well in a flying model.
I also tweaked the cowl today, removed quite a bit of excess material and made it easier to access a brushless outrunner. I just uploaded that as well. Ive left some heft in walls tho... We obviously dont want a tail heavy plane, I will also be making a firewall later to mount in this thing, just not there yet. I really need to know the total weight before selecting components.
Just added the Edited outer wings with aileron gap filled.
12/22/2021: I have been working on the firewall and motor mount today, I have test fit it in a few different programs and it seems to be ok... haven't printed it yet, but i will upload, seems to slide inside the cowl without issue. I've tried to make it as light as possible while keeping in mind it still has to be strong enough to pull the entire airplane and resist the torque of the motor without snapping. It is still around 40 grams at 20% tho
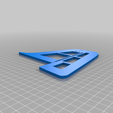
12/23/2021 First off... the motor mount printed very well first try. WINGS in first upload have some serious export ERRORS, only noticing some of these today, when I tried to slice in cura they were giving me some real issues with unwanted gaps. I have completely redone the wing piece exports to try to solve these, and will probably remove the old files with the errors so no one makes that mistake of printing those. section3 was almost missing half a former for example. Fuselage is solid now, no worries there. compiling a whole new zip file that contains ALL the edited parts.
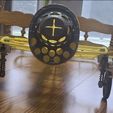
12/26/2021: I was gonna start covering the model today, but would rather delay. I have seen so many different ways to potentially skin this cat.... i just cant decide yet. leaning towards a roll hangar9 parklite thermo coating Ive had sitting around for years, people flinging all kinds of ideas at me how to cover this thing some sound crazier then others. tissue paper and dope, monokote, packaging tape, tin foil "please dont do this if u got radio. lol", lady nylons and epoxy, masking tape and paint, thin tpu, newspaper glue and paint, rice paper, fiberglass sheeting.... yea.... I'm just gonna focus on making the landing gear today. lol the plan for landing gear is relatively simple as i want to keep it light. So no retracts unfortunately, but I want at the very least a functioning sprung suspension and steering tail wheel. So expect those to be uploaded shortly and leave the under area of former 3 on the wings uncovered for access in attaching these.
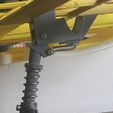
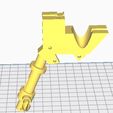
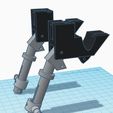
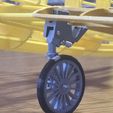
Front landing gear is done and just now uploaded. Take the time to make something fly, you should probably spend time in making it land too... these will also reinforce your glue seam and give you something to further brace the outer wing spars on. uses 7/32 x 1 in extension spring for the ground adjust mechanism and a section cut from a piston spring used in common airsoft AEG for the impact shock. Uses all 3mm screws. if you scale down they may not work and you're on your own for finding the hardware. I will work on a static version tomorrow that will be scalable for those with smaller beds making airplanes so light they wont even need the springs more than likely. tail wheel still not done and neither are the tires. they are going to be black tpu stretched over that wheel in the .ZIP so... no worries if you want matching tires they are on the way soon. the wheel may need a little force and a file to get over the stopper. :) For those of you following along. Enjoy.
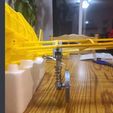
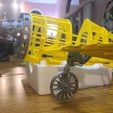
12/27/2021: really excited for this landing gear. I ended up having to use 2 small extension springs on the ground adjust mechanism to get the ideal resistance. I have a small assorted spring kit in front of me about 7 dollars on amazon. I use these things all the time so i have a selection. if your springs dont provide enough resistance ur gonna have to get stronger ones or double up. I did both, 1 spring on the outside and 1 on the other held to same screws with 3mm nuts. Thats all it took and shes standing on her own now without support. Couple pics added as proof of concept and maybe assist in your assembly.
The TPU tires fit good with a lil stretch and are now uploaded.
12/28/2021: Ive just uploaded a static model of the landing gear for those who don't care or need the function. My first attempt at a tail wheel was rather embarrassing.. lol so Im giving a couple prototypes a try before releasing. The critera: light, has to clip on to bottom keel, has to be routed around a frame we are not going to modify, then be easily tied into the rudder action from inside the frame, it need to also be strong enough to survive a hard landing so some sort of shock is necessary. Not giving up on it, just slow go. plastic that small starts to get brittle.
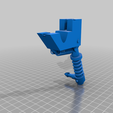
well after 6 broken prototypes.... I have released the first version of the tail wheel assembly that didn't fail. Make sure to print the shock and axle horizontal for strength. This tiny guy has been one of the more difficult things on this build to print actually. The wheel axle is just a 3mm screw. The compression spring came from the assortment but you can probably get away with a common pen spring here. Im open to ideas on how to improve this piece, however for now... this one has met the criteria at only 7 grams.
12/29/2021: When i started this build I did a risk assessment and calculated a safe flying weight of 1100 grams for an aircraft of this size. My goal has been to keep it under this number at all costs, more weight is gonna require more power, generate more stress and potentially snap a wing in a hard G turn or barrel roll. Over 1100 grams is danger zone and would require secondary bracing in the wing like an arrow shaft run all the way thru, an idea that will be introduced into any form of V2. All that said the V1 airplane now weighs 900 grams even. without electronics, propeller, flaps, or covering. it is very much skirting the line of being perfect or being too heavy. My previous assumed components totaled in puts me at 1197G. I am 97 grams into the danger zone, so... something has to go. The first obvious thing to drop would be the plastic rudder and elevators and replace them with traced out foam board. that may be enough depending on the electronics and covering used. other than that we could potentially carve some of our fuselage formers out as needed. there honestly is way more material in those than actually needed to maintain structure. So overall on paper V1 CAN potentially Fly. Real world testing however... gonna be a seat of your pants type deal. I would suggest using a removable type glue for replacing sections instead of having to replace airplanes. I dont claim to be the best experimental airplane pilot either...., I've crashed a lot of airplanes at this point if you can't tell. lol.
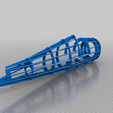
1/17/2022: Added easier to print fuselage sections split at the keel. these should also be way easier to scale down to 60% avoiding all those nightmarish supports between stringers in some sections.

/https://fbi.cults3d.com/uploaders/21229341/illustration-file/c2884471-f740-4f04-be1f-c79b88e7d064/fixed.jpg)

