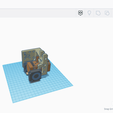
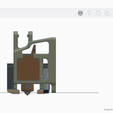
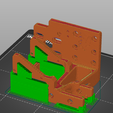
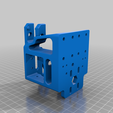
The work in progress sign is not to be ignored. I have not tested this design yet, as the H2 has not come in. Further major updates and upgrades to this design will be made, and documentation may or may not be given regarding the updates. Use at your own risk right now!
Basics
This design stemmed from my desire to create a perfectly controlled and powerful stringing-free hotend carriage. Here's the details:
- Hotend: BIQU H2 direct drive hotend
- Probe: 8mm SuperPINDA probe (or other 8mm probe, inductive or otherwise)
- Cooling: two 4010 blower fans (along with the duct designs provided)
- Hardware: twelve m4 screws and a good amount of varied m3 screws. One note: you will have to have very short screws for the 4010 fans; the screws can easily hit the H2 once the fan is tightened down.
For the Nerds... (like me!)
Use the next bit of this summary as a guide to hotends; no fully necessary info is in here.
As already noted, this design is part of my journey to create a string-less environment. I've cycled through many designs and variations, and have landed on a direct drive hotend as the possible solution.
Most of the credit for this design goes straight to @morganlowe (https://www.thingiverse.com/morganlowe/designs) here on thingiverse. This design is a remix of his design (https://www.thingiverse.com/thing:4880632) for the H2, so a big thanks goes to him for helping me out by making some modifications to the design that I couldn't!
Over the past five-ish months, I have been at work creating a design for the E3D V6 that I had, along with the two 4010s and the SuperPINDA. I have had constant trouble with the setup, mainly involving stringing, so I turned away from that approach. Instead of doing it all myself, which I typically prefer, I have taken a full blown hotend from BIQU and trust that it will solve my stringing issues.
The main parts of this have been thought out very well.
- The position of the H2 was changed from the original (thanks @morganlowe for going into the source files and modding that for me...) to allow space for a second fan between it and the backplate, which brings me onto the next part: dual fans.
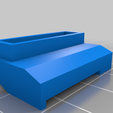
- Among many other issues from the past 4 years has been cooling. I used a single 5015 paired with a circular duct for a while, but could never get overhangs to work out well. I then turned to dual 5015s. This was a pain to design, as the 5015s are rather large. So I did some research and found 4010 blowers to be nearly as powerful as the 5015s I was using. I bought some, changed my designs to fit them, then tested. Thus far, these have been the best cooling; the cooling they provide easily rivals that of my Prusa Mini+. So, yes, dual fans. But I also wanted to get excellent placement that would not cool down the hotend block when the fans turn on. So I quickly designed some ducts, and they work like a charm (files included).
- Moving on to the SuperPINDA: I used a BLTouch for the longest time, as it seemed very popular. Honestly, I'm never going back to it. It was not very consistent, was extremely slow, and had quality issues. After 2.5 years of use with it, the plastic broke from overtightening (totally my fault). So I searched around and landed on getting an inductive probe. I wanted one that was small and could run fast, which pretty much describes the SuperPINDA made by Prusa. I bought it for roughly the same price as the BLTouch, set it up quickly, and had much better results with it than with the BLTouch. One major thing is the placement. The closer the probe can be to the hotend, the better. Many do not realize this when they design hotend carriages, throwing in their probe wherever they feel like. But it is important that, for a non-tilted probe result, the probe be as close as possible to the nozzle. That said, I did my best for this design.
That's pretty much it!
Go down the page for info and help on putting this thing together.

/https://fbi.cults3d.com/uploaders/16094255/illustration-file/02b92b1a-2fa5-4df2-8538-9d96b1c413ac/Full_View.png)
