WORK IN PROGRESS, not tested in conditions yet!
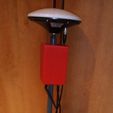
The Transferable Positioning Unit (TPU) is specifically designed for versatility of use and to be easiest as possible to transfer from a vehicle to another or even to use by hands.
More exactly, as farmer, I made it to have a GNSS auto-guidance system that can be changed of machine as fast as possible with minimum complexity in use. For this reason the TPU is intended to use with the TASU (Transferable AutoSteer Unit, coming soon).
The usual logic with autoguidance is to equip each vehicle, 4 machines in the company mean 4 equipments.
The TPU aim is to get rid of this logic, because if there is 2 drivers for the 4 machines it mean that at the same moment 2 auto-guidance equipment are useless and it cost much!
In case of use as autosteer component, only stay on the vechicle the steering sensor and the steering motor if you don’t use some integrated steering valve’s called “GPS pre-equipment”.
In term of function the TPU is made of a step dowm regulator supplying a GNSS receiver board to get the position and a board with a gyro/accelero/magnetometer to get heading and roll angle correction. Of course it must use with a GNSS antenna.
In the aim to get the less possible cables to connect it to the austosteer unit (faster to mount, no cables stay on the tractor) both receiver and heading/roll boards have wifi and Bluetooth capabilities. In the end, the TPU in order to work need only one connection (vehicle battery power supply or dedicated battery).
So to change the TPU of vehicle you just need to unplug power supply and to remove the support and the opposite to mount it.
The TPU mean you have some electronic outside of the cab, it could appear as a problem, are you afraid?
However there is no other way to keep it as transferable as possible, this way, you have literally no cable between the antenna and the cab/autosteer unit. That make it fast to change from a tractor to another (or combine…etc), the TPU can even be used without the autosteer side for exemple on a car or by hands to check the plot limits.
Just think about to put a plastic bag on it when you’ll use the karcher, rain won’t be a problem!
/! \If you estimate this necessary, to protect the electronic boards from atmospheric humidity you can use special spray for electronic devices dedicated to it.
/! \The CMPS14 sensor is sensible to electromagnetic interferences, despite the buck converter is really near I didn’t noticed anything bad, tell me if it happen.
NB: For those interested, front loader bracket threaded holes on MF77 series are M20 size (30mm wrench).
/!\ Mount must be rigid enough!
My 19mm tube isn't and need reinforcement.
Printing instructions:
The material must resist to quite high temperature (sun and near motor), up to you, I choose high temperature PLA.
Bottom/top and walls are 0.8mm infill semi-cubic 25%.
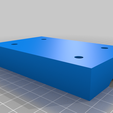
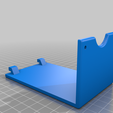
Only the hood need supports to print, it must be printed on it’s “L” side so that the walls lines will be in the direction that will make the part the strongest.
List of materials:
-Some Dupont cables and pin’s to connect everything.
-DC 2.1mm round connector
-Switch KCD11
-For power supply, a MP1584EN buck converter if your DC power input may exceed 12V … 12V batteries may be 14.5V (MF77), or even few more when motor of the vehicle is started and alternator charge it (C099-f9p stand maximum 12V).
For positioning:
- Antenna with integrated ground plane (up to you, mine is Beitian BT-160)
- C099-F9P, version according your continent
- Coaxial cable of the appropriate length with connectors according antenna and receiver board
For roll compensation and heading:
- Wemos D1R32, which is a uno form factor ESP32
- CMPS14, which is an accelero/gyro/magnetometer
Mounting instructions:
-Solder pins on the power board and install it.
-Solder wires on the DC round connector and switch, install and connect it (one wire, between connector and switch is needed to solder after installation).
-With 12V power supply connected and small screwdriver, set the output voltage around 7V.
-Install the CMPS14.
-Solder wire to the power socket of the C099-f9p, install it in the rail and connect it to the power board, DON’T FORGET the wifi/BT antenna before to power on.
-Same as previously for the Wemos D1R32 board, connect the CMPS14 to it, you’ll need to make special’s low profile cables with male pins for this (few space to make it as compact as possible).

/https://fbi.cults3d.com/uploaders/15496892/illustration-file/e398aa0c-007e-4f22-949f-7c54a366cf7f/MountingPlateV9ht.png)


