Skip to content

Dewalt 611 dust shoe and deflector

Advertising
Advertising
?
Creation quality: 0.0/5 (0 votes)
Evaluation of members on the printability, utility, level of detail, etc.

  • 1.5k views
  • 1 like
  • 2 downloads

License
3D design format
STL Folder details Close
  • AirGuide.stl
  • AirGuide_A.stl
  • AirGuide_C.stl
  • AirGuide_D.stl
  • AirGuide_E.stl
  • Bristle_Holder.stl
  • DustShoe.stl
  • Lever.stl
  • Shoe_for_bristles.stl

Learn more about the formats

Publication date 2022-01-17 at 10:11
Design number 610713

behemoth

3D printer file info

3D model description

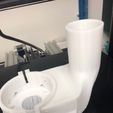
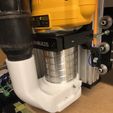
Dust shoe for dewalt 611 router

Locking lever to change tool (rotate spindle to find lock position, then pull the lever up)
Direct suction above the tool.
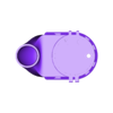
Detachable AirGuide (has tight fit and stays on by attaching to the layers of the print)
Collet nut tightening works with the router's own flat wrench
Installs in 30 seconds!

Bristle shoe addded - stays in place with 6pcs 10x2mm neodymium magnets (glued with superglue) The groove for bristles is 3mm deep and 2.5mm wide.

Print your own bristles with https://www.thingiverse.com/thing:3929569

3D printing settings

Print Settings

Rafts:
No

Supports:
No

Resolution:
0.6

Infill:
20%

Filament brand:
Frontier Fila

Filament color:
White / Transparent

Filament material:
PETG

Notes:
This model prints without supports - note that the extrusion width is 0.8mm, and the model is optimized for it at the funnel part. I have 0.8 nozzle. Print speed is 40 mm/s with volcano extruder with 220C. Print shell from inside to out 3 perimeters, 4 top and bottom layers.

Print time was 2h 40min. I really like the big nozzle, quick, bit ruff but hey it works.

I decided to use 0.6 layers all the way up. For Air Guide use transparent filament and 0.4 layer height.

Lever is printed with 0.2 layers with 0.4 extrusion width.

You can anyhow print this with 0.4 mm nozzle with 0.4 mm extrusion width. Choose perimeters and layers what makes most sense with your printer...

Post-Printing
Remove the sacrificial layer on router hole.

Use hack saw blade, or cutter knife to remove build in supports of the tightening strap.

Finally use 4mm screws to attach the lever and tightening strap.

Tags

Advertising


Issue with this design? Report a problem.

Would you like to support Cults?

You like Cults and you want to help us continue the adventure independently? Please note that we are a small team of 3 people, therefore it is very simple to support us to maintain the activity and create future developments. Here are 4 solutions accessible to all:

  • ADVERTISING: Disable your banner blocker (AdBlock, …) and click on our banner ads.

  • AFFILIATION: Make your purchases online by clicking on our affiliate links here Amazon.

  • DONATE: If you want, you can make a donation via Ko-Fi πŸ’œ.

  • WORD OF MOUTH: Invite your friends to come, discover the platform and the magnificent 3D files shared by the community!


Sharing and downloading on Cults3D guarantees that designs remain in makers community hands! And not in the hands of the 3D printing or software giants who own the competing platforms and exploit the designs for their own commercial interests.

Cults3D is an independent, self-financed site that is not accountable to any investor or brand. Almost all of the site's revenues are paid back to the platform's makers. The content published on the site serves only the interests of its authors and not those of 3D printer brands who also wish to control the 3D modeling market.

100% secure payment by credit card, PayPal, Apple Pay, Google Pay, etc.
View all payment options.