Skip to content

Garmin Fenix 6X charging stand

Advertising
Advertising
?
Creation quality: 5.0/5 (2 votes)
Evaluation of members on the printability, utility, level of detail, etc.

  • 5.6k views
  • 16 likes
  • 26 downloads
  • 1 comment

License
3D design format
STL Folder details Close
  • Base.stl
  • Bracket.stl
  • Face.stl
  • North tab.stl
  • South tab.stl

Learn more about the formats

Publication date 2022-01-30 at 09:52
Design number 623331

karrebaektech

3D printer file info

3D model description

This is a charging stand for a Garmin Fenix 6X watch using the stock charging cable. It may fit similar Garmin watches that use the same cable.

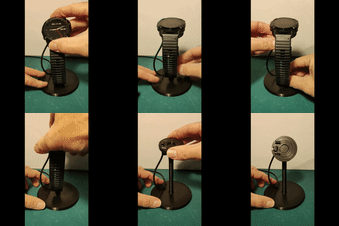
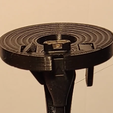
I know there are a lot of charging stands already out there, but I couldn't find one that let me adjust the angle so I could actually see the face while it was charging. The charging connector fits very tightly into the watch, so I also had to make release tabs to be able to remove the watch again without lifting the entire assembly off the table. The ratcheting angle adjustment makes a very satisfying, solid click (watch https://youtu.be/MGaiTr-W7BQ to hear).

Assembly instructions:
Note that these parts are all a very tight snap fit, so some force is required! Here is the best order in which to put the parts together:
1. Place the bracket in the face. The flat side of the face is the bottom, and the bracket goes in from the bottom and locks in place flush, leaving space on top for the sensors on the watch base. Once they are aligned, press down on the face with the bracket flush against the edge of a tabletop, repeat on the other side if necessary. Make sure the bracket is aligned correctly with the face before proceeding, as it will be difficult to turn with the other parts in place.
2. Insert one tab at a time in the face from the top, making sure that you have the right tab in the right slot. The tabs are mirror images of each other and are slanted to match the dishing of the face and will not work if interchanged. Making sure the tab is in the right position, invert the face and press down on a tabletop to click in place. Repeat for the other tab.
3. Guide the charging cable through the slot and seat the connector in the face by inverting and pressing gently down against a table. A locating ring will snap into the detent, holding the connector in place projecting up from the face. Force is required, but of course I assume no responsibility if you break your charging cable.
4. Press the bracket into the top of the base until it snaps into position and the ratchet engages. This is also a very tight fit.
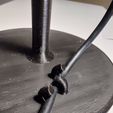
5. Place the cable in the guides on the base if desired.

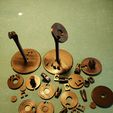
As you can see in the pictures, I spent some time designing this, and had quite a few learning experiences (failures) along the way, but the result is very satisfying and I hope you like it.

3D printing settings

I printed this in PLA on a Prusa Mk3S+ at 0.15 mm, 15% infill and no supports. Total print time was about 5 hours. A higher resolution may yield cleaner results but print time will go up. Depending on where you want to place it, you can make the base significantly heavier by printing with 100% infill.

https://youtu.be/MGaiTr-W7BQ

Advertising


Issue with this design? Report a problem.

Would you like to support Cults?

You like Cults and you want to help us continue the adventure independently? Please note that we are a small team of 3 people, therefore it is very simple to support us to maintain the activity and create future developments. Here are 4 solutions accessible to all:

  • ADVERTISING: Disable your banner blocker (AdBlock, …) and click on our banner ads.

  • AFFILIATION: Make your purchases online by clicking on our affiliate links here Amazon.

  • DONATE: If you want, you can make a donation via Ko-Fi 💜.

  • WORD OF MOUTH: Invite your friends to come, discover the platform and the magnificent 3D files shared by the community!


Sharing and downloading on Cults3D guarantees that designs remain in makers community hands! And not in the hands of the 3D printing or software giants who own the competing platforms and exploit the designs for their own commercial interests.

Cults3D is an independent, self-financed site that is not accountable to any investor or brand. Almost all of the site's revenues are paid back to the platform's makers. The content published on the site serves only the interests of its authors and not those of 3D printer brands who also wish to control the 3D modeling market.

100% secure payment by credit card, PayPal, Apple Pay, Google Pay, etc.
View all payment options.