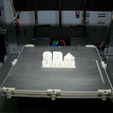
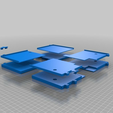
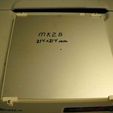
xyzprinting table for use of MK2B or MK3 heat beds and glass
214x214 and 220x220
this was by request as i did not realy nead to upgrade i have plenty of new replacement
heat beds for the printer and i showed you how to use both sides of the glass in a
previous upload
but when you go and try to find just a piece of 211x211 glass for the xyz printer
absolutly nobody sells this size glass so this is when to upgrade to standard size bed
you can also remove the heat element from your xyzprinting bed and put a piece of paper on
the top like i show you in my previous instructions to use both sides of the xyz printing
glass and just purchase the standard size glass bed and use your old heat element
there are 2 sizes i made the first table for 214x214 and purchased a 214x214 aluminum heat
bed but was sent a 220x220 heat bed so i had to order another 214x214 heat bed to check
fit
to make sure you get the right 214x214 bed is make sure it has MK2B in the title even
thought it says MK3 214x214 chances are they will send the wrong bed but don't freet the
220x220 bed will work in the xyzprinter this is probaby the max size that will fit but it
will work
you can use either the aluminum plate or purchase a seperate heat element and glass
these are the same instructions for both 214x214 and 220x220
this was also made to acomadate a 2mm piece of cardboard for the bottom heat shield under
the heat bed
these are the back side of the bed
print bottom side bottom left
print bottom side bottom right
working with acitone i find that a brush works realy well i also have a 3d smoothing pen
you fill it with acitone and use it to smooth ABS prints that works realy good for this as
well
glue using acitone this is the back side of the bed where the wires are on the heat bed
you will see the 2 indentations for the wires
these are the front side of the bed
print bottom side top left
print bottom side top right
where the center screw hole is there is a indentation that fits the 2 pieces together
next glue the 2 parts together using acitone
now you are looking at this thing on the top this is where the confusion in naming is the
names are to match the top with the bottom but now you are looking at it from a differant
view of how i created it from bottom to top left is now right and right is now left bottom
is now back and top is now front
print top side bottom left atach using acitone to the top back right corner you will see
the extra tab this is for the xyz printing thermaster
print top side bottom right atach to the back left corner lineing up the hold down screw
tab and the cutt out for the wires
print top side top left atach to the front right corner lineing up the adjuster screw hole
on the top
and fianly print the top side top right and atatch to the final space front left corner
print 7 glass bolt downs
drill all the holes with a 2.5mm drill bit
on the bed there is a hole in the center this is where the thermaster would normaly go we
are not using this so tap with a 3mm tap and put a screw in with lock tite and grind flush
the bed i have found that nothing and i mean nothing sticks to this stuped thing all your
old methods of making plastic stick to the bed like elmers purple, hair spray,ect ect are
now usless methods so back to the beginning with thinking
what i had to do with the 220x220 is i had to take realy rough sand paper about 80 grit
this thing is hardend aluminum and rough up the surface then put a coat of polyurathane
when sanding only go left and right then top to bottom do not use circular pattern
let it air cool then heat the bed up to temp and let cool this will cure the surface if
you do not do this you will constantly be reaplying
this method is a permanent sticking solution and no nead to use anything on top of this
if you get any pealing just take a paint brush and fill the open spots
i do not know how long this method is good for but it is probably about the same time as a
build teck top which trust me does not last as long as you think it should for the price
next is optional but highly recomended
now pat yourself on the back and go have a beer and take a break consult a therapest as to
what was going through your head and why you got into 3d printers in the first place
??????

/https://fbi.cults3d.com/uploaders/16777860/illustration-file/1ffccc7e-940c-43a2-af48-dce82884da0d/DSCN0485.JPG)


