Skip to content

Preassembled Pliers

Advertising
Advertising
?
Creation quality: 5.0/5 (1 vote)
Evaluation of members on the printability, utility, level of detail, etc.

  • 1.2k views
  • 1 like
  • 33 downloads

License
3D design format
STL Folder details Close
  • print_in_place_pliers_V1.stl
  • print_in_place_pliers_V2.stl

Learn more about the formats

Publication date 2021-05-05 at 23:15
?
Published to Thingiverse on: 2014-12-23 at 13:27
Design number 420011

3D printer file info

3D model description

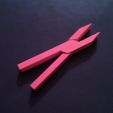
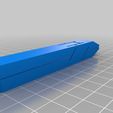
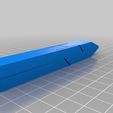
This is a fully functional set of pliers that prints in only one piece. They work pretty well and cannot be disassembled unless they are broken.

One cool thing about the design is that it used only 10 boolean operations to make the entire model.

I was going through a box of old prints and I came across a pair of pliers. It was one of my first prints, and it didn't work very well. It was not the design, just my settings at the time. Nevertheless, rather than printing a new pair of the same pliers I decided to revamp them by making them print in place. It's more of a novelty than anything useful, but it was a fun design challenge :) I was inspired by the printed pliers (designed by russrobot) and all of emmett's print in place designs.

3D printing settings

I would recommend the V2 file because it looks a little better, but it also has a tighter tolerance (800 microns), so it may not work as well on some printers. I am using a Solidoodle 2 Pro and the print came out almost perfectly for me. If you are having trouble with the V2 file try the V1. If it works than your tolerances are not tight enough to successfully print the V2.

I find that the design prints best on it's side, the way that it is oriented in the .STL file. I would recommend the MakerBot standard layer height (200 microns). The infill should be no less than 15%. I print with two shells and two bottom/top layers. I have only printed this model in PLA, but I don't see a reason that it wouldn't work with ABS. Once the print is done, simply use a sharp blade to wedge in between the two halfs on the tip and the base and snap them apart gently.

This is a video of how to prepare them. http://youtu.be/fd35CpxsiBk

Advertising


Issue with this design? Report a problem.

Would you like to support Cults?

You like Cults and you want to help us continue the adventure independently? Please note that we are a small team of 3 people, therefore it is very simple to support us to maintain the activity and create future developments. Here are 4 solutions accessible to all:

  • ADVERTISING: Disable your banner blocker (AdBlock, …) and click on our banner ads.

  • AFFILIATION: Make your purchases online by clicking on our affiliate links here Amazon.

  • DONATE: If you want, you can make a donation via Ko-Fi πŸ’œ.

  • WORD OF MOUTH: Invite your friends to come, discover the platform and the magnificent 3D files shared by the community!


Sharing and downloading on Cults3D guarantees that designs remain in makers community hands! And not in the hands of the 3D printing or software giants who own the competing platforms and exploit the designs for their own commercial interests.

Cults3D is an independent, self-financed site that is not accountable to any investor or brand. Almost all of the site's revenues are paid back to the platform's makers. The content published on the site serves only the interests of its authors and not those of 3D printer brands who also wish to control the 3D modeling market.

100% secure payment by credit card, PayPal, Apple Pay, Google Pay, etc.
View all payment options.