Skip to content

K40 linear rail upgrade

Advertising
Advertising
?
Creation quality: 5.0/5 (2 votes)
Evaluation of members on the printability, utility, level of detail, etc.

  • 9.9k views
  • 3 likes
  • 89 downloads

License
3D design format
STL, SVG, and TXT Folder details Close
  • 2mm_Spacer_xile6.stl
  • 5mm_spacer_xile6.stl
  • Carriage_One_piece_xile6.stl
  • Carriage_xile6.svg
  • Centering_Tool.stl
  • K40_linear_rail_upgrade_xile6.txt
  • laser_head_holder_xile6.svg

Learn more about the formats

Publication date 2021-05-09 at 23:03
?
Published to Thingiverse on: 2021-05-09 at 01:48
Design number 423007

Template info

3D model description

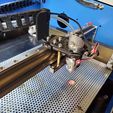
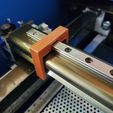
This is a simple linear rail upgrade for the K40 laser cutter.

I was tired of the wheels giving wavy lines and none smooth movement. I came up with this.

The linear rail i choice sits about 5mm higher then the stock k40 metal head holder.
This setup adds the linear rail and drops the lens back down. So the focus length should be unchanged.
Mirror 3 will be a tad higher tho, about 3mm.

Part list:

MGH9 H Linear rail 400mm long
3mm acrylic sheet
3d printed files (petg, abs or asa)
m3 screws (3x 6mm, 5x12mm (12 to 16mm)
m3 washer 5x
m3 drill bit and a good drill.
m3 nut 2x
super glue (not 100% needed)

Files :
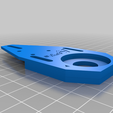
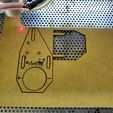
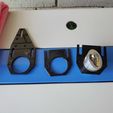
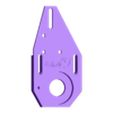
Laser head holder - acrylic
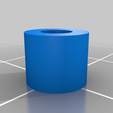
2mm spacer - 3d printed
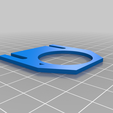
Carriage - acrylic
5mm spacer - 3d printed
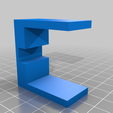
Linear rail center tool - 3d print
Rail center tool 2x - 3d printed
One piece - untested all 3d printed.

Start by downloading and cutting/printing all the files.

Glue the 3d printed 2mm spacer to the acrylic lase head holder. Clamp down and let dry. (not 100% needed but helps keep it in place)

Time to disassemble your laser head.

This step is only needed to align mirror 3 faster if your already aligned.
Put tape over your mirror 3.
Move the laser to the bottom right of the machine.
Do a light test fire so it will mark the center.
Remove the laser head and set it aside. Keep the tape on it.
You will be left with just the metal lens holder bolted to the wheel carriage.

Center it. Then remove the 3 screws holding it.

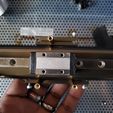
Put the linear rail on the stock k40 railing.
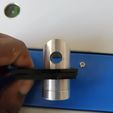
Use the 3d printed tool to center the linear rail. Once your happy with the placement drill a hole throw one of the linear holes. Normally just 1 on each end will do.

Put a m3 screw in the holes and then put a nut on the bottom. Tighten down the screws. MAKE sure the linear rail still moves smoothly. IF not its possible your k40 rail isnt 100% flat and you’re bending your smooth rail. Your either need a shim or to loosen the screw to make the rail flat.

Get the glued together laser head holder and 2mm spacer.
Place the "carriage" on top of this. Hold it together or use tape.
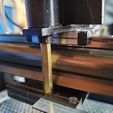
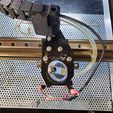
Place it on top of the linear rail and screw in the 3 screws (6mm with washer)
Then lightly screw in the front 2 screw on the wheel carriage.
Add the 5mm spacer between the two carriages and tighten it with a m3 screw.

It should all be together and move as one piece.
Loosen the wheel carriage's wheels and pull them out.

Now you’re ready to line your laser back up.

Slide the laser head back/forward to line it up with mirror 2.
Do a light test fire and adjust it back/forward until your dot is line up horizontally.
Its fine if its lower your need to adjust your mirror 2 higher.

IF you want the red dot or drag chain, check my other files.

if you really like this, feel free to donate :D

https://www.buymeacoffee.com/F7OvV6j

https://www.paypal.com/donate?hosted_button_id=XGS7KT52TP3G6

amazon link for linear rail i ordered.
https://www.amazon.com/gp/product/B07ZJNML2Y/ref=ppx_yo_dt_b_asin_title_o02_s00?ie=UTF8&psc=1

Manufacturing settings

-

Advertising


Issue with this design? Report a problem.

Would you like to support Cults?

You like Cults and you want to help us continue the adventure independently? Please note that we are a small team of 3 people, therefore it is very simple to support us to maintain the activity and create future developments. Here are 4 solutions accessible to all:

  • ADVERTISING: Disable your banner blocker (AdBlock, …) and click on our banner ads.

  • AFFILIATION: Make your purchases online by clicking on our affiliate links here Amazon.

  • DONATE: If you want, you can make a donation via Ko-Fi 💜.

  • WORD OF MOUTH: Invite your friends to come, discover the platform and the magnificent 3D files shared by the community!


Sharing and downloading on Cults3D guarantees that designs remain in makers community hands! And not in the hands of the 3D printing or software giants who own the competing platforms and exploit the designs for their own commercial interests.

Cults3D is an independent, self-financed site that is not accountable to any investor or brand. Almost all of the site's revenues are paid back to the platform's makers. The content published on the site serves only the interests of its authors and not those of 3D printer brands who also wish to control the 3D modeling market.

100% secure payment by credit card, PayPal, Apple Pay, Google Pay, etc.
View all payment options.