Skip to content

Unfolding Flower Lamp nr4

Advertising
Advertising
?
Creation quality: 5.0/5 (1 vote)
Evaluation of members on the printability, utility, level of detail, etc.

  • 1.4k views
  • 4 likes
  • 1 collection

License
3D design format
3MF, OBJ, and STL Folder details Close
  • Ceiling bracket.stl
  • Foot.stl
  • Unfolding Flower Lamp4 Hanging Assembled obj.obj
  • Unfolding Flower Lamp4 Hanging Assembled.3mf
  • Unfolding Flower Lamp4 Standing Assembled obj.obj
  • Unfolding Flower Lamp4 Standing Assembled.3mf
  • Unfolding Flower LampShade4.stl

Learn more about the formats

Publication date 2021-05-23 at 12:43
Design number 433954

3D printer file info

3D model description

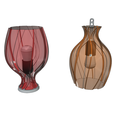
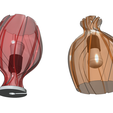
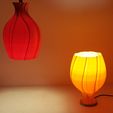
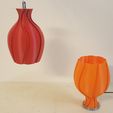
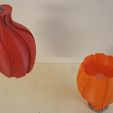
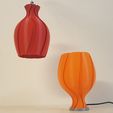
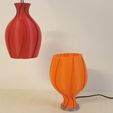
This is my fourth Unfolding Flower Lamp. It is inspired by the opening of a Flower Bud. If you like this Lamp, please take a look at the other Unfolding Flower Lamps on my Page.

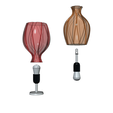
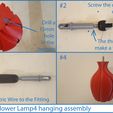
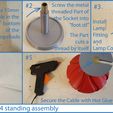
This Lamp is made out of 2 3d printable parts and therefor very easy to make. You can make it as a Table Lamp or as a Ceiling Lamp. In the Photo section I added 2 images with assembly instructions. One gives instructions for the Table Lamp, the other for the Ceiling Lamp.

The light source is a standard E14 Bulb and E14 Fitting. But a E27 Fitting will also fit. For the Table Lamp you also need some Hot Glue to secure the electric wire that goes to the Lamp Fitting.

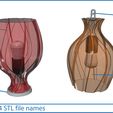
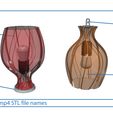
he STL Files are meant to 3D print on your 3D Printer. The 3mf an obj files are added to give you an 3D view of the assembled Lamps.

If you have any questions, feel free to ask :-)

3D printing settings

The Lampshade must be printed in the "Spiral Outer Contour Mode (in Slicer Software of Cura) to print it hollow. This mode also goes by the name: VASE MODE or SPIRAL MODE. It means that only the outer Wall Line and Bottom Layers will be printed. The Top Layers and the Infill will be left away. Therefor the Lamp Shade will be hollow. If you do not have this function in your Slicer Software, you can also use the Settings: 3 Bottom Layers, 0 Top Layers, 0% Infill, 1Wall Layer.

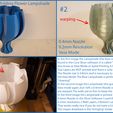
To Successfully print the Lampshade without warping I used a 0.8mm Nozzle! If you have a 0.4mm Nozzle, you have to use 2 Wall Layers. The settings for a 0.4mm Nozzle will be: 3 Bottom Layers, 0 Top Layers, 0% Infill, 2 Wall Layers. I also added a image in the Photo Section to give you a better idea. The Image is called "Howto 3D print the Unfolding Flower Lampshade. Here you can see that the 0.8mm Nozzle works the best.
The "Foot.stl" and the "Ceiling bracket.stl" can be printed with normal Print Settings and any Nozzle size.

Advertising


Issue with this design? Report a problem.

Would you like to support Cults?

You like Cults and you want to help us continue the adventure independently? Please note that we are a small team of 3 people, therefore it is very simple to support us to maintain the activity and create future developments. Here are 4 solutions accessible to all:

  • ADVERTISING: Disable your banner blocker (AdBlock, …) and click on our banner ads.

  • AFFILIATION: Make your purchases online by clicking on our affiliate links here Amazon.

  • DONATE: If you want, you can make a donation via Ko-Fi πŸ’œ.

  • WORD OF MOUTH: Invite your friends to come, discover the platform and the magnificent 3D files shared by the community!


Sharing and downloading on Cults3D guarantees that designs remain in makers community hands! And not in the hands of the 3D printing or software giants who own the competing platforms and exploit the designs for their own commercial interests.

Cults3D is an independent, self-financed site that is not accountable to any investor or brand. Almost all of the site's revenues are paid back to the platform's makers. The content published on the site serves only the interests of its authors and not those of 3D printer brands who also wish to control the 3D modeling market.

100% secure payment by credit card, PayPal, Apple Pay, Google Pay, etc.
View all payment options.