Skip to content

Kit Axe X Wanhao suplicator I3 V2.1

Advertising
Advertising
?
Creation quality: 5.0/5 (1 vote)
Evaluation of members on the printability, utility, level of detail, etc.

  • 732 views
  • 2 likes
  • 5 downloads

License
3D design format
STL Folder details Close
  • Bas_V0.0.stl
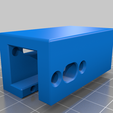
  • EndAxeX_V0.0.stl
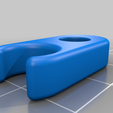
  • Filament_V0.0.stl
  • FixRef_V0.0.stl
  • FixWanhao_V0.0.stl
  • Haut_V0.0.stl

Learn more about the formats

Publication date 2021-05-25 at 23:03
?
Published to Thingiverse on: 2020-04-03 at 17:18
Design number 436039

3D printer file info

3D model description

Information de ce projet :

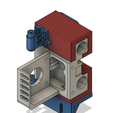
Petit projet qui suit mon upgrade de ma « Wanhao Duplicator I3 V2.1 »
Je trouve que la partie de l’extrudeur n’est pas top, j’ai changĂ© celui de base par un Flexion et vu la qualitĂ© que j’ai gagnĂ© en impression (et le prix) je voulais le garder, et je voulais du solide, j’ai trouvĂ© ce Un Kit pour moteur Nema17 et avec un entraxe de 45mm pour les deux tiges de l’axe X
J’ai donc fait des piĂšces pour l’adapter Ă  mon imprimante (avec une facilitĂ© pour de nouvelles adaptation sur d’autre machine, comme la fixation des cĂąbles arriĂšre, la face avant, ou encore le dessous)
J’ai prĂ©vu d’installer un E3D V6 hotend aussi pour le remplacer par Celui-ci plus tard ^^
Pour le refroidissement, j’ai rĂ©alisĂ© un support rĂ©glable sur la hauteur, j’ai imprimĂ© le refroidisseur pour l’impression et le E3D de MT2

Suivi du projet :

  • V0.0 : CrĂ©ation

Matériel nécessaire :

  • 1 Kit Axe-X
  • Insert M3 x D4.6 x L5.0 (Attention, c’est des nouvelles insert bien diffĂ©rente que celles que j’utilisais avant, et bien mieux !!! pour une M3, je fais un trous de 4,2mm)
  • 1 E3D HOTEND
  • 1 Extrudeur FLEXION pour E3D
  • 1 Capteur Reed plastique 2.5*14
  • 1 Aimant neodyme rond 6*3

Information supplémentaire :

  • Le bloque de maintien pour le E3D V6 hotend doit ĂȘtre modifiĂ©, il faut enlever juste un coin pour qu’il rentre sans problĂšme, juste le trou, et limer un peu sur le cĂŽtĂ© (+/-30 minutes avec des petites lime xD)
  • J’ai utilisĂ© le switch end X pour en faire un dĂ©tecteur de filament et l’insĂ©rer dans la piĂšce « Filament » (Attention, je l’ai rĂ©alisĂ© en vitesse aprĂšs l’upgrade avec des tolĂ©rances diffĂ©rente le temps de calibrer l’extrudeur
  • Les vis livrĂ© avec l’extrudeur ne peuvent plus le fixĂ© car trop courte, il manque 3 ou 4mm, j’ai juste utilisĂ© des vis normal avec un bout de collant pour Ă©viter que les piĂšces bouge, le temps de trouver des vis convenable

UPDATE :

  • 2020/04/03 :
    • CrĂ©ation du projet (V0.0)
    • Ajout du STL et photo du projet (V0.0)

Information about this project :

Small project following my upgrade from my "Wanhao Duplicator I3 V2.1"
I find that the part of the extruder is not top, I changed the basic one by a Flexion and saw the quality I gained in printing (and the price) I wanted to keep it, and I wanted solid, I found this A Kit for Nema17 engine and with a center distance of 45mm for the two rods of the X axis
So I made parts to adapt it to my printer (with ease for new adaptations on other machines, such as fixing the rear cables, the front panel, or even the underside)
I plan to install an E3D V6 hotend also to replace it with This one later ^^
For cooling, I made an adjustable support on the height, I printed the cooler for printing and the E3D of MT2

Project follow up :

  • V0.0: Creation

Necessary material :

  • 1 Kit Axe-X
  • Insert M3 x D4.6 x L5.0 (Attention, these are new inserts very different than those I used before, and much better !!! for an M3, I make a 4.2mm hole)
  • 1 E3D HOTEND
  • 1 Extruder FLEXION for E3D
  • 1 Plastic reed sensor 2.5*14
  • 1 Round neodymium magnet 6*3

Additional information :

  • The holding block for the E3D V6 hotend must be modified, just remove a corner so that it fits without problems, just the hole, and file a little on the side (+/- 30 minutes with small files xD )
  • I used the switch end X to make a filament detector and insert it in the “Filament” part (Attention, I made it in speed after the upgrade with different tolerances the time to calibrate the extruder
  • The screws delivered with the extruder can no longer fix it because too short, it is missing 3 or 4mm, I just used normal screws with a piece of sticky tape to prevent the pieces from moving, until I find suitable screws

UPDATE :

  • 2020/04/03 :
    • Creation of the project (V0.0)
    • Addition of the STL and photo of the project (V0.0)

3D printing settings

-

Advertising


Issue with this design? Report a problem.

Would you like to support Cults?

You like Cults and you want to help us continue the adventure independently? Please note that we are a small team of 3 people, therefore it is very simple to support us to maintain the activity and create future developments. Here are 4 solutions accessible to all:

  • ADVERTISING: Disable your banner blocker (AdBlock, 
) and click on our banner ads.

  • AFFILIATION: Make your purchases online by clicking on our affiliate links here Amazon.

  • DONATE: If you want, you can make a donation via Ko-Fi 💜.

  • WORD OF MOUTH: Invite your friends to come, discover the platform and the magnificent 3D files shared by the community!


Sharing and downloading on Cults3D guarantees that designs remain in makers community hands! And not in the hands of the 3D printing or software giants who own the competing platforms and exploit the designs for their own commercial interests.

Cults3D is an independent, self-financed site that is not accountable to any investor or brand. Almost all of the site's revenues are paid back to the platform's makers. The content published on the site serves only the interests of its authors and not those of 3D printer brands who also wish to control the 3D modeling market.

100% secure payment by credit card, PayPal, Apple Pay, Google Pay, etc.
View all payment options.