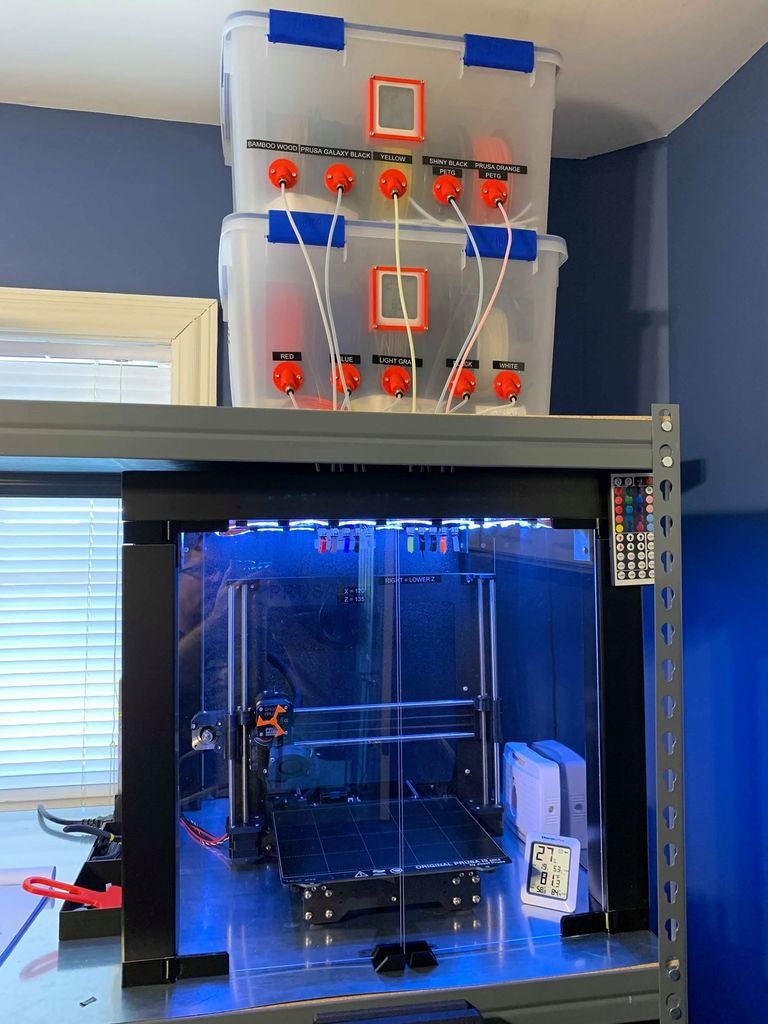
I wanted a ikea lack enclosure that had filament fed into it via ptfe tubes coming out of dryboxes.
I really like a lot of things about the original prusa lack enclosure but wanted a few changes.
For example, my printer is on a muscle rack shelving unit bolted to the wall. It is much sturdier than a couple of lightweight lack tables stacked vertically so I don't need the bottom table as a stand.
The legs of the table are connected to the shelf with a steel plate on top for fire safety. I really don't like the idea of something that gets up to 500 degrees F sitting on top of particle board shelving so there is sheet metal construction glued above and below the printer god forbid that is needed.
Because the table isn't sitting on the mostly hollow lack table noise is reduced quite a lot which is great.
I modified a few parts of the original prusa lack enclosure design seen here
https://www.thingiverse.com/thing:2864118
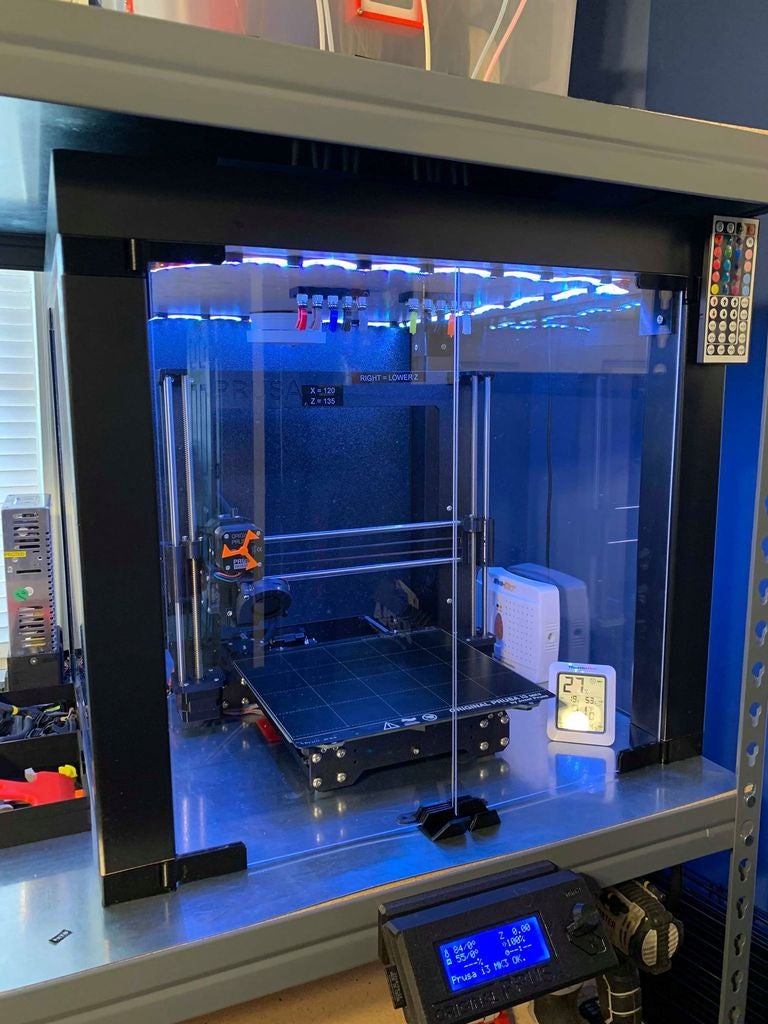
I used 3mm acrylic panels from tap plastics. The standard door knobs don't fit very tightly on this so I modified the file to fit tighter such that it doesn't even need glue.
https://www.thingiverse.com/thing:3450802
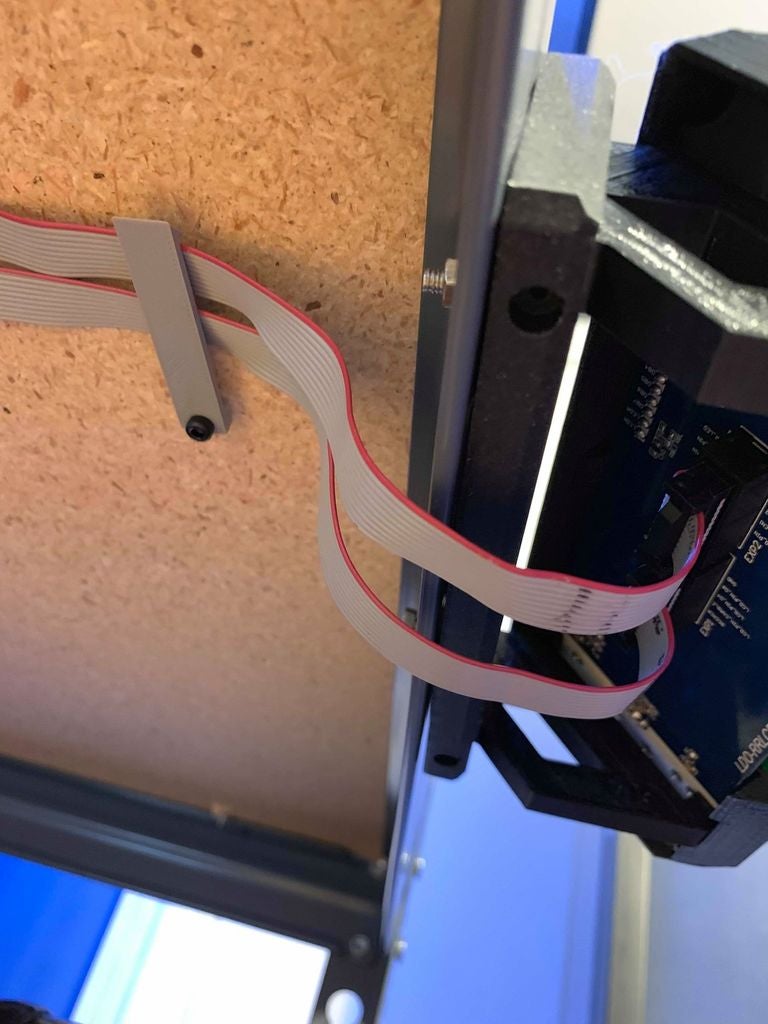
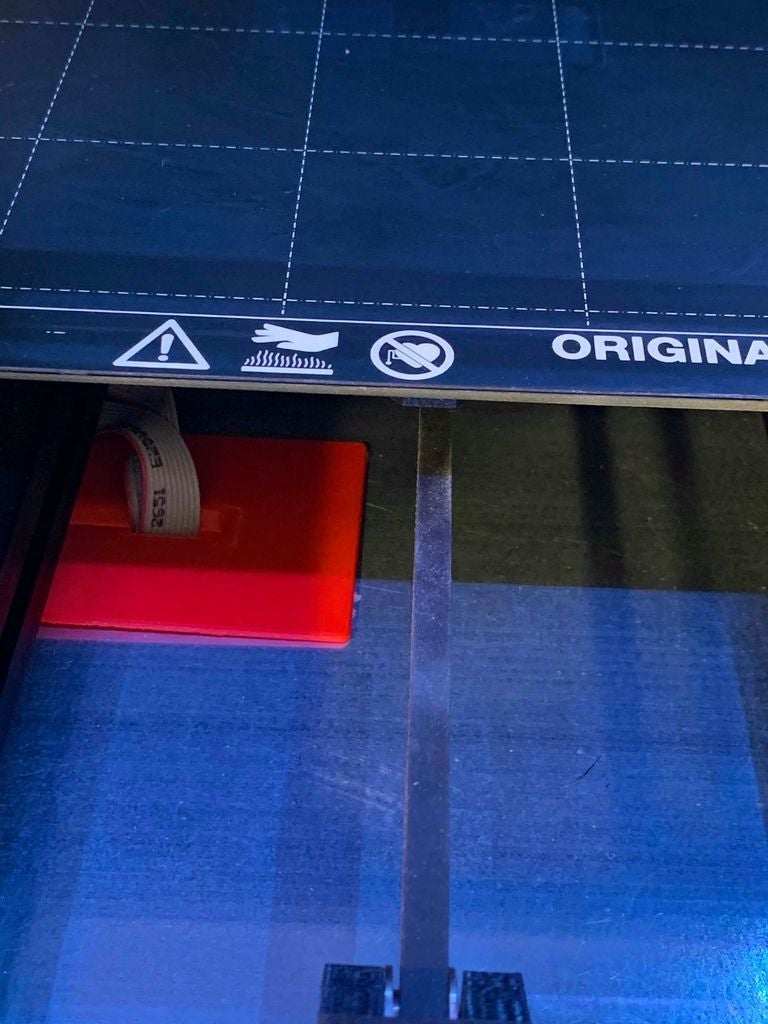
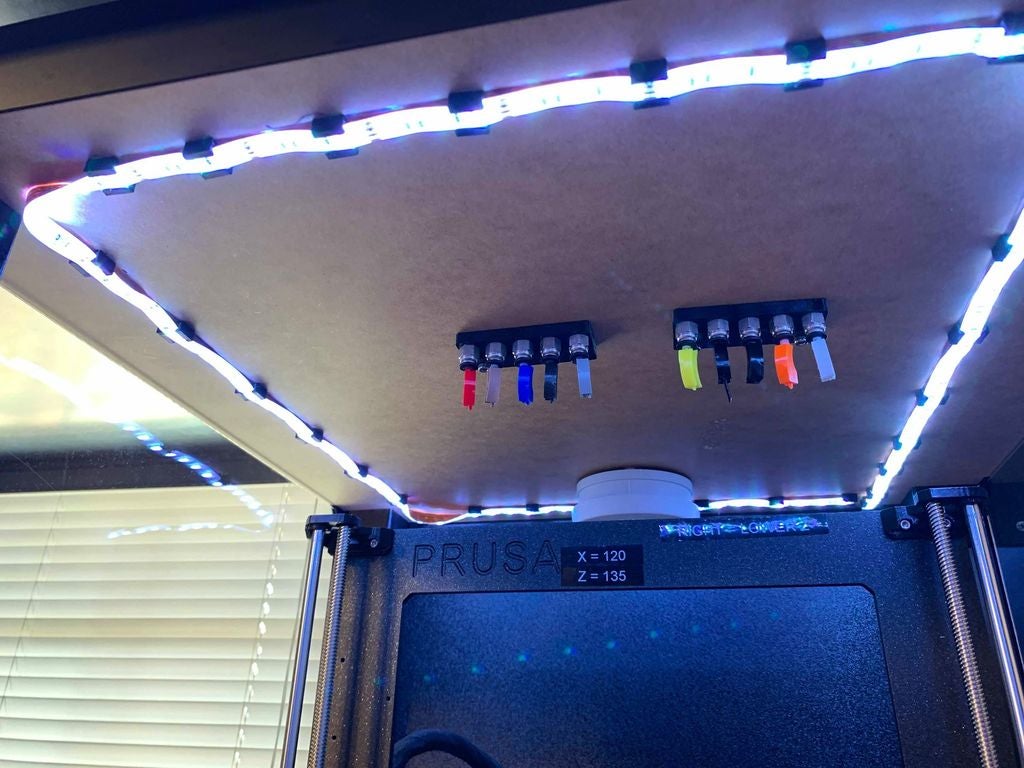
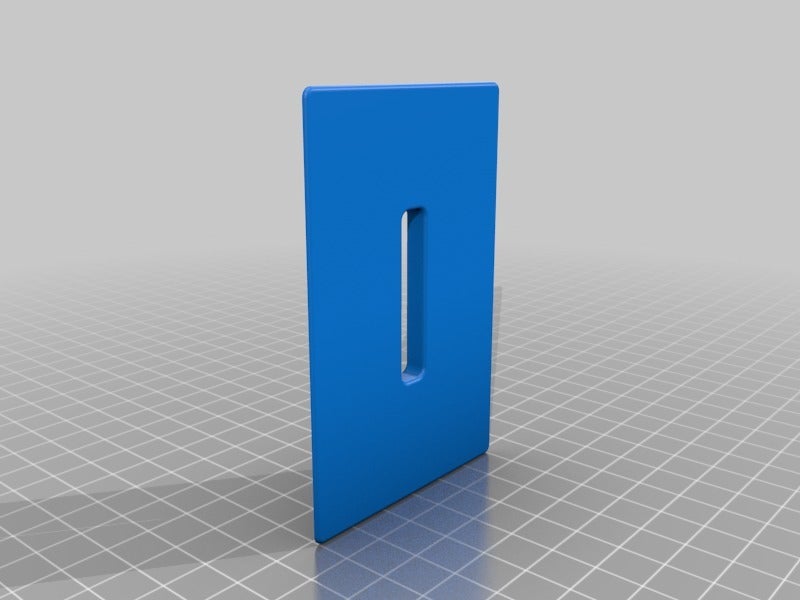
I wanted the lcd panel outside the enclosure. This is a godsend being able to go through the menu without opening the doors. However I didn't want the ribbon cable interfering with the doors opening and closing so I cut through the sheet metal and shelf and ran the ribbon cable underneath. I created a grommet to protect the cable and clean up the look
https://www.thingiverse.com/thing:3451403
I also created some ribbon cable clips to hold it to the underside of the shelf
https://www.thingiverse.com/thing:3451480
The original design has the power supply connected to a table leg underneath the enclosure however sitting on a shelf this doesn't work. I just sat the power supply outside the enclosure.
The orignal enclosure design has some really shitty led strip clips btw. They are huge and fit very loosely leaving a very sloppy look.
I have this led strip from amazon
https://www.amazon.com/gp/product/B07GP4WXHN/ref=oh_aui_search_asin_title?ie=UTF8&psc=1
This design scaled up 25 percent in size works perfectly with it and looks much nicer than the prusa led clip design
https://www.thingiverse.com/thing:333778
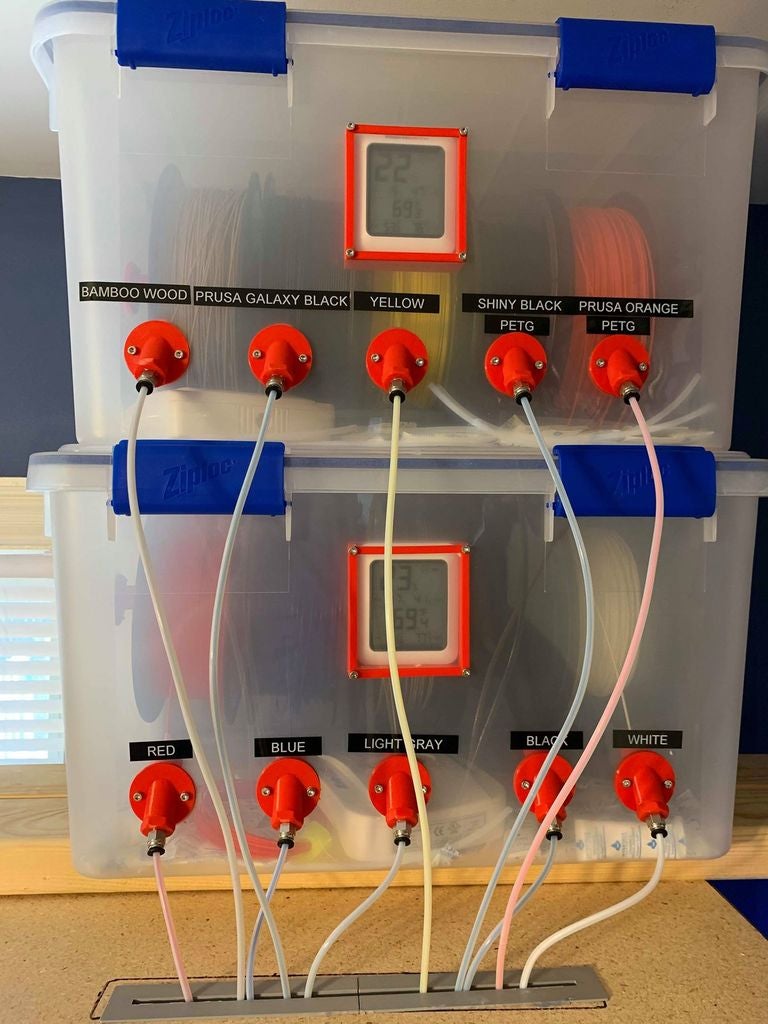
Inside the enclosure I have this dessicant. It is great because the color changes when wet and you can plug it in to dry it back out
https://www.amazon.com/gp/product/B000H0XFCS/ref=ppx_yo_dt_b_asin_title_o04_s00?ie=UTF8&psc=1
As well as this temp/humidity sensor
https://www.amazon.com/gp/product/B01H1R0K68/ref=ppx_yo_dt_b_asin_title_o07_s00?ie=UTF8&psc=1
Regarding the drybox.
The original design has filament sitting on spools entering the enclosure from above. This is great but doesn't allow for easy storage of filaments that you don't want exposed to humidity. I suppose that you could store filament in dryboxes or bags with dessicants and then add to a spool for each print and then remove after you are done, but lets be honest we are gonna leave the filament on the spool from time to time and eventually it will get ruined. A much better idea is to have a drybox that feeds directly to inside the enclosure via capped ptfe tubes so the only time the filament is exposed is when it is printing.
The box itself is a ziplock gasketed tub.
https://www.walmart.com/ip/Ziploc-44-Qt-11-Gal-WeatherShield-Storage-Box-Clear-Available-in-a-Case-of-4-or-Single-Unit/38345583?athcpid=38345583&athpgid=athenaItemPage&athcgid=null&athznid=PWVUB&athieid=v0&athstid=CS020&athguid=29ffa613-7f5-1695191491a40f&athena=true
Inside of the box I have the same humidity sensors mentioned earlier but I needed a way to hold them inside the box so I could see the numbers easily. I created this design to mount the sensors.
https://www.thingiverse.com/thing:3421484
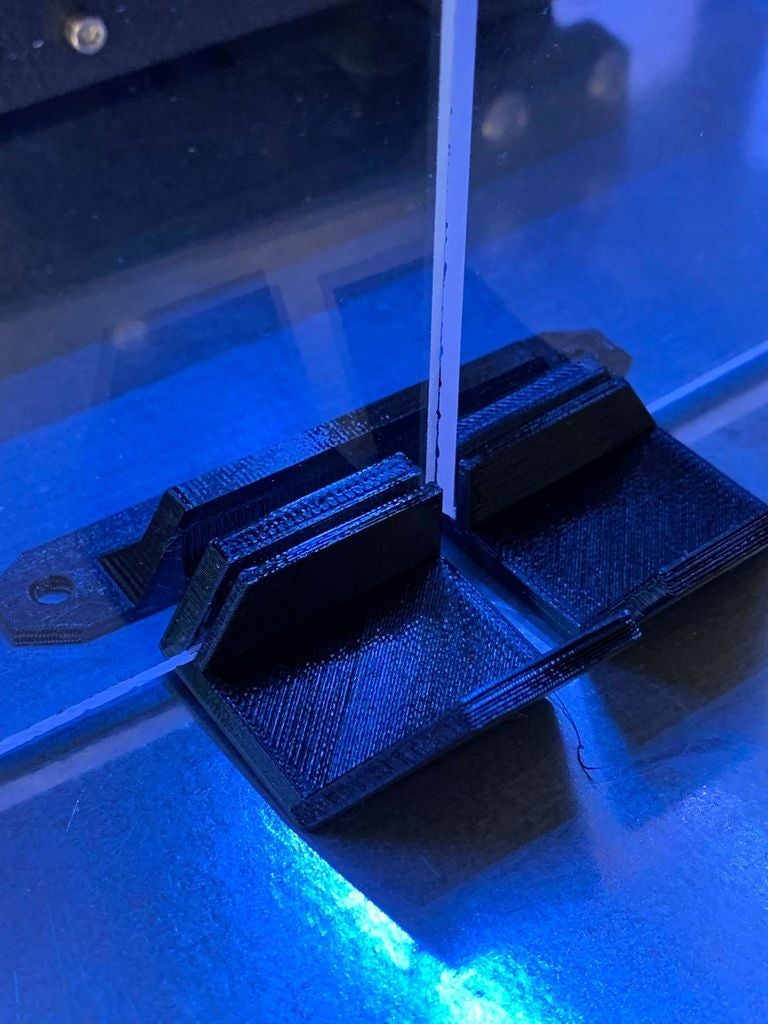
Inside is an 8mm threaded rod for the spools to sit on. It was surprisingly hard to find as all the big box home stores in my area only had SAE and no metric. Amazon saved the day
https://www.amazon.com/gp/product/B00G3R7OX0/ref=ppx_yo_dt_b_asin_title_o00_s00?ie=UTF8&psc=1
The rod sits on mounts from this design
https://www.thingiverse.com/thing:961881
I scaled them down a bit to better hold the rod so that it wouldn't spin and unravel spools not being used. I settled on 91percent which is a tight fit that prevents spinning of the rod.
The spools spin on 608zz bearings
https://www.amazon.com/gp/product/B00OKY2NWU/ref=ppx_yo_dt_b_asin_title_o03_s00?ie=UTF8&psc=1
That sit on the threaded rod and fight nicely inside of filament spool hubs from this design
https://www.thingiverse.com/thing:605360
The filament exits the box via this design
https://www.thingiverse.com/thing:2896547
Screwed into the filament guides are these pc4-m10 ptfe fittings
https://www.amazon.com/gp/product/B01KHN1HWY/ref=ppx_yo_dt_b_asin_title_o06_s00?ie=UTF8&psc=1
The fittings are threaded to accept these perfectly. They hold the ptfe tube tightly
I used this ptfe tube. The 3mm ID 4mm OD size is great because it is loose enough that 1.75mm filament slides through it without resistance but it fits inside a pc4-m10 fitting well
https://www.amazon.com/gp/product/B07B8CT1YH/ref=ppx_yo_dt_b_asin_title_o04_s00?ie=UTF8&psc=1
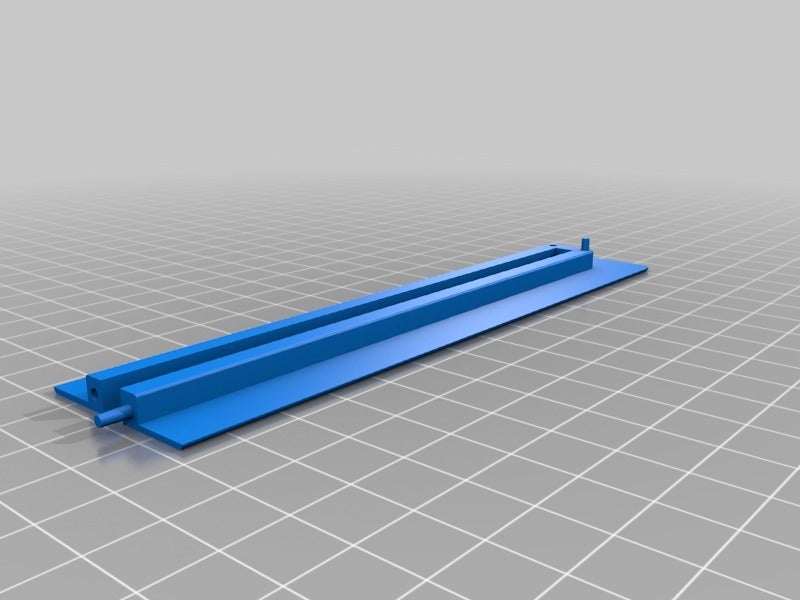
The ptfe tubes go through the shelf. I created this grommet to protect and guide them as well as clean up the look.
https://www.thingiverse.com/thing:3451429
The ptfe tubes then enter the lack enclosure and are held in place using this design and some pc4-m10 fittings.
https://www.thingiverse.com/thing:3439584
I created a top piece to clean up the top of the lack enclosure by slicing off a few mm of that design.
https://www.thingiverse.com/thing:3451470
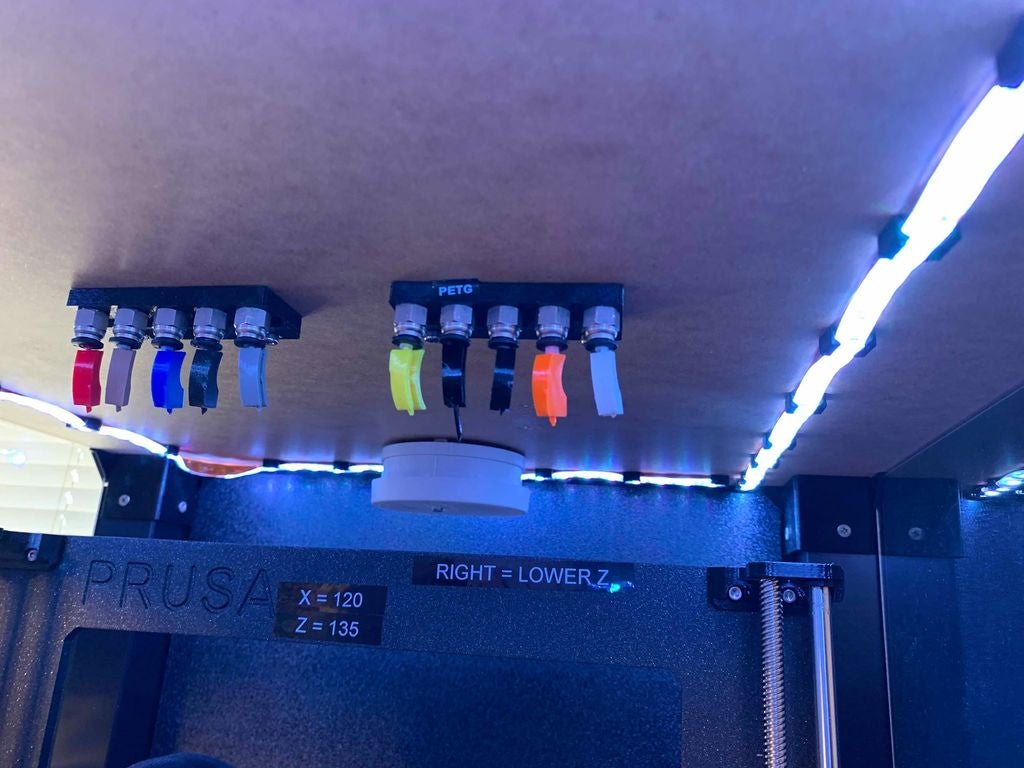
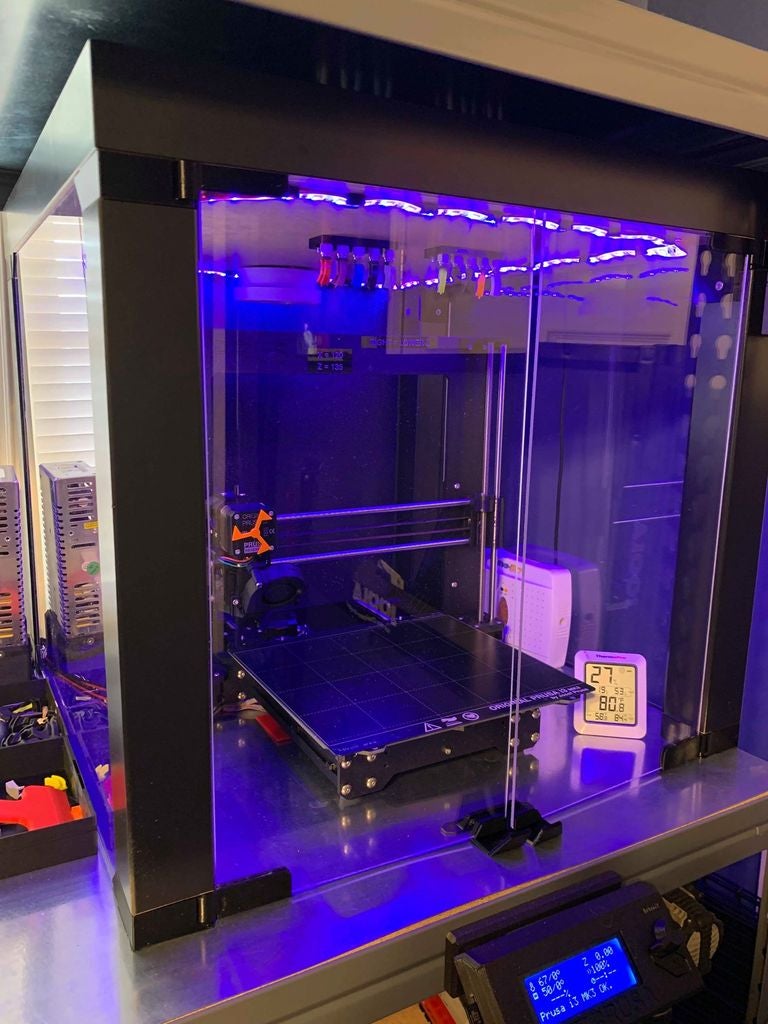
The filament is then held in place at the end of the ptfe tube using these clips
https://www.thingiverse.com/thing:3450830
They are the best filament clips I've ever used, slightly modified to better fit inside the enclosure. To start a print you remove the cap, pull down filament to the extruder and it pulls through the ptfe tube all the way to the drybox, then when you are done you just feed the filament back up and put the cap back on. The caps are printed in the color of each filament. I used petg for my petg and pla for my pla. The top of the enclosure doesn't get hot enough to reach the glass point of pla so this is fine.
:format(webp)/https://fbi.cults3d.com/uploaders/13855236/illustration-file/a549fbed-3106-4c3f-b376-fce8495c07e7/52944319_2527871113908002_7084204957368320000_n.jpg)


/https://preview3d-images.cults3d.com/j9ewpv20okfnb1miy0z134p943vr)
/https://preview3d-images.cults3d.com/g7pi0xtme200ngysuvstg7vopv9k)
/https://preview3d-images.cults3d.com/y218mnzpihbj92edz3ck5g4bwkmp)
/https://preview3d-images.cults3d.com/sxedp34m2nenhistb8znjbkte38i)
/https://preview3d-images.cults3d.com/zyeyh176dem1hff0afckqcr266ek)


