Skip to content

Porsche Panamera 970 Phone Mount

Advertising
Advertising
?
Creation quality: 5.0/5 (1 vote)
Evaluation of members on the printability, utility, level of detail, etc.

  • 2.2k views
  • 7 downloads

License
3D design format
STL Folder details Close
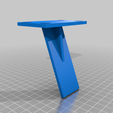
  • ARM_Panamera_970_Phone_Mount_v3.stl
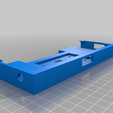
  • BASE_Panamera_970_Phone_Mount_v2.stl
  • BODY_Panamera_970_Phone_Mount_v2.stl
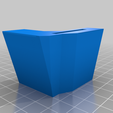
  • WEDGE_Panamera_970_Phone_Mount.stl

Learn more about the formats

Publication date 2021-06-20 at 01:02
?
Published to Thingiverse on: 2020-05-20 at 23:47
Design number 455164

duanel

3D printer file info

3D model description

Updated 06/23/20: v3 has a relocated arm to keep the body from pressing on the Panamera's armrest and a little more room "cut out" at the top of the body to make removing the phone more easy.

Updated 05/27/20: v2 has a better angle for the arm, refined body to hold phone and make it easier to remove, MUCH better base that fits ashtray better.

Introduction

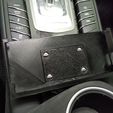
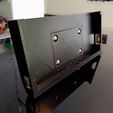
There's no attractive and functional phone holder for the Porsche Panamera (especially if you don't want to use adhesives and trip clips). It's a niche project, but works exceptionally well... and who needs an ashtray anyway?! This is compatible with 2010 - 2016 Panamera models (970.1 and 970.2) and is designed for my Asus ROG Phone II (hey, I said it was niche...), but could be modified easily as the phone holder body is just a box. The holder BASE and WEDGE should be printed in TPU or FLEX and are simply inserted into the ashtray. No clips, no adhesive, no modifications to your car. The TinkerCAD is maintained here:
* v1: https://www.tinkercad.com/things/2BlIoSTxllE.
* v2: https://www.tinkercad.com/things/c62ldRzIpXI

Printing Instructions:

  • Print the WEDGE in TPU or FLEX. I used clear TPU from SAINSMART. Printing with a .10mm layer thickness works well. Print bottom-down (normal orientation). No supports are needed.
  • Print the BASE in TPU or FLEX. I used the same SAINSMART TPU. I recommend printing at a relatively large layer height. Either .20 or .30mm leaves nice ridges on the sides that seem to grip the ashtray nicely. Print top-down (slot facing down) and you won't need any supports.
  • Print the ARM in something heat appropriate. PLA might get a little flexy in hot climates. I used ABS for the latest version, but PETG works in cooler climates (keep in mind tolerances and material shrinkage if you use ABS). Print upside down with supports, with the mounting face on the print bed and the supports for the screw recesses will be minimal. I printed without supports while testing and the results were acceptable, but I wanted more strength. Layer height is at your discretion. Thicker layers print faster and have a different aesthetic. I printed my parts at .20mm.
  • Print the BODY in the same kind of material as the ARM using the same settings, with supports. Print normal orientation (back on the print bed)... I experimented printing vertically, but had some warping because it took longer. YMMV.

Assembly Instructions:

  • You will need (4) 10-32 x ~1/4 or 3/8 long screws and nuts with a shallow head to attach the body to the arm.
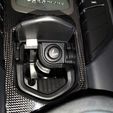
  • Insert the WEDGE between the ashtray and console opening just above the release point (see ashtray photo above). This prevents accidental ejection of the ashtray as well as firms up the mounting for the holder.
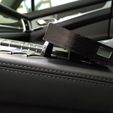
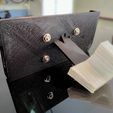
  • Insert the ARM through the "t" shaped opening on the front of the BODY with the ARM angled towards the bottom of the body. (See photos for reference.)
  • Use the 4 10-32 screws the BODY to the ARM. You may need to use a screwdriver as the tolerance is very tight. Tighten the 4 nuts reasonably onto the screws. Some washers will prevent crushing the plastic.
  • Insert the ARM of the assembly into the slot in the BAS. Note the orientation of the BASE relative to the ashtray.
  • Gently insert the BASE fully into the ashtray.

Removal Instructions:

  • Gently lift the BODY/ARM/BASE assembly straight out of the ashtray.
  • Remove the stabilizing WEDGE from between the ashtray and the console opening.

3D printing settings

-

Advertising


Issue with this design? Report a problem.

Would you like to support Cults?

You like Cults and you want to help us continue the adventure independently? Please note that we are a small team of 3 people, therefore it is very simple to support us to maintain the activity and create future developments. Here are 4 solutions accessible to all:

  • ADVERTISING: Disable your banner blocker (AdBlock, …) and click on our banner ads.

  • AFFILIATION: Make your purchases online by clicking on our affiliate links here Amazon.

  • DONATE: If you want, you can make a donation via Ko-Fi πŸ’œ.

  • WORD OF MOUTH: Invite your friends to come, discover the platform and the magnificent 3D files shared by the community!


Sharing and downloading on Cults3D guarantees that designs remain in makers community hands! And not in the hands of the 3D printing or software giants who own the competing platforms and exploit the designs for their own commercial interests.

Cults3D is an independent, self-financed site that is not accountable to any investor or brand. Almost all of the site's revenues are paid back to the platform's makers. The content published on the site serves only the interests of its authors and not those of 3D printer brands who also wish to control the 3D modeling market.

100% secure payment by credit card, PayPal, Apple Pay, Google Pay, etc.
View all payment options.