Skip to content

VertiBird

Advertising
?
Creation quality: 5.0/5 (1 vote)
Evaluation of members on the printability, utility, level of detail, etc.

  • 2.2k views
  • 2 likes
  • 29 downloads

License
3D design format
STL Folder details Close
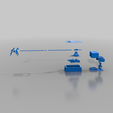
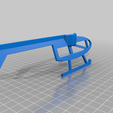
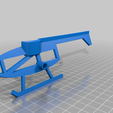
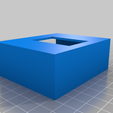
  • VBChopperLeft.stl
  • VertiBirdChopperRight.stl
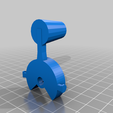
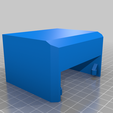
  • VertiBirdControlHandle.stl
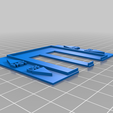
  • VertiBirdControlLabel.stl
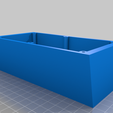
  • VertiBirdControllerBoxShort.stl
  • VertiBirdControllerBoxTall.stl
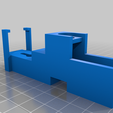
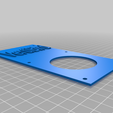
  • VertiBirdControllerMainPlate.stl
  • VertiBirdMotorMount.stl
  • VertiBirdPivotBoxTop.stl
  • VertiBirdPivotDome.stl
  • VertiBirdPivotHinge.stl
  • VertiBirdPivotMainBox.stl
  • VertiBirdPivotMotorMount.stl
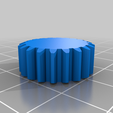
  • VertiBirdPivotSmallGear.stl
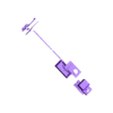
  • VertiBirdRodConnector.stl
  • VertiBirdRodX2.stl
  • vertibird.stl

Learn more about the formats

Publication date 2021-06-20 at 23:08
?
Published to Thingiverse on: 2020-02-06 at 21:54
Design number 455678

ljbeng

3D printer file info

3D model description

This thing was made with Tinkercad. Edit it online https://www.tinkercad.com/things/10viA752liE

https://www.youtube.com/watch?v=0eCAvSWgvUw

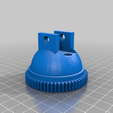
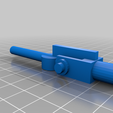
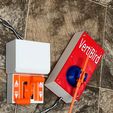
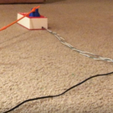
When I was growing up in the 70's these were a very popular toy. The original had a cable that ran to the helicopter and the cable would spin making the helicopter move up and down. Then another rod would tip the chopper forward or reverse to make the motion move forward or reverse.

This is a little different spin. It has the motor on the helicopter and power wires are run out to the motor. Forward and reverse is accomplished by spinning a separate motor a the pivot joint. The power travels through a microphone audio jack that can spin freely. This prevents the wires from getting twisted up.

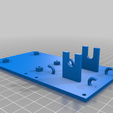
An arduino is required along with 2 potentiometers, a motor driver and a high current 5V regulator.

Detailed Pictures of the assembly process can be found here:
https://hackaday.io/project/169813-vertibird-redo

Here is a list of parts you will need:

Audio Jack and Plug for center Dome.

https://www.amazon.com/gp/product/B077XVDQ5R/ref=ppx_yo_dt_b_asin_title_o02_s00?ie=UTF8&psc=1

https://www.amazon.com/gp/product/B06XG3YTC4/ref=ppx_yo_dt_b_asin_title_o02_s01?ie=UTF8&psc=1

If you want to modify the parts to make it work with the mono plug and jacks, you would only need to modify the mount in the center where the jack would be mounted.

Motor Driver:
https://www.sparkfun.com/products/14450

Center Dome Motor:
https://www.amazon.com/Cylewet-Motor-Shaft-Arduino-CYT1037/dp/B01N9MS3UZ/ref=sr_1_3_sspa?keywords=gear+motor&qid=1581021316&sr=8-3-spons&psc=1&spLa=ZW5jcnlwdGVkUXVhbGlmaWVyPUEyU0tINzNQRTJXVlNGJmVuY3J5cHRlZElkPUEwMDQ3NzU2MVlGUlJPNzNORUpSVSZlbmNyeXB0ZWRBZElkPUEwNTk0ODAzSVFCR0pNVDZBNzEyJndpZGdldE5hbWU9c3BfYXRmJmFjdGlvbj1jbGlja1JlZGlyZWN0JmRvTm90TG9nQ2xpY2s9dHJ1ZQ==

Arduino:
https://www.sparkfun.com/products/13975

Potentiometer x 2:
https://www.digikey.com/product-detail/en/tt-electronics-bi/P160KN-0QC15B10K/987-1301-ND/2408878

Power Supply:
https://www.amazon.com/Chanzon-Switching-100-240V-Transformer-Security/dp/B07G1219LQ/ref=sr_1_3?keywords=12v+1+amp&qid=1581009320&sr=8-3

A good 5v regulator for the motors. Don't try to use the 5v Arduino power for the motors. It IS ok to use the Arduino 5v for the potentiometers.

https://www.amazon.com/DROK-Adjustable-Electronic-Transformer-Stabilizer/dp/B00SY37S00/ref=sr_1_2_sspa?keywords=5+volt+regulator&qid=1581009473&sr=8-2-spons&psc=1&spLa=ZW5jcnlwdGVkUXVhbGlmaWVyPUEyNVBDS0dOMDdVOUZGJmVuY3J5cHRlZElkPUEwMTY1MDUxMUZONjJOS1YzVDRGWSZlbmNyeXB0ZWRBZElkPUEwMjU5NTU3MTdHUTVNRTQwU1MxSSZ3aWRnZXROYW1lPXNwX2F0ZiZhY3Rpb249Y2xpY2tSZWRpcmVjdCZkb05vdExvZ0NsaWNrPXRydWU=

Chopper Motor:
https://usa.banggood.com/Coreless-Reducer-CW-Motor-Propeller-Combo-Set-For-RC-Models-DIY-p-998786.html?utm_design=41&utm_source=emarsys&utm_medium=Neworder171109&utm_campaign=trigger-emarsys&utm_content=winna&sc_src=email_2675773&sc_eh=ddedf71ef6b23ad31&sc_llid=19738787&sc_lid=105229698&sc_uid=mlck2km0nC&ID=49510&cur_warehouse=USA

I recommend using 18ga wire all the way to the motor. I tried smaller gauges and did not get enough power to take off due to voltage drop.

3D printing settings

-

Advertising


Issue with this design? Report a problem.

Would you like to support Cults?

You like Cults and you want to help us continue the adventure independently? Please note that we are a small team of 3 people, therefore it is very simple to support us to maintain the activity and create future developments. Here are 4 solutions accessible to all:

  • ADVERTISING: Disable your banner blocker (AdBlock, …) and click on our banner ads.

  • AFFILIATION: Make your purchases online by clicking on our affiliate links here Amazon.

  • DONATE: If you want, you can make a donation via Ko-Fi πŸ’œ.

  • WORD OF MOUTH: Invite your friends to come, discover the platform and the magnificent 3D files shared by the community!


Sharing and downloading on Cults3D guarantees that designs remain in makers community hands! And not in the hands of the 3D printing or software giants who own the competing platforms and exploit the designs for their own commercial interests.

Cults3D is an independent, self-financed site that is not accountable to any investor or brand. Almost all of the site's revenues are paid back to the platform's makers. The content published on the site serves only the interests of its authors and not those of 3D printer brands who also wish to control the 3D modeling market.

100% secure payment by credit card, PayPal, Apple Pay, Google Pay, etc.
View all payment options.