Skip to content

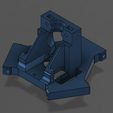
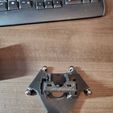
Flsun QQS Ball Mount Effector

Advertising
Advertising
?
Creation quality: 5.0/5 (1 vote)
Evaluation of members on the printability, utility, level of detail, etc.

  • 3.2k views
  • 6 likes
  • 22 downloads
  • 1 comment

License
3D design format
STL Folder details Close
  • 1PC BALL MOUNT EFFECTOR_4MM.stl
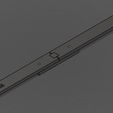
  • 6.6MM_.25IN SHAFT ARM.stl
  • Belt Retainer.stl
  • CENTER BRACE_ROD FIXTURE.stl
  • FIXTURE.stl
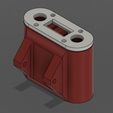
  • Slide Main Body.stl
  • back cover.stl
  • top cover.stl

Learn more about the formats

Publication date 2021-06-26 at 17:59
Design number 459476

3D printer file info

3D model description

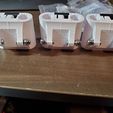
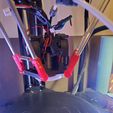
This is my version of the Flsun SR effector and rods for the QQS. It improves accuracy, reduces noise, and can improve speed.

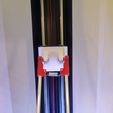
This design is for the use of 10mm ball stud that are threaded with 4mm threads. I used 60mm long full thread bolts cut down to approximately 54mm long for the effector, and used 4mm x 12mm bolts for the slide.

The slides are designed for long series LM8LUU linear bearings. I used these https://www.amazon.ca/gp/product/B083XQTH41/ref=ppx_yo_dt_b_asin_title_o01_s00?ie=UTF8&psc=1

But this will be up to you.

I would refrain from using 2 shorts bearing stacked, I tried this and has alignment issues, so a single 45mm long bearing is best.

For the balls, I used https://www.amazon.ca/gp/product/B07HQ72H1R/ref=ppx_yo_dt_b_asin_title_o06_s00?ie=UTF8&psc=1
and work great.

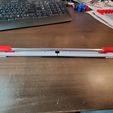
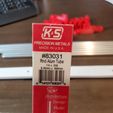
For the Arms, I used 1/4" aluminum tubes I purchased from a local hobby store. I cut to a length of 255mm and glued one end on and let cure, I used 2 part 5 minute epoxy. once cured I used the fixture to set the lengths, do one at a time and the overall length is critical, only use one fixture to make all 6. this should make 285mm rods. But measure the best you can for yours and use that for your settings.

3D printing settings

For the effector, I used PETG-Carbon fiber, as I found this material hold up to the heat, as well is extremely stable dimmensionally.

The rod ends can be made from PETG, Nylon, PLA, printer must be pretty well calibrated as the diameter for the ball cup is tight and may even still require some work to get them a perfect fit. I used PETG for mine. And I took a spare ball and used a grinder to cut a slot in it, then mounted in an electric drill to shave the inside of the cup, the fit needs to be perfect, and no resistance to move the ball once installed.

Once you have all printed and installed. Perform calibration and enjoy.

Advertising


Issue with this design? Report a problem.

Would you like to support Cults?

You like Cults and you want to help us continue the adventure independently? Please note that we are a small team of 3 people, therefore it is very simple to support us to maintain the activity and create future developments. Here are 4 solutions accessible to all:

  • ADVERTISING: Disable your banner blocker (AdBlock, …) and click on our banner ads.

  • AFFILIATION: Make your purchases online by clicking on our affiliate links here Amazon.

  • DONATE: If you want, you can make a donation via Ko-Fi πŸ’œ.

  • WORD OF MOUTH: Invite your friends to come, discover the platform and the magnificent 3D files shared by the community!


Sharing and downloading on Cults3D guarantees that designs remain in makers community hands! And not in the hands of the 3D printing or software giants who own the competing platforms and exploit the designs for their own commercial interests.

Cults3D is an independent, self-financed site that is not accountable to any investor or brand. Almost all of the site's revenues are paid back to the platform's makers. The content published on the site serves only the interests of its authors and not those of 3D printer brands who also wish to control the 3D modeling market.

100% secure payment by credit card, PayPal, Apple Pay, Google Pay, etc.
View all payment options.