Skip to content

Nexus 7 (2012 & 2013) Wall Mount

Advertising
Advertising
?
Creation quality: 5.0/5 (1 vote)
Evaluation of members on the printability, utility, level of detail, etc.

  • 1.9k views
  • 17 downloads

License
3D design format
STL Folder details Close
  • Left_side.stl
  • Right_side.stl

Learn more about the formats

Publication date 2021-06-27 at 00:14
?
Published to Thingiverse on: 2020-10-04 at 19:54
Design number 459735

3D printer file info

3D model description

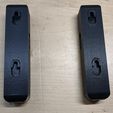
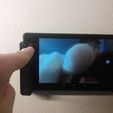
These brackets work with both the 2012 and 2013 (WiFi and WiFi+LTE) versions of the Nexus 7. For the 2013, if you want to use the front camera, it has to be put in with the power cable on the right. I have added a photo, where I am pointing at the camera on a Nexus 7 Second Generation (2013) WiFi+LTE.

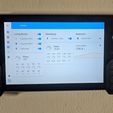
I got a few old tablets to use as wall panels for my home automation (Home Assistant). I needed something to hang it on the wall with. Using our phones to control everything was getting annoying.

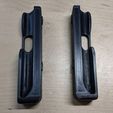
I remixed this from mpaulus's "Two-part wallmount for Google Nexus 7(2012)". He did a wonderful job with the inside curves and screw mounts, but it's too blocky on the front.

I curved quite a few places, to try to give it a more finished appearance.

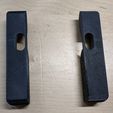
My magnetic cord I use with this didn't fit in the original cord holes. I made those slots, and extruded through both sides. Now, you do have to insert the magnet mount after putting the tablet in. I may make the slot up later, if I decide to make another.

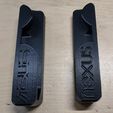
The logos on each side match the logo from the back of the tablet. The SVG were sourced from Wikipedia. The logo are embossed at 0.5mm. They could be painted in or something inlayed, if you're feeling really ambitious.

https://commons.wikimedia.org/wiki/File:ASUS_Logo.svg
https://commons.wikimedia.org/wiki/File:Google_Nexus.svg

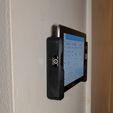
In the pictures, it is initially mounted with "nano tape" mounting tape. I simply placed tape on the brackets, put them on the tablet, opened a level app, and stuck it to the wall. Press hard to make it stick. To make it permeant, mark the holes, and screw it in.

Nano tape and double sided tape can fail pretty quickly sometimes, so this is only for getting it in the right place. It will fall eventually.

I did all the editing in Fusion 360, and slicing with Ultimaker Cura

Let me know if you like, or don't like this. Your input will help shape my future designs and remixes.

3D printing settings

-

Advertising


Issue with this design? Report a problem.

Would you like to support Cults?

You like Cults and you want to help us continue the adventure independently? Please note that we are a small team of 3 people, therefore it is very simple to support us to maintain the activity and create future developments. Here are 4 solutions accessible to all:

  • ADVERTISING: Disable your banner blocker (AdBlock, …) and click on our banner ads.

  • AFFILIATION: Make your purchases online by clicking on our affiliate links here Amazon.

  • DONATE: If you want, you can make a donation via Ko-Fi πŸ’œ.

  • WORD OF MOUTH: Invite your friends to come, discover the platform and the magnificent 3D files shared by the community!


Sharing and downloading on Cults3D guarantees that designs remain in makers community hands! And not in the hands of the 3D printing or software giants who own the competing platforms and exploit the designs for their own commercial interests.

Cults3D is an independent, self-financed site that is not accountable to any investor or brand. Almost all of the site's revenues are paid back to the platform's makers. The content published on the site serves only the interests of its authors and not those of 3D printer brands who also wish to control the 3D modeling market.

100% secure payment by credit card, PayPal, Apple Pay, Google Pay, etc.
View all payment options.