Real working Lawgiver (2012 model) bodykit for cal.43 PPQ T4E gun
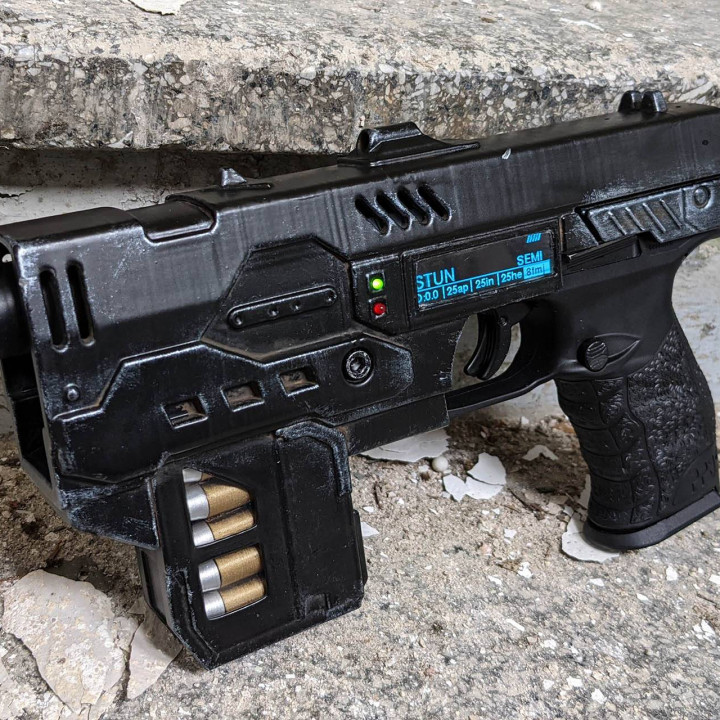

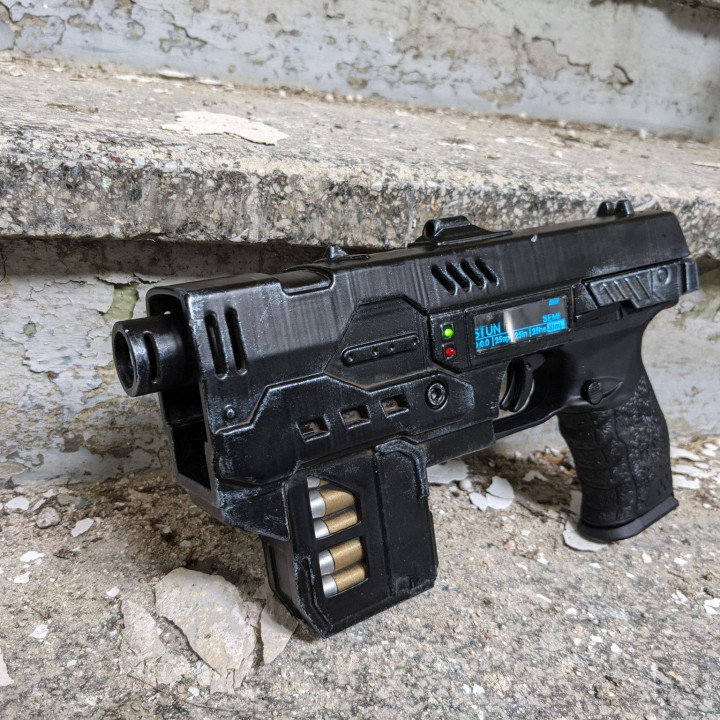


Real working Lawgiver (2012 model) bodykit for cal.43 PPQ T4E gun
Published 2021-07-01T09:19:52+00:00
Real working Lawgiver bodykit for cal.43 PPQ T4E Gun
Functions :
-startup-sequence as seen in Dredd movie from 2012
-real bullet count for fmj round type
-low ammo detection and visualization
-if slide stays in open position for a couple of seconds => reload will be assumed and fmj count will be reset to 8 if slide is closed
-nice to have without real impact: change ammunition type by pushing a button on the mag backside
-working holster/gun interaction, if gun is removed from the holster, startup sequence begins (DNA Check...)
Video:
https://youtu.be/DzzUT7qJJKc
If you like my work, I would appreciate a small donation.
Instructions:
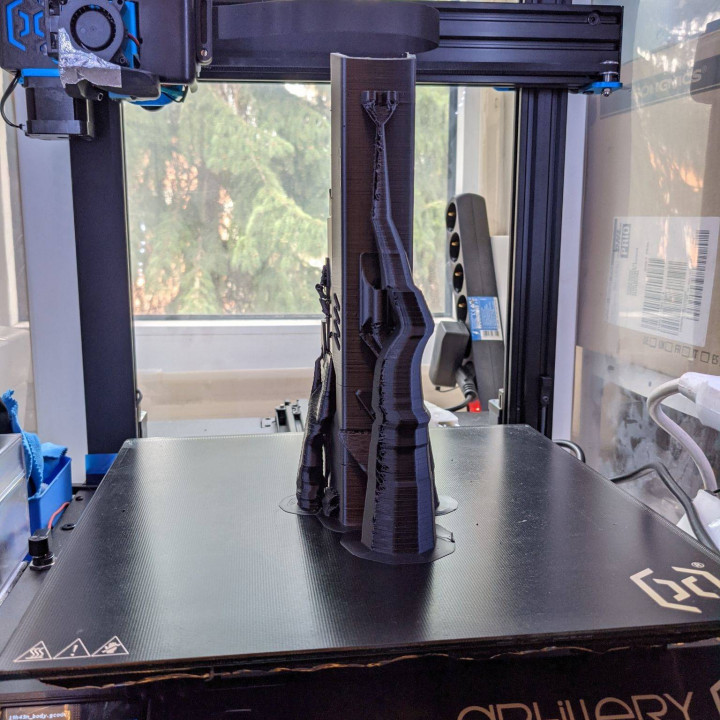
print part 1-8 with ABS/PLA+/PETG
print part 9 with flexible filament like TPU
optional print part 10 if holster is needed (can be attached to molle systems)
my workflow:
smoothing part 1-6 with acetone vapor
glue body, mag_body & barrel together
use some 1mm thick transparent plastic to fill the display cut out. Sand to fit and glue it also in. Protect the surface with some tape, also during paintjob ;-)
do paintjob for part 1-5 (dull black, highlights with silver dry brushing, dull clearcoat and finally some washing with brownish tone)
do paintjob for ammo parts (brass for shells & silver for the projectiles)
glue some thin transparent plastic windows into the mag_body and cap
glue projectiles and shells together and glue into mag_body and cap
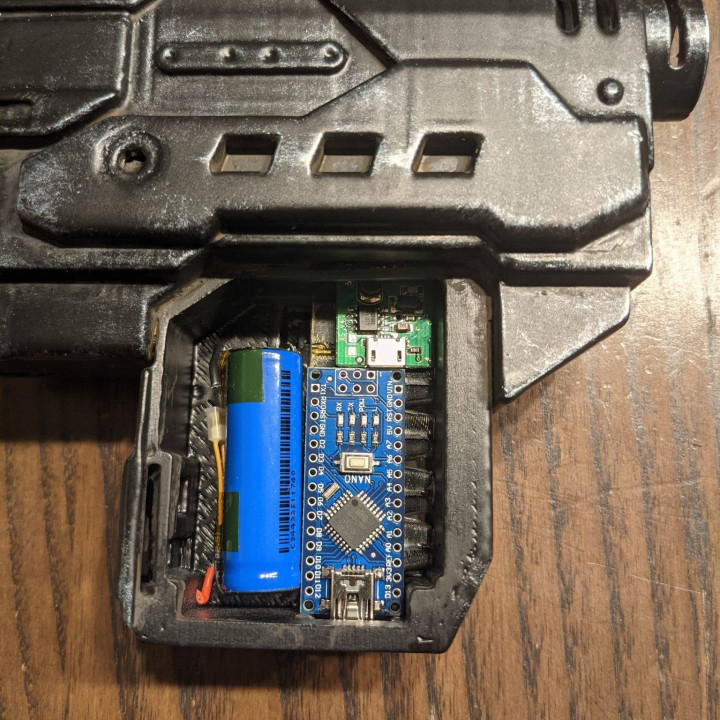
electronics:
!!!!build up first on breadboard to test functionality!!!
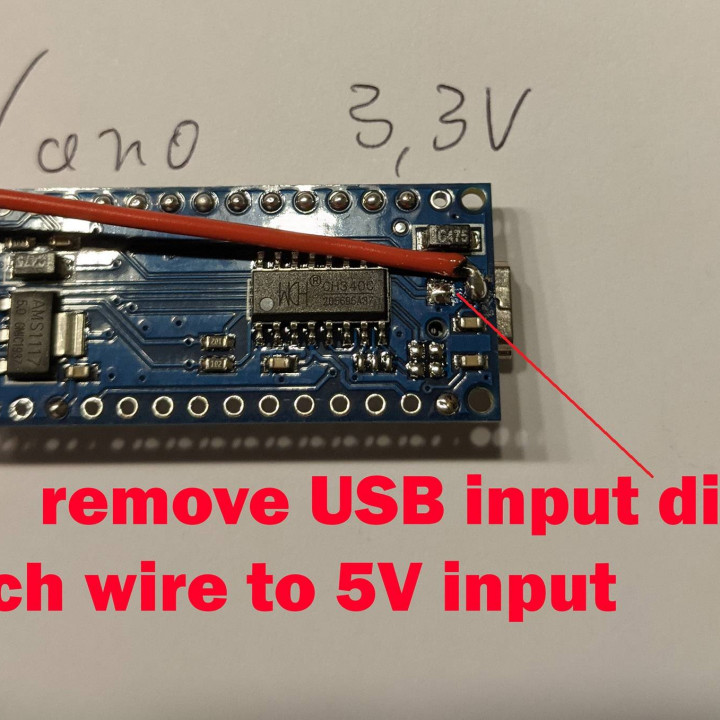
convert Arduino nano to 3.3V (display use 3.3v VCC), remove USB input diode from Nano PCB and attach a wire to the 5V USB input => this wire is 5V input from now (used for charging the LiIon battery). 3.3V input will be the 5V pin on the Nano (see schematics)
use schematics to finish the complete circuit:
-reed opener will switch on the electronics if gun is removed out of the holster (magnet inside the holster)
-micro momentary switch will change ammo type
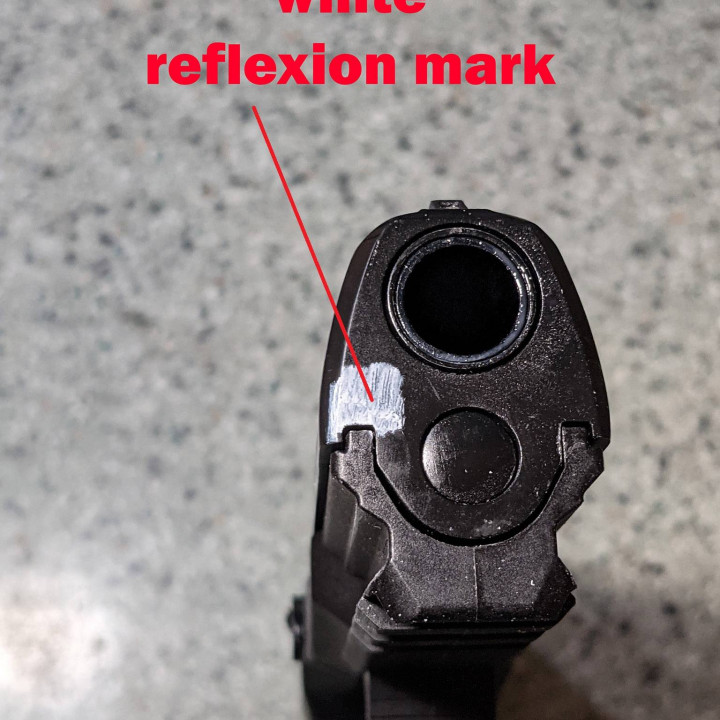
-reflective optical sensor is used to detect slide-movement and count ammo down
Use attached Arduino sketch and load it into the Nano.
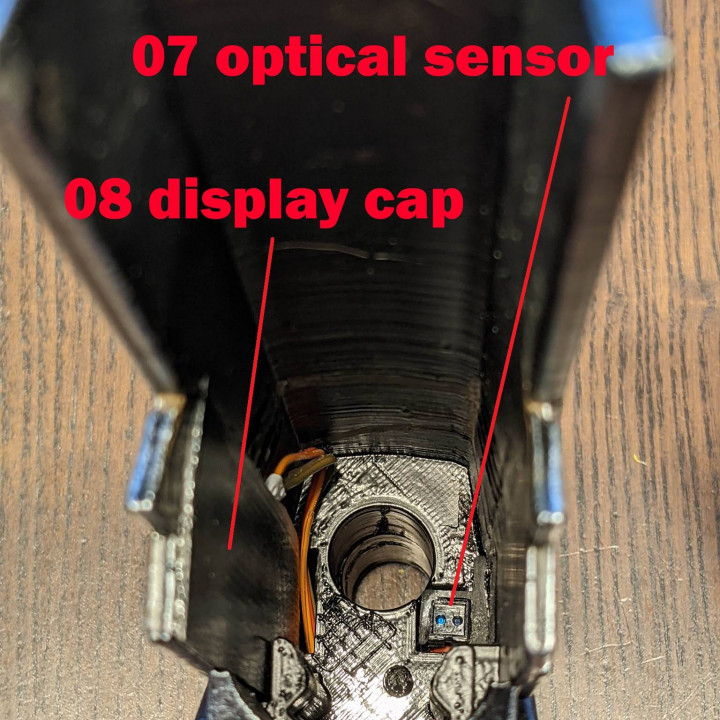
if electronics is functional, detach glued display from driver PCB board (cut off carefully, keep flex wiring intact!)
insert LEDs, display with driver board and optical sensor into the main body
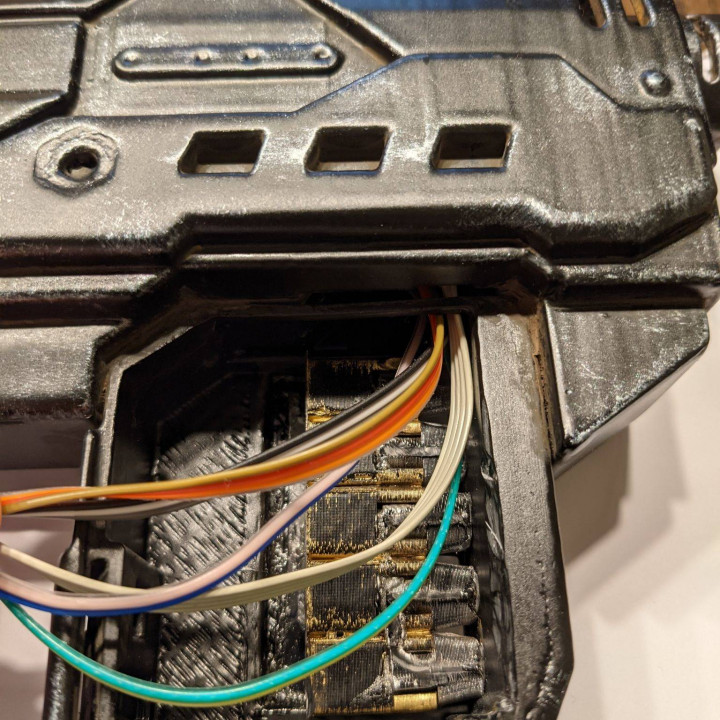
thread all wires down into the mag body
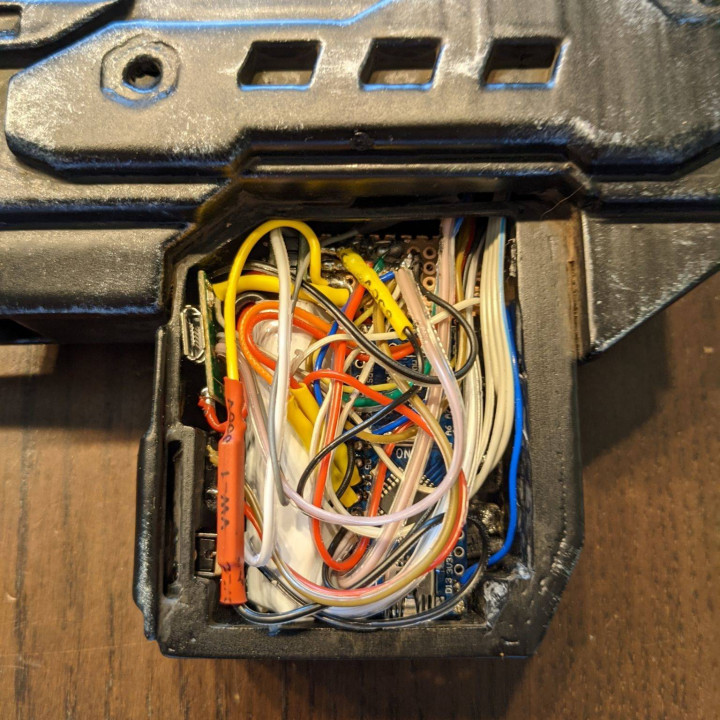
insert all other electronic stuff into the mag body (see pictures)
redo all necessary wirings
if electronic is also working inside the body:
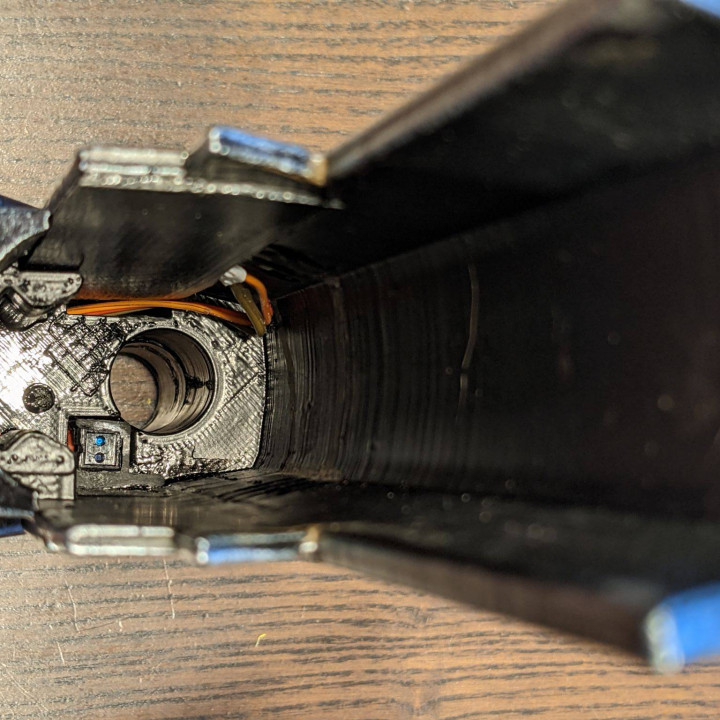
-use part 07 to fix the optical sensor in a suitable position (detect slide movement), small white mark on front slide of the gun needed
-insert display cap on the backsid and glue it also together
-use as small piece of rubber film to protect the switches on the backside of the mag (insert into the small slot and glue into place)
-use some tiny screws to attach the mag cap to the mag body
-attach the slide with some double-sided duct tape to the PPQ
-insert PPQ into the body kit and fix it with an M5 screw and nut
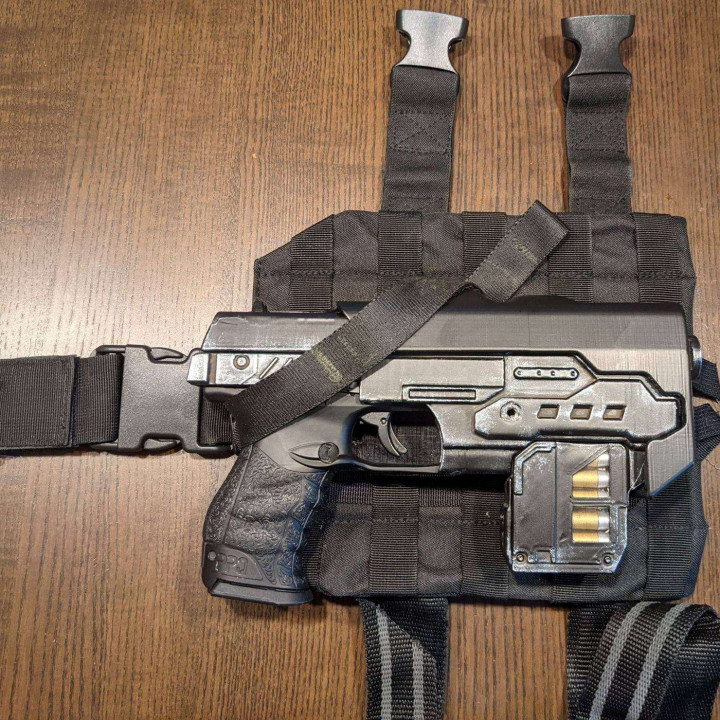
For the holster:
-Print in PETG or Nylon, may also do dull black paintjob
-glue some thin black felt into the inside of the holster
-attach to a molle drop leg platform
-for working holster/gun interaction => glue a magnet into the holster (mag section). Needs to be aligned to the reed opener inside the mag. If Gun is inserted into the holster, the electronics will be switched of.
Have fun an administer justice all over the place!
Electronics part list:
1x 10440 or 14430 LiIon battery
1x Arduino Nano
1x 2,08 inch 256*64 7PIN SPI blue OLED display w. SH1122
1x CNY70 Reflective Optical Sensor 50mA
1x 5V USB powerbank electronics for 1x LiIon battery
1x green LED 3mm
1x red LED 3mm
1x resistor 100
2x resistor 120
1x resistor 10k
1x reed opener
1x micro momentary switch
1x SS12D00 switch
2x 1.8-5V to 3.3V DC DC buck boost converter
some wires ;-)


| Date published | 01/07/2021 |