3D model description
I am happy to announce that since posting this design I had made an upgraded version of it, which features several improvements. Most notibly it no longer requires making a custom spring.
Please check it out at the link below:
https://cults3d.com/en/3d-model/various/quick-dettach-airsoft-silencer-bundle-no-custom-spring
I also made an experimental 3d printed spring that replaces the metal one. Check it out here:
https://cults3d.com/en/3d-model/various/3d-printed-spring-for-the-qd-suppressor
THERE ARE NOW CUSTOM BAFFLES PROVIDED IN THE PROJECT!!
IMPORTANT NOTE BEFORE YOU PURCHASE THIS ITEM
This suppressor requires an 18 mm diameter spring. There is a printable spring making tool that comes with this item. However you will still need a 0.5 - 0.8 mm spring steel wire (or if you happen to have a fitting spring you can use that). Ideally you would also need an 18/3 mm Oring, but I included a version of the Endcap file that does not require it. You will also need some basic tools like side cutters and needle nose pliers for this build.
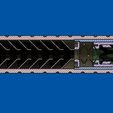
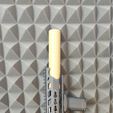
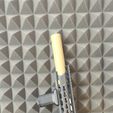
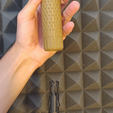
An AIRSOFT suppressor with a quick detach functionality. The suppressor can be filled with acoustic foam for noise reduction. It is a cool option for reducing the size of the replica for transport. It consist of two parts: suppressor and a compensator, which is always attached to the rifle. This way you can run your gun with or without the suppressor. The suppressor sits on the gun very securely once locked, so you do not need to worry about losing it during gameplay.
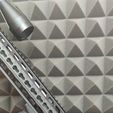
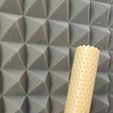
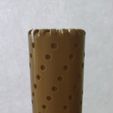
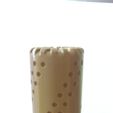
Threre are 3 Main Suppressor Body options included for you to choose (standard, spiral 1 row, spiral 2 rows). All of them are shown on the photos.
Dimensions:
-Diameter 35 mm (1.3779 in)
-Length 175.60 mm (6.9133)
If you have any questions regarding this item please feel free to contact me.
3D printing settings
There is not much to say as far as print settings for the suppressor parts go, everything can be printed in PLA on 0.2 mm (or whatever layer height you desire). Depending on the adhesion on your printer, you may need to add a brim to the compensator and the main suppressor body. Those parts should be printed standing on the thread side. None of the parts requires support material.
Post processing:
Remove the brims from the parts if you chose to use them. Remove the single layer bridge located where the BB leaves the suppressor (on the main suppressor body). The bridge is there to make it printable without supports.
The spring making tool should be as strong as possible, so be sure to give it 3 or 4 perimeters. You can print it at 0.3 mm layer height. Give the long spiral part a solid brim to prevent it from tipping over during printing.
The process of making a spring is pretty self explanatory. Put the threaded handle onto the spiral. Rotate the handle so that the little holes on the handle and the spiral align with each other. Insert the wire through the hole. At this point it is a good idea to bend the wire upwards using a pair of needle nose pliers. This should prevent the wire from getting out of the spring maker. Start rotating the handle. You can use the additional handle for more torque. BE VERY CAREFUL WHILE DOING THIS. The wire can spring back and hurt you so always keep tension on it. The spring only needs to be around 50 mm long. Cut the excess wire on both sides with side cutters and the spring is ready.
Assembly:
Optional. If you chose the Oring version of the endcap, insert the Oring there. The Oring placement is shown in the schematic.pdf file. Otherwise omit this step.
Assemble the suppressor according to the schematic. Assemble the endcap first and then screw on the main suppressor body. Once again be very careful while inserting the spring into the endcap. Use needle nose pliers to screw on the spring plate.
Screw the compensator onto your rifle. Make sure you screw it on tightly, as the whole mechanism will not work well if it loosens.
If you assembled everything correctly, you now should be able to attach and dettach the suppressor as shown on the GIFs. There are arrows on the suppressor body showing you the motions to go through to ATTACH or DETTACH The suppressor.
Tolerances on this suppressor are really tight in order to always keep it coaxial with the barrel of your gun. If the parts do not fit together well straight out of the printer, go through the ATTACH / DETACH motions a few times applying a bit of force. This should break in the parts.

/https://fbi.cults3d.com/uploaders/15111662/illustration-file/5acc49c6-130f-4395-bb3f-84f788bf9d0a/1.gif)


