Skip to content

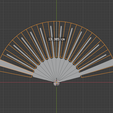
Spanish fan - cabriolet - 22.5cm

Advertising
Advertising
?
Creation quality: 5.0/5 (1 vote)
Evaluation of members on the printability, utility, level of detail, etc.

  • 3.7k views
  • 6 likes
  • 10 downloads

License
3D design format
MTL, OBJ, and ZIP Folder details Close
  • Branche (print 12x).mtl
  • Branche (print 12x).obj
  • Guide - patron.zip
  • panache (print 2x).mtl
  • panache (print 2x).obj

Learn more about the formats

Publication date 2021-07-10 at 17:30
Design number 469301

3D printer file info

3D model description

French :

Hand fan cabriolet and Spanish style : print 12 branches + 2 plumes (guard branches)

Warning! This requires dexterity and patience when creating the 1st fan.

Instructions:

I. The leaf model

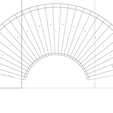
  • Print the pattern (3 A4 sheets)

  • Cut out the pattern

  • Use the pattern to create your own pattern / design on an A3 sheet

  • Cut out the design following the lines of the pattern

II. Form the fan

  • Fold the sheet to form the accordion of the fan

  • Glue a plume (guard branch) on the front side, at the white point

  • Glue each branch on the front face, at the black points

  • Glue the second plume on the back side (at the white point)

III. Binding

At the bottom is a 20 mm hole to pass a metal rod or brass. For my part I used 20mm 3D printer wire and melted the ends.

The result is more aesthetic with a binder screw / capscrew.

Guide printing precaution: avoid the printer margins, at the risk of decreasing the width of the fan in particular.

Good luck and good summer to all!

English:

Hand fan cabriolet and spanish style : print 12 branches + 2 feathers (guard branches)

Caution! This requires dexterity and patience when creating the 1st fan.

Instructions:

I. The pattern of the sheet

  • Print the pattern (3 A4 sheets)

  • Cut out the pattern

  • Use the pattern to create your own design on an A3 sheet

  • Cut out the design following the lines of the pattern

II. Form the fan

  • Fold the sheet to form the fan accordion

  • Glue a feather (guard branch) on the front side, at the white point

  • Glue each branch on the front side, at the black points

  • Glue the second plume on the back side (at the white point)

III. Binding

At the bottom there is a 20 mm hole to put a metal rod or brass. For my part I used 20 mm 3D printer wire and melted the ends.

The result is more aesthetic with a binding screw.

Caution when printing the guide: avoid the margins of the printer, at the risk of reducing the width of the fan in particular.

Good luck and have a good summer!

Advertising


Page translated by automatic translation. See the original version.
Issue with this design? Report a problem.

Would you like to support Cults?

You like Cults and you want to help us continue the adventure independently? Please note that we are a small team of 3 people, therefore it is very simple to support us to maintain the activity and create future developments. Here are 4 solutions accessible to all:

  • ADVERTISING: Disable your banner blocker (AdBlock, โ€ฆ) and click on our banner ads.

  • AFFILIATION: Make your purchases online by clicking on our affiliate links here Amazon.

  • DONATE: If you want, you can make a donation via Ko-Fi ๐Ÿ’œ.

  • WORD OF MOUTH: Invite your friends to come, discover the platform and the magnificent 3D files shared by the community!


Sharing and downloading on Cults3D guarantees that designs remain in makers community hands! And not in the hands of the 3D printing or software giants who own the competing platforms and exploit the designs for their own commercial interests.

Cults3D is an independent, self-financed site that is not accountable to any investor or brand. Almost all of the site's revenues are paid back to the platform's makers. The content published on the site serves only the interests of its authors and not those of 3D printer brands who also wish to control the 3D modeling market.

100% secure payment by credit card, PayPal, Apple Pay, Google Pay, etc.
View all payment options.