Skip to content

Weather station scaffold tube pole adaptor

Advertising
Advertising
?
Creation quality: 0.0/5 (0 votes)
Evaluation of members on the printability, utility, level of detail, etc.

  • 1k views
  • 1 like
  • 3 downloads

License
3D design format
STL Folder details Close
  • 32.5mmWeatherstation_scaff_tube_adaptor.stl
  • Scaff_tube_Drilling_guide_flanged.stl

Learn more about the formats

Publication date 2021-07-16 at 23:05
?
Published to Thingiverse on: 2021-07-16 at 23:34
Design number 473533

3D printer file info

3D model description

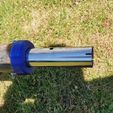
Currently, I have my weatherstation mounted on a 1 1/4" aerial pole fixed to the gable end of the house. I have always had erratic rainfall measurement and discovered that it is due to the aluminium pole, which is around 6Ft long, whipping around in the high winds. This is especially true with the Weatherflow's Tempest, which has a haptic rain sensor which appears to be exceptionally sensitive to vibration.
Consequently, I've decided to mount the weather station onto a scaffold tube mast, clear of the house. The only issue was how to affix the station to the pole without it looking like it had been carried out by Mr H Robinson and Co.
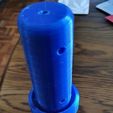
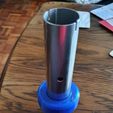
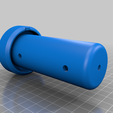
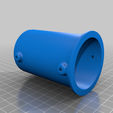
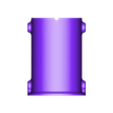
So I've designed this adaptor. It is designed to fit inside the end of the scaffold tube and covers the top edge, whilst having a circular (Annular) slot designed to accept a 1 1/4" aluminium or stainless steel tube which is the usual mounting pole diameter for these weather stations. It looks much neater that tube clamping the mounting pole to the side of the scaffold tube and provides a strong and rigid joint.
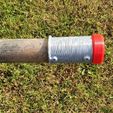
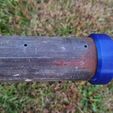
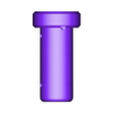
I've designed a drilling jig which slips over the scaffold tube to ensure the bolt holes are drilled in the scaffold tube aligned with the corresponding securing holes and nuts in the adaptor. It's the grey bit in the prototype photo with the red / grey parts. The adaptor is designed to accept a standard galvanised steel scaffold tube, 48.3mm external diameter, max wall thickness of 4mm.
You will need two M5 nuts and a pair of M5 screws, either 30mm long if using the internal mounted nuts or 60mm long if passing right through the scaffold tube.

3D printing settings

-Print Settings
Printer brand:
Anycubic

Printer:
Kossel

Rafts:
No

Supports:
No

Resolution:
0.2mm

Infill:
30%

Filament brand:
Sunlu

Filament color:
Blue

Filament material:
PETG

Notes:
Print the adaptor upside down on the bed, no supports. I printed the drilling guide out of PLA as this is disposable once the scaffold tube and the weather station pole has been drilled for the M5 securing bolts. I printed a prototype out of Red PLA during development but the final adaptor has been printed out of Blue PETG due to its weather resistance.

Post-Printing
Postprint and Assembly
Once you have printed the tube adaptor, test fit the 1 1/4" mounting tube into the adaptor, push fully home into the adaptor if the fit is deemed acceptable. Slip the drilling guide over the scaffold tube, ensuring the flanged end is furthest away from the scaffold pole top. Test fit the adaptor and tube assembly into the end of the scaffold tube and ensure fit is good. The adaptor should slide in the tube with a little resistance, the collar should slide over the outside of the tube when the last 10mm or so is pushed home.
It is important to test the fit of the components to ensure there is minimal wobble or looseness before deciding the fixing method. For my first attempt, I drilled the scaffold tube on both sides and passed the bolts right through the scaff tube and the adaptor, securing with an M5 nut. If you find there is a bit of slop in the fit of the components, you can fit a pair of M5 nuts into the slot in the centre of the adaptor, ensuring they align with the corresponding bolt holes. When the bolts are tightened, they will pull the centre post and the adaptor tight against each other and the scaffold pole. If you decide on this route, you will need M5 x 30mm cap head screw and the two nuts previously obtained.
Drilling the tube can be challenging. Slip the drilling guide up the scaff tube until the keyway engages with the lug on the adaptor. This ensures the holes will be aligned. I used 3mm drill bit to drill through the guide holes in the drilling jig and into the steel scaffold tube. Once all four holes have been centred with the 3mm drill and drilled through, follow through with a 5mm Cobalt steel drill and it will walk through the job. Allow the drill bit to pass into the adaptor piece and make a centre mark on the 1 1/4" mounting tube. Remove the tube from the adaptor and drill through with the cobalt drill. Reinsert the tube and align the holes. If through bolting, drill through one last time and ensure the drill emerges from the holes in the opposite side of the scaff tube. This will ensure the bolts pass through.
Once everything is tightened, fit the weatherstation onto the 1 1/4" pole and tighten any clamping system with you model. Job complete.

Advertising


Issue with this design? Report a problem.

Would you like to support Cults?

You like Cults and you want to help us continue the adventure independently? Please note that we are a small team of 3 people, therefore it is very simple to support us to maintain the activity and create future developments. Here are 4 solutions accessible to all:

  • ADVERTISING: Disable your banner blocker (AdBlock, …) and click on our banner ads.

  • AFFILIATION: Make your purchases online by clicking on our affiliate links here Amazon.

  • DONATE: If you want, you can make a donation via Ko-Fi πŸ’œ.

  • WORD OF MOUTH: Invite your friends to come, discover the platform and the magnificent 3D files shared by the community!


Sharing and downloading on Cults3D guarantees that designs remain in makers community hands! And not in the hands of the 3D printing or software giants who own the competing platforms and exploit the designs for their own commercial interests.

Cults3D is an independent, self-financed site that is not accountable to any investor or brand. Almost all of the site's revenues are paid back to the platform's makers. The content published on the site serves only the interests of its authors and not those of 3D printer brands who also wish to control the 3D modeling market.

100% secure payment by credit card, PayPal, Apple Pay, Google Pay, etc.
View all payment options.