Skip to content

GM328A simple desk stand with good access, 2 versions, with and without battery compartment

Advertising
Advertising
?
Creation quality: 5.0/5 (1 vote)
Evaluation of members on the printability, utility, level of detail, etc.

  • 734 views
  • 1 like
  • 6 downloads

License
3D design format
SCAD and STL Folder details Close
  • GM328A-battery-stand.scad
  • GM328A-battery-stand.stl
  • GM328A-knob.stl
  • GM328A-stand.scad
  • GM328A-stand.stl

Learn more about the formats

Publication date 2021-07-18 at 23:12
?
Published to Thingiverse on: 2020-06-28 at 00:36
Design number 475366

3D printer file info

3D model description

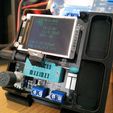
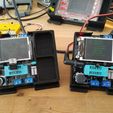
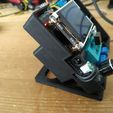
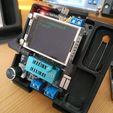
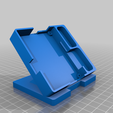
A easy to print stand and encasement for the popular GM328A component testers.

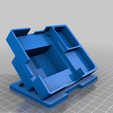
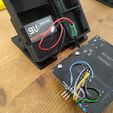
There are two versions, the smaller version just holds the tester, and has two narrow parts trays, the larger one has a battery compartment under the board and 1cm wider trays.

The 'floor' of the lower tray is at the PCB height making it a doddle to slide components into position, the same cutout gives good access to the bail arm on the DIP socket. There is good access, with clearance, to all the other connectors.

There are screw holes, but also a little out-dent on the right hand case wall to grip the board when operating the bail arm without needing the screws.

I have uploaded the scadfiles, they are fully parameterised and moderately well commented, just in case you wish to customise for other boards etc.

Sticking some small feet on the base finishes this off nicely, if the knob is hard to fit, try heating it with an airgun or some hot water to soften it. Special bonus points if you avoid burning your fingers doing that.

###Note for hackers

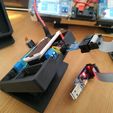
There is a full height access slot at the top centre to cater for a ISP (In System Programmer) connector. I have adapted one of my two testers this way so that I can reprogram it and experiment and customise the tester code. I'm not sure it will be useful to others but if you want to play I suggest you look at the article here:
https://dragaosemchama.com/en/2019/04/gm328a-reverse-engineering-new-firmware-and-tetris/
For wiring, simply look at how standard ISP connectors are connected to breadboarded 328P's, and wire the appropriate ISP pins to the +ve, gnd, MOSI, MISO and SCK pins on the underside of the board. Remember the chip is 'reversed' when looking from underneath.

I use a dedicated USB-ASP in-system programmer these days (great tool, 3 euros on aliexpress, lots of time saved..), before that I used the 'Arduino as ISP' sketch and wiring with my Uno board as the programmer.

3D printing settings

-

Advertising


Issue with this design? Report a problem.

Would you like to support Cults?

You like Cults and you want to help us continue the adventure independently? Please note that we are a small team of 3 people, therefore it is very simple to support us to maintain the activity and create future developments. Here are 4 solutions accessible to all:

  • ADVERTISING: Disable your banner blocker (AdBlock, …) and click on our banner ads.

  • AFFILIATION: Make your purchases online by clicking on our affiliate links here Amazon.

  • DONATE: If you want, you can make a donation via Ko-Fi πŸ’œ.

  • WORD OF MOUTH: Invite your friends to come, discover the platform and the magnificent 3D files shared by the community!


Sharing and downloading on Cults3D guarantees that designs remain in makers community hands! And not in the hands of the 3D printing or software giants who own the competing platforms and exploit the designs for their own commercial interests.

Cults3D is an independent, self-financed site that is not accountable to any investor or brand. Almost all of the site's revenues are paid back to the platform's makers. The content published on the site serves only the interests of its authors and not those of 3D printer brands who also wish to control the 3D modeling market.

100% secure payment by credit card, PayPal, Apple Pay, Google Pay, etc.
View all payment options.